E PZ 16-50mm F3.5-5.6 OSS electronic zoom lens
Sony’s 16-50mm electronic zoom lens is
probably our favorite retractable one – not because of its optical properties,
but mainly because it offers a zoom slider on the barrel and a zoom ring around
the front of the lens. Both the mechanisms control the operation of the engine
instead of offering the zoom control mechanisms directly, but the zoom ring
allows faster and more responsive control over the lens, like an ordinary
mechanical lens, while the slider provides subtle zoom, which is slow for videos.
This is a huge improvement in Panasonic X Vario’s 14-42mm electronic zoom lens,
trying to use a light switch to meet both needs. Sony’s lens also allows you to
take the function of the lens ring for manual focus control. Although you have
to wait for the lens to extend before you can shoot, the camera can capture the
first photo in less than 2 seconds after you press the power switch.
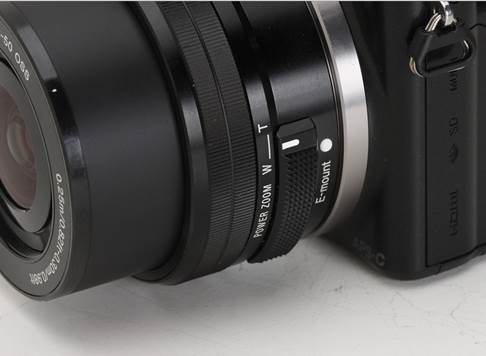
Adjusting
the zoom lens on the lens
The 16-50mm F3.5-5.6 OSS electronic zoom
offers two means to zoom the lens. A slider on the zoom lens provides slow zoom,
suitable for filming, while a ring around the front of the lens provides a more
common mode. In addition, the front ring may be aimed to control the focus
manually.
Interestingly, the NEX-3N’s default
settings assume that you will want to use the 'Clear Image Zoom' digital zoom
of the camera, rotating the zoom ring now is easy to dive into the digital zoom
area. The results are not bad in the previous model, but we've seen a slight
advantage of it through a simple up scaling in Photoshop, so I'm not sure it's
so easy to use out of purpose.
The parts of the machine
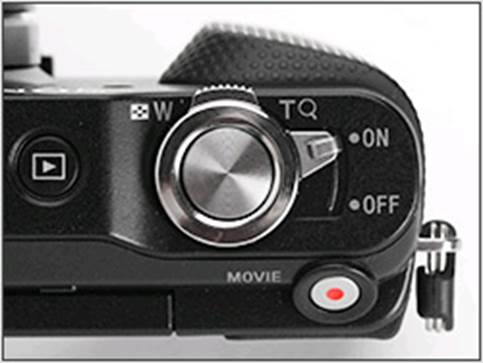
The
zoom lever
The most significant addition on the NEX-3N
is the zoom lever. While this does not seem to be the most important change
that can be made, it combines with the 16-50mm electronic zoom which allows the
3N to provide a shooting experience much like using a compact camera.
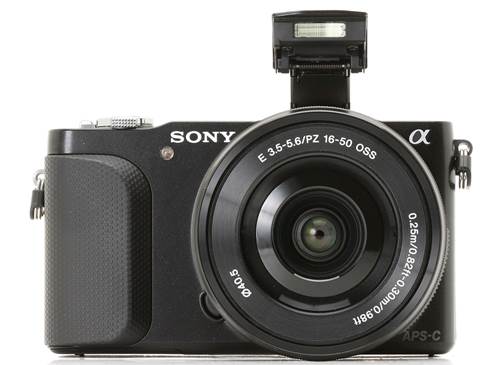
The
pop-up flash
Although greatly reduced in size compared
to the F3, the 3N retains a small pop-up flash.
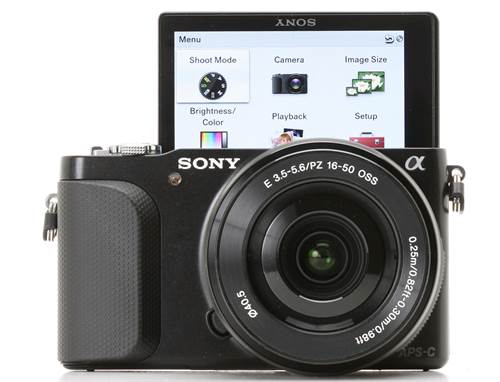
180-degree
flip-up screen
It also continues to provide a 180-degree
flip-up screen. Unlike the more expensive 5R, the 3N’s screen is not a touch
one.
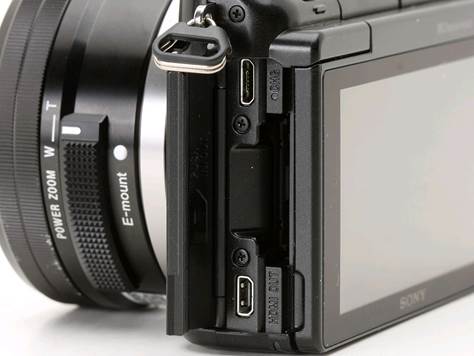
The
memory card slot
The 3N’s rear has an easy-to-use SD card
slot, along with the ports on the left. These ports include a micro HDMI slot
at the bottom, along with a micro USB slot at the top, which also acts as a
means to charge the battery of the camera.

The
NP-FW50 battery
The NEX-3N’s NP-FW50 battery is the same in
all the NEX models which were launched in the past. It is a 7.3Wh battery that Sony
said would provide enough power for about 480 photographs, when tested using
the CIPA standard method. However, we must assume that the test does not
include the use of electronic zoom lens, which we suspect the NEX battery will
run out of power faster than normal.
The NEX interface
The NEX-3N has the latest interface version
that Sony created for the NEX series. It is also aimed at new users, but after
five redevelopment generations, it becomes quite complex, with messy icons on
the screen, but there is no clear way of interacting with them. However, the
'Photo Creativity' system is quite good at controlling a little the automatic
mode – a few buttons make it easy to adjust brightness, warmth or contrast of
an image. The option is available in both Intelligent Auto and Superior Auto
modes, which will take advantage of multi-shot mode of the camera if necessary.
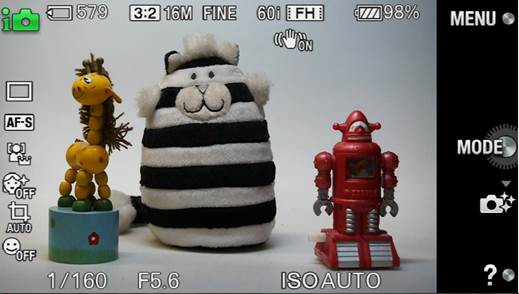
The
NEX interface
The NEX-3N’s default screen is quite regular.
Oddly to say, however, there is no button that allows you to change any of the
settings displayed by icons on the left. Press the down button will take you to
'Photo Creativity' mode, which allows you to change the five key parameters of
the camera, based on the results.
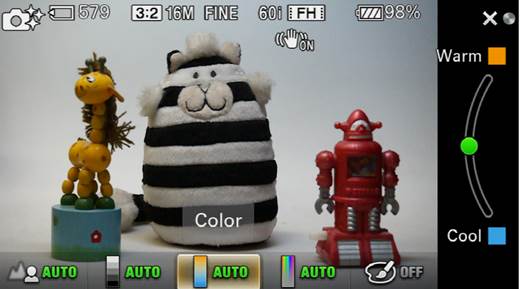
In
this picture, we adjusted the warmth (a proxy for white balance).
The NEX-3N is built on the Auto Portrait
Framing mode introduced in Sony’s last generation, now called Auto Object
Framing. The main difference is that the camera will now attempt to re-crop the
image to focus on what it understood as the object of the object, even if it
does not recognize the faces in the scene. Now, as well as portraits, the
camera will re-crop the close-up object (macro) or whatever is determined
according to the focus-mode on the subject of the new camera. Previously, the
camera saved the original image as well as showed the cropped part that it
selected.
Collection of sample photos
The first 15 photos in this collection were
shot using the camera's Intelligent Auto and Superior Auto modes, with the
camera selecting all the settings.

Collection
of sample photos
|
Specifications
·
Resolution: 16.10 MP
·
Kit lens: 3.10x zoom, 16-50 mm (24-75 mm eq.)
·
Viewfinder: LCD
·
LCD size: 3.0 inches
·
ISO: 200 – 16000
·
Shutter: 30 – 1/4000
·
Max aperture: 3.5
·
Dimensions: 4.3x2.4x1.4 inches (110x62x35 mm)
·
Weight: 13.6 oz. (385 g) including batteries,
kit lens
|