Thanks to migration tools, your
operating system and programs can be transferred onto a new SSD with just a few
clicks
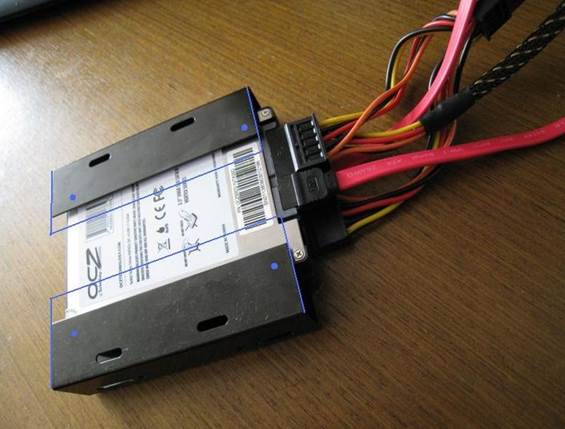
1. Attach SSD
Enclosed connect the SSD drive, plug the
SATA SATA ports on the motherboard. Connect the other end of the cable to the
drive. Connect the power cable that was designed for SATA drives to the SSD and
start up the computer. The BIOS usually detects the SSD on its own.
Furthermore, you no longer have to pay any attention to a master/slave configuration.
Once Windows boots up, it registers the new drive and installs the respective
device driver. After you restart Windows, you should be able to see the
still-empty SSD in Windows Explorer.
Connect
the power cable that was designed for SATA drives to the SSD and start up the
computer. The BIOS usually detects the SSD on its own.
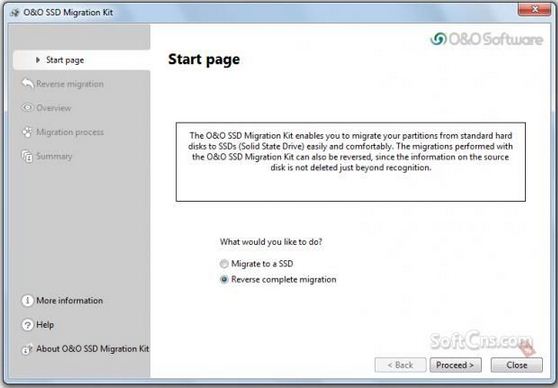
2. Install migration tool
Many come models, migration tool. We are
going to illustrate the process using O&O's SSD Migration Kit (which you'll
have to purchase, but it's very nifty) as an example. Install the program and
close the install wizard once done. Registering your email address is
completely optional.
Registering
your email address is completely optional.
Note:
Advanced users who are comfortable with some dabbling can make use of a free
alternative to SSD Migration Kit. This alternative can be found at minitool-drivecopy.com.
However, under certain circumstances, it may delete data without issuing a
warning in advance. So, when it comes to transferring Windows, you should know
exactly what you are doing. Other than that, the operation is similar.
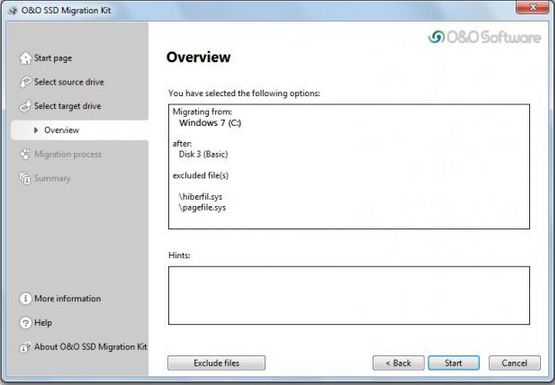
3. Transfer system partition
At this point, another you need to select
the source and target drives. If you only have a single Windows partition, it
will be ticked by default. Then the wizard displays a summary of the copy job.
The migration file closes the »hiberfil.sys« and »pagefile.sys« files, as
Windows reinstalls them from scratch on the SSD. If you want to conserve a
higher quantity of storage space, click »Close files«. The »C:\ Windows\Temp«
folder and images that are no longer required and would be good candidates for
elimination. Once you have made your choice, start the migration.
Transfer
system partition
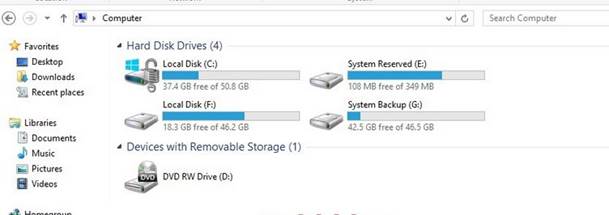
4. Upgrade old drive
Mark off the old drive and restart your
computer. An up-to-date BIOS the will automatically restart detect the SSD as a
boot drive. From this point onwards, Windows should boot up a lot quicker than
it usually does. On our test system, the 64-bit variant of Windows 7
Professional only took 12 seconds to get started. The process took 25 seconds
when it was carried out in with a magnetic hard disk. The migration to the SSD
can be considered to have been successful if the operating system runs smoothly
and all your data is available.
Upgrade
old drive