3. Choose The Peripherals
As desktop commandos, we know exactly which
mouse and keyboard combo we usually prefer, but that all changes when you move
to a softer, more comfy location Like the couch. We needed a keyboard that was
tight and wireless, and we decided against a mouse simply because neither our
legs nor our couch is flat enough to provide an accurate moussing surface. We
also needed to select a gamepad that works well on a PC, and it’s slim pickings
these days as most garners just use a mouse and keyboard.
Keyboard
To satisfy both our mouse and keyboard
needs we went with the sublime Logitech K400 Wireless Touch Keyboard - not to
be confused with its predecessor from the 1980s, the Invisible Touch. The K400
is incredibly Light but provides comfortable keys and a surprisingly accurate
touchpad with vertical scrolling support that makes browsing the web and
navigating Steam’s interface a cinch. The keyboard’s 30 foot wireless range is
more than sufficient, and its slim profile comes in handy when we need to stow
it inside our entertainment center. We also Like the fact that the included AA
batteries will last up to a year; we just have to remember to turn off the
keyboard when not using it.

To
satisfy both our mouse and keyboard needs we went with the sublime Logitech
K400 Wireless Touch Keyboard
Game Controler
We debated for quite a while over which
game controller to choose before settling on an old standby, the Xbox wireless
controller for PC. We like that it’s comfortable, easy to set up. and it works
perfectly. We could have saved some money by going with something from Saitek
but we Like the build quality and heft of the Microsoft controller. Say what
you will about Microsoft’s ability to craft a touch-based OS. but the company
knows how to build a peripheral, that’s for sure. The wireless dongle is also
easy to tuck away in our rat’s nest of cables.
4. Connect To The Network
Powerline Networking has overcome most of
its initial teething issues and has turned into a reliable and fast alternative
to wireless. Obviously, running a gigabit hardline would be the best option,
but that’s not always an option. And while wireless is the easiest option, it’s
also prone to problems if you live in a dense area where several routers are
stomping on each other. Thus, we opted for powerline networking. We can plug
our router into a power outlet in our office, then connect the Steam box to a
power outlet in our Living room and be done with it.
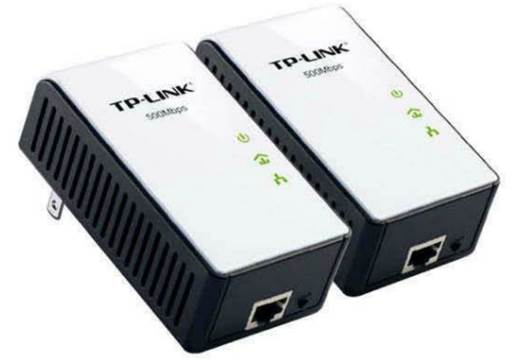
The kit we chose was the winner of our
power Line networking roundup in the December issue, the TP-Link AV500. This
$95 kit was the fastest kit we tested, with 66Mb/s average read speeds, and the
(east expensive, so that’s a win-win in our book. We also like how the LEDs on
the front of the units show us how fast our connection speed is.
Connect
To The Network
Setting it up was as simple as plugging one
unit into a wall socket, then connecting the cable to the LAN port on our
router, and pressing a button on the adapter to begin the syncing process. We
then connected the second adapter to a power out(et behind our entertainment
system, and ran CAT5 cable from the adapter to our Steam box. After we pressed
the sync button on the second adapter, we had a signal in about 45 seconds and
were able to get online.
5. Enter Big Picture Mode
With our rig connected to our HDTV, alt of
our peripherals functioning, and our Internet connection humming along, we
installed our OS (Windows 8 Pro), and installed the Steam client. Big Picture
Mode is not enabled by default, so we followed a few steps to enable it, which
involves opting in to the Steam Beta program. Once we restarted Steam, we found
a Big Picture button in the upper right-hand corner, so we clicked it to
activate Big Picture Mode.
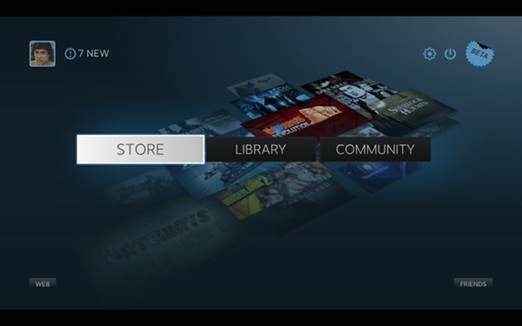
After
a brief intro animation, you'll be in Steam's Big Picture Mode.
The interface is extremely easy to
navigate, with everything nicety organized into big boxes that are easy to see,
even from the couch. We attempted to navigate the UI with our Xbox controller
but found we prefer using the Logitech keyboard/touchpad just because it was
easier to move our finger on the touchpad and it’s what we’re used to. The main
screen lets you choose between the Store, Library, and Friends list; we dove
right into our Library. Games are organized just like in regular Steam, so we
could see installed games, games we played recently, and even games that
support a controller a very nice touch, and an indication that Steam took the
implementation of Big Picture Mode seriously as opposed to just overlaying a
bigger skin on top of Steam. BPM also includes a web browser as well as a home
page portal that includes Facebook, Twitter, Google, and our other “favorites,”
which are easily customizable. Is it possible that someday we’ll boot into a
Steam OS with all our games, our favorite web browser, and our files hosted in
the cloud? We shall see.