Adobe Flash has made a remarkable transition in the past few years.
Market penetration of the Flash player (the plug-in) has always been very high, but whenever a new player version
came out, it took several months for it to reach a good-size audience.
However, this adoption has sped up significantly recently. There may be many
reasons for this, but one of the most compelling is that recent Flash
versions have acquired much better video support. Given that video sites
such as YouTube are extremely popular at the moment, they prompt users to
install the latest player to see the content.
Multimedia support is a key feature of many browser plug-ins, and
Silverlight clearly does not want to disappoint its users here. For obvious
reasons, the supported media formats are biased toward Microsoft's
offerings. Silverlight supports Windows Media Audio (WMA) and Windows Media Video
(WMV) files, versions 7 through 9. Also, WMVA and WMVC1, two rather
new video formats from Microsoft, are supported. The only external format
Silverlight can process is the very popular MP3 audio format.
There is a reason for this bias, however. The plug-in plays content in
these formats without the help of any other software or player. So, it is
not necessary to have an MP3 player or even Windows Media Player to play
supported multimedia content in Silverlight. This applies to both the
Windows and Mac platforms.
Silverlight also supports streaming, in the form of either Windows
Media Server streaming data, or ASX files. Note, however, that the stream
support has some limitations: the content may not be paused and not all ASX
features are supported. Refer to the Silverlight SDK for a list of
restrictions when using streamed multimedia data.
Preparing Multimedia Data
Ideally, you already have your audio or video data in the correct
format and can directly embed it into your Silverlight application . However,
usually at least one step remains—converting the audio data. For example,
the audio data could be in the wrong format, the video data might be too
big for reasonable web playback, or you would like to add some markers to
a video presentation. You can use some helpful tools to get your
multimedia data into the right format.
1. Converting Data
Starting with Windows XP, Microsoft began bundling a simple but
reasonable video editing tool: the Windows Movie Maker. If you are using Windows XP and don't see it in your Start
menu, you might want to visit Windows Update (menu entry in Internet
Explorer's Tools menu) and install it from there. Windows Vista users
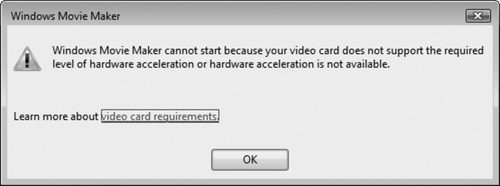
will find the Windows Movie Maker in their Start menu. However, there is
a catch; if you have an outdated video card, its hardware acceleration
may not be good enough for Windows Movie Maker (see Figure 1). Also, some editions of Windows don't come with
Windows Movie Maker. If this is the case, there is one more option: an
older Windows Movie Maker version, 2.6, has been made available for
Windows Vista. You can download it from http://www.microsoft.com/downloads/details.aspx?FamilyID=d6ba5972-328e-4df7-8f9d-068fc0f80cfc&DisplayLang=en.
Note that Windows Movie Maker needs some libraries installed by
Windows Media Player. Some Windows editions (the ones whose names are
ending in "N"—e.g., Vista Business N) do not come with Windows Media
Player, but you can download it too: http://www.microsoft.com/downloads/details.aspx?FamilyID=1d224714-e238-4e45-8668-5166114010ca&DisplayLang=en.
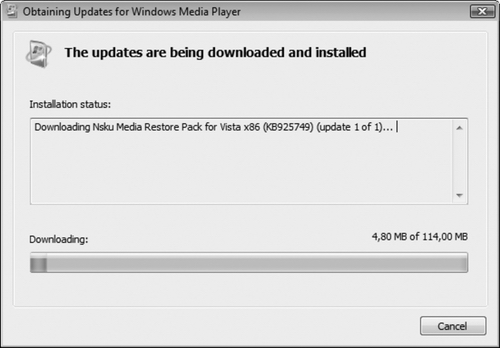
Do not let the name of the download page confuse you: although it says
that you get "Windows Media Player 11 for Windows XP," it also runs
under Windows Vista and restores the Windows Media components there, as
you can see in Figure 2.
NOTE
Make sure you visit Windows Update after installing Windows
Media Player, since there have been some security updates for this
product recently.
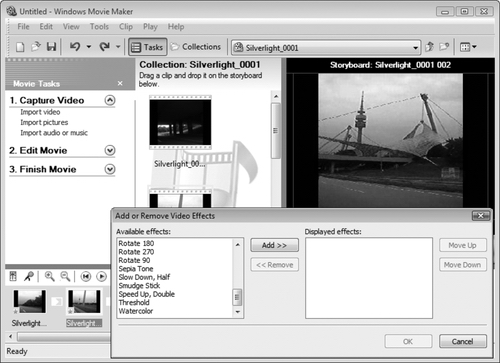
You can import a number of formats into Windows Movie Maker,
including AVI. Within the software, you can also cut the video and add
special effects, including rotating effects (see Figure 3). For instance, the sample video used in this
chapter was originally recorded in portrait mode, but cameras usually
default to landscape mode. Windows Movie Maker provided an easy way to
get the video into the right orientation.
After editing the video, you can export it using File Save Movie
File. You can tune the output format quite a bit (see Figure 4). If you optimize it for web play, you have a
lower quality, but the file size can get drastically smaller. If you
want to retain reasonable video and audio quality, the trade-off may be
a big file size. Experiment a bit with the settings to find a good
compromise between size and quality.

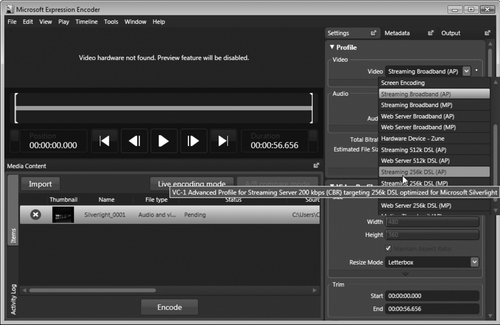
Another video editing option is a tool from the
Microsoft Expression offerings : the Microsoft Expression
Media Encoder (see Figure 5).
At this writing, you can get a time-limited trial version from
http://www.microsoft.com/downloads/details.aspx?FamilyID=ba187636-abb6-4e55-9706-5bd346e39ea9&DisplayLang=en
(the full version is available for purchase). The Expression Media
Encoder installs special profiles for generating Silverlight
content.
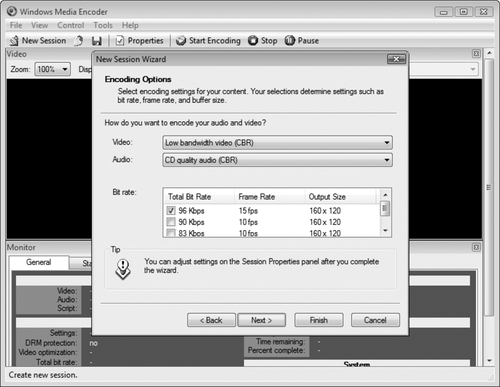
A third option, available only for Windows versions 2000 and XP,
is the Windows Media Encoder 9 series. This is available for download from http://www.microsoft.com/downloads/details.aspx?FamilyID=5691ba02-e496-465a-bba9-b2f1182cdf24&DisplayLang=en.
Figure 6 shows the software in action.
2. Adding Markers
An advanced
multimedia feature that can be really convenient, especially with
video data, is marker support. This lets you mark special points within
a media file. You can compare this to the chapters of a movie on a DVD,
where you can jump between chapters to reach a certain point in the
movie.
The same things are valid for markers. You can define markers,
either within the media file (covered in this section) or, temporarily,
within the Silverlight application . Silverlight provides a
C# API that can access markers and also determine when a marker has been
reached.
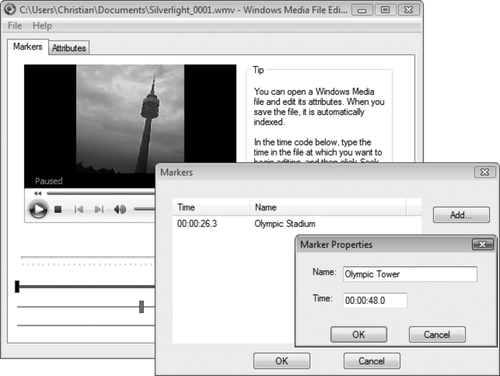
The Windows Media File Editor component of the Windows Media Encoder allows markers to be
inserted into Microsoft's video formats. Figure 7
shows what this looks like. Just navigate to certain positions in the
file, provide a name, and you have a marker. Microsoft Expression Media
Encoder also allows you to set markers in the UI. The marker editor
resides by default in the top-right corner and is displayed in Figure 8.

3. Streaming Video
When you convert media data into one of the supported formats, the whole
file will then be loaded from the Silverlight plug-in and will play. A
much better option, of course, is to use streaming video. With streaming
video, the file resides at a (usually fast) remote server, the amount of
data transferred can be adapted to the connection speed of the current
user, and it is impossible to directly download the media file. Various
streaming options exist, but for Silverlight users, the Windows Media
Server is a good choice. Microsoft has recently started to offer
more or less free Silverlight streaming. "More or less free" means there
are some restrictions, but for many scenarios, they do not hurt the
application. Currently, the maximum speed for streaming is 700 kbps, and
the streamed files may comprise up to 4 GB of space. The streaming
service is currently in alpha, and later versions will add additional
restrictions, but plans include 1 million minutes of streaming per month
or unlimited streaming if you agree to have advertisements shown.
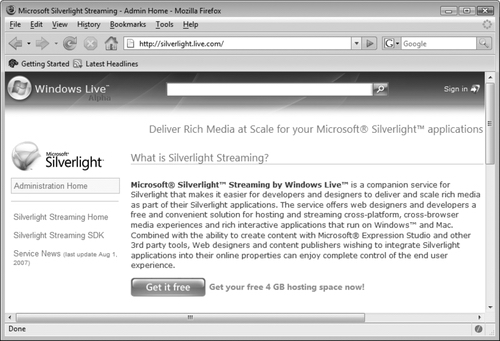
The streaming service's home page, http://silverlight.live.com/, contains up-to-date information about the streaming service
and the current restrictions.
There are two ways to use the streaming service. You can either
host your complete Silverlight application on the streaming server, or
just put your video file up on the server and reference it in your
locally hosted Silverlight application. At the time of this writing, the
service and API are frequently changing, so we will discuss it only
briefly here.
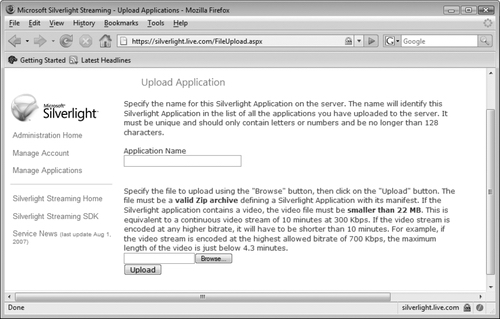
Figure 9 shows the streaming site, and Figure 10 shows how you can upload your own files and
applications to the service. You can find more information in the
web-based Silverlight streaming SDK at http://dev.live.com/silverlight/.
 |
If you are using Microsoft Expression Media Encoder, the
application already comes with suitable Silverlight profiles for
exporting content. However, when you want to use the Windows Media
Encoder, you can find Silverlight profiles at:
http://dev.live.com/silverlight/downloads/profiles.zip.
|
|