Body and design
The Fujifilm X-E1 is fairly close in design
to the X-Pro1; with the lack of the optical viewfinder and combined mode
switching are the most obvious differences. The panels on the top and front are
made from magnesium alloy, and rotating buttons machined from metal, but a
minor setback in the structure is that the rear panel is made from plastic
sheet. The buttons are too, but they are unusually large for a small camera,
and active in operation.
Close
in design to the X-Pro1
The control principle is based on
traditional analog rotation – the shutter speed and exposure compensation dials
are on the top panel; and the aperture is controlled by a ring on the lens. The
back of the X-E1 has the redundant buttons, providing lots of direct login,
including the Q button to call up a control screen where you can make a lot of
changes of the camera settings.
The Fujifilm X series has always aimed at
still photography unhesitatingly; with essentially filming is a supplement, and
this principle goes on with the X-E1. Most notably, there is no direct record
button, which you'll find on almost all of its close rivals, and video
recording is accessed as a rotating mode (at that point, you can no longer have
still shooting modes). The video recording mode still keeps the same
limitations as the X-Pro1, which consists of the lack of ability to control the
shutter speed or ISO.
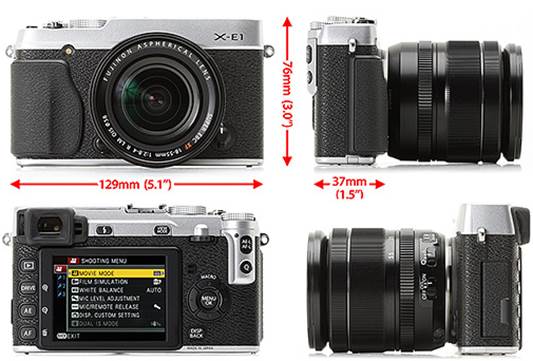
The
top of camera

The
X-E1’s top panel
The top panel of the X-E1 looks much like
X-Pro1 and X100, with rotating shutter speed and aperture, power switch around
the threaded shutter release button, and customizable 'Fn' button by default of
ISO control. But there are also detail changes - here you can see the cover for
the pop-up flash and small holes for the integrated stereo microphones for
filming.
Comparing
the design with the X-Pro1’s
For those who own the X-Pro1 will be able
to select the X-E1 and use it at once, and swap between the two cameras with
little fuss. This also expands to the user interface and menus.
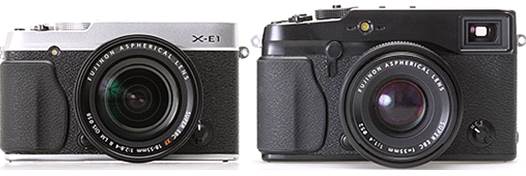
The
front, the most obvious difference in design between the X-E1 and its big
brother the X-Pro1 is the lack of optical viewfinder and its associated
searching mode switch. The AF illuminating light moves closer to the handle,
and the stereo microphones move onto the top plate.
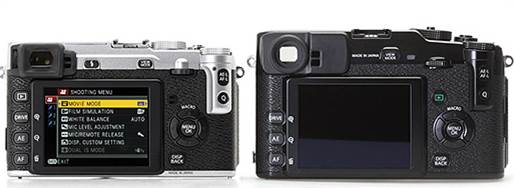
From
the rear, the two cameras are very similar. The Playback button moves to the
left edge of the screen and there is a small flash release button next to the
EVF, but otherwise it has the similar layout. A notable addition, though, is a
diopter adjustment swivel for the viewfinder, which has its adjusted range from
-4 to +2.
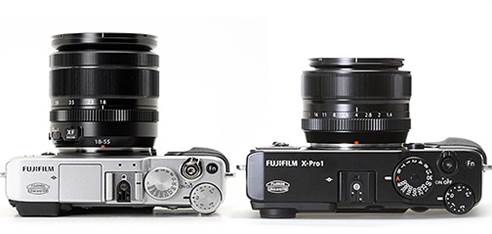
From
the top you can see the pop-up flash of the X-E1 and stereo microphones. Look a
little closer and the shutter speed dial has also been simplified, basically
borrowed from the X100, the loss of the central locking switch and markings for
½ and 1 second, which are now accessed by the T position.
Optional
accessories
The X-E1 has a number of accompanied
accessories that come with it. There is the BLC-XE1 half-leather shell, with a
hinged lid allows access to the memory card/ battery compartment, and the
handle that latches into the tripod socket (locking access to the battery and
card). It can also use a wired remote shutter release (RR-80-W) which plugs
into the USB port, and there is a 2.5 mm socket for an external stereo
microphone (note, Mic described below is not a Fujifilm product).
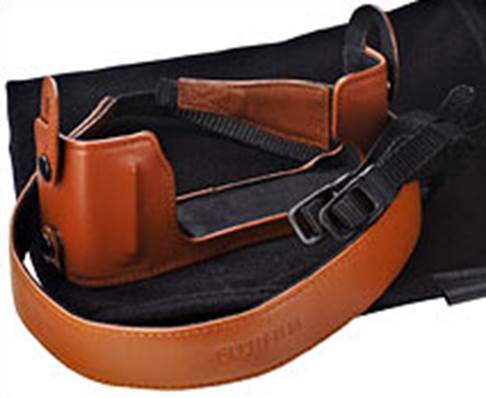
The
BLC-XE1 leather shell, ~ $130
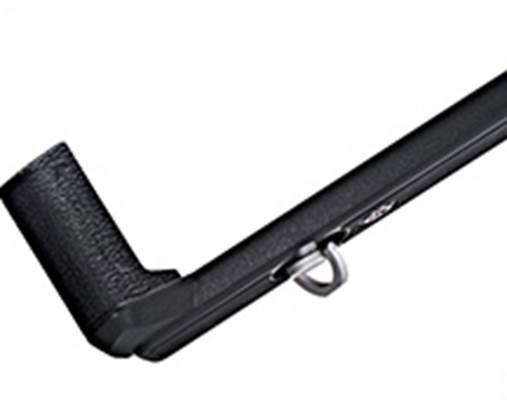
The
HG-XE1 handle, ~ $150
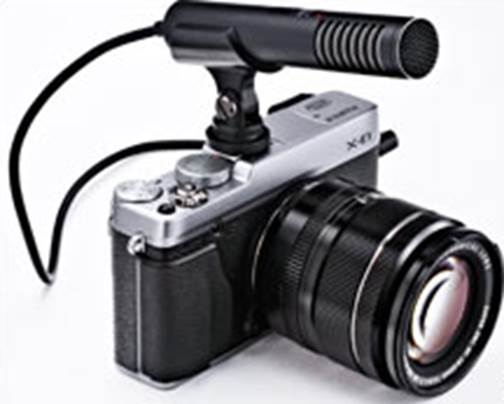
The
X-E1 with the accessory microphone
Body
factors
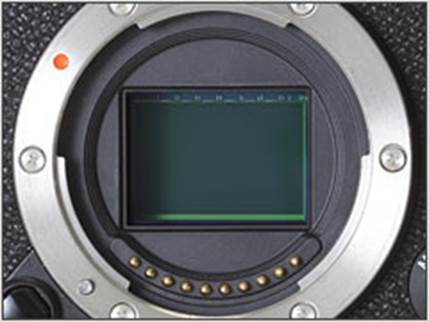
The
Fujifilm X-E1 is based on the same 16MP X-Trans CMOS and XF lens mount as the
X-Pro1.
You are also able to use Leica M lenses via
the adapter of Fujifilm, and a wide range of other handmade focus optics that
use third party adapters.

Rotating
the shutter speed on the top plate is like the X100. This means that there is
no locking button for the A position and the lowest speed is marked as ¼
second.
Speeds from ¼ to 30 seconds are accessed
from the T position, and set in the left and right keys of the 4-way
controller.

The
rotating edge button is perfectly placed for operation by your right index
finger, and can be used to change the settings in harmony with the different
buttons.
In manual focus mode, clicking to select it
allows access to a magnified vision in the EVF for precise focusing. The new
feature of the X-E1 is the ability to choose between 3x and 10x magnification,
simply by spinning the gear.

The
Fujifilm X-E1 has a light that supports autofocusing on the handle with the aim
of focusing in dark conditions. This can be naturally turned off in the menu if
you want.
It can also be disabled, along with flash
and operating sounds, by pressing down the "DISP" button for 2 seconds
to access 'Silent' mode.

The
small flash unit automatically pops up out of the top plate, and is activated
by a small button next to the viewfinder eyepiece. It has an oriented number of
only 7m at ISO 200.
As on a great variety of cameras of this type,
you are allowed to pull back the flash, so it points upwards and bounces lighting
from the ceiling to make more appealing lighting. It is not an
"official" feature; therefore, using it is at your own risks.

There
is also a standard slot for connecting a peripheral flash including Fujifilm’s
dedicated models (EF-X20, EF-20 and EF-42). The two small holes in front of it
are the stereo microphones for filming.
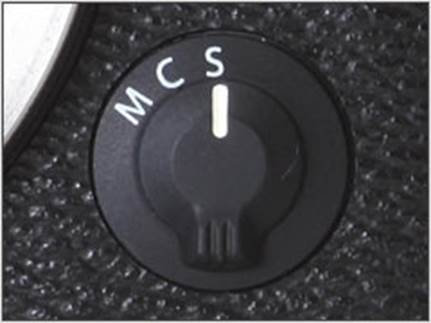
The
front of the camera has current-standard focus mode switch of Fujifilm - M for
manual, C for continuous AF, and S for single-shot AF, it is very close to the
lens mount.

The
connectors of the X-E1 are found on the left side of the camera, from top to
bottom there is a 2.5mm socket for an external stereo microphone or wired
remote shutter release, an HDMI connector for video playback, and a USB /
AV-out pin. The USB port also accepts Fujifilm’s RR-80 wired release, while the
microphone socket can be used with many remote release accessories that are
compatible to Pentax or Canon.
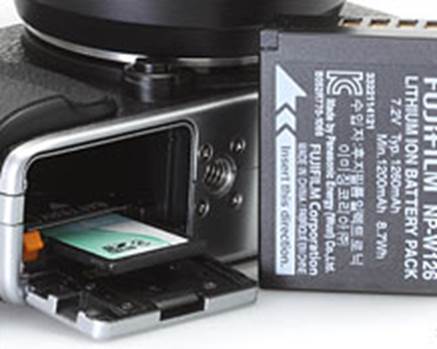
The
Fujifilm X-E1 uses the same battery as the X-Pro1, the NP-W126. This 7.2V, this
8.7Wh battery retains enough power to take 350 photos in standard CIPA testing
using LCD or EVF- 50 more than the X-Pro1. The SD card slots stand along the
battery under the same door.

The
X-E1’s tripod socket is located in the center of the lens, which can be
complicatedly linked to several tripod operations, like panorama shooting. It
is also located right next to the door of the battery compartment. That means
you do not have the opportunity to change the battery or SD card when placing
the camera on a tripod.
