“Ever needed to undo changes to a
file? DocShield allows you to do just that by rolling back to previous
versions.”
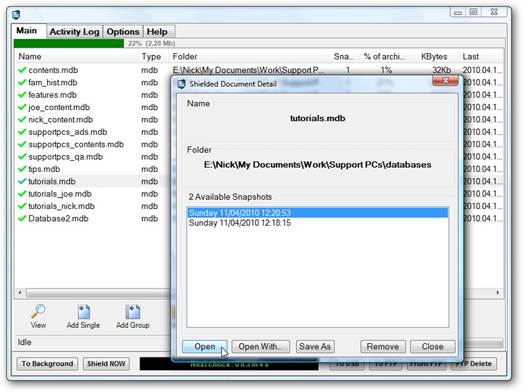
DocShield is a fantastically useful program
that will allow you to restore earlier versions of the same file in seconds.
Never again will you have to painstakingly reverse all changes made to a
document, or try to remember how the original draft sounded and undo your
botched rewrite. Now, thanks to this powerful backup tool (included on your
free disc), you can simply pick an earlier revision of the file and either
restore it over the current version or save it as a separate file and work on
it independently.
The idea of backing up multiple revisions
of a file certainly isn’t new – it’s even built into Windows 7 in the form of Shadow
Copy, and many online backup tools make it possible to restore earlier
versions of a file too – but the key advantage of DocShield is that you’re in
complete control of when backups are taken, and exactly which files and folders
get backed up. Read on to discover how this versatile program can help protect
your data in the future.

DocShield
is a fantastically useful program that will allow you to restore earlier
versions of the same file in seconds
Step-by-step: Protect your data with
DocShield
- Check requirements DocShield requires that Microsoft .NET Framework 2.0 or later
is installed – it’s included in Windows 7 and Vista, but Windows XP users
should check the Add or Remove Programs Control Panel. If it’s not there,
click ‘Start > All Programs > Windows Update’ and perform a custom
scan to download and install it. Once it’s in place, install DocShield
from your free disc.
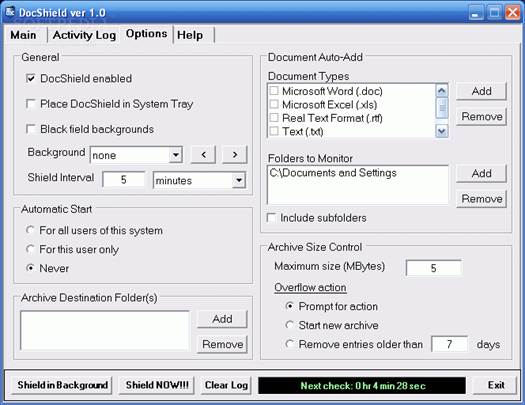
- Set backup location Once it’s installed, double-click the DocShield desktop icon
and click’ Yes’ or ‘Continue’ when prompted. Read the warning about
setting up your backup device. Click ‘OK’ and switch to the Options tab,
then click the ‘+’ button under Archive File Destinations, followed by
‘Browse’. Select or create a suitable folder on your backup drive, then
click ‘OK’ followed by ‘Save’.

DocShield
is completely free for personal use, but there’s one main drawback: it won’t
work with 64-bit versions of Windows
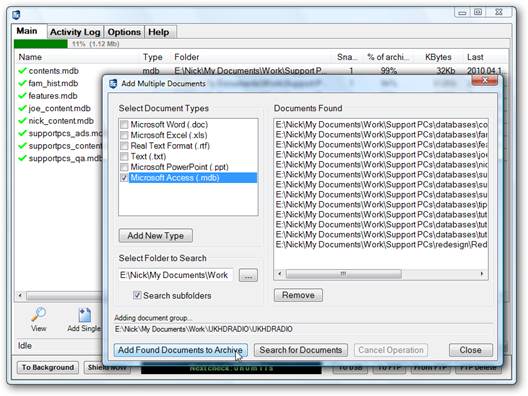
- Monitor documents types Use the Document Add-On section to pick specific file types to
protect. To protect them, you can either tick an existing document type
such as .doc or .txt, or click the ‘+’ button to add your own. If adding
your own, enter a suitable description and the file extension (minus the
full stop before it) and click ‘OK’ – it will appear at the bottom of the
list, pre-selected.
- Select folders to watch One folder – C:\Documents and Settings – is selected by
default in the ‘Folders to monitor’ box. This may cause error messages in
later versions of Windows, so select it and click the ‘-‘ button to remove
it. Now click the ‘+’ button to select the folders containing documents
with versions you wish to back up. Tick ‘Subfolders’ to ensure everything
inside the folder is protected.
- Increase archive size By default, DocShield limits the total backup size to just
10MB, which means it’ll probably be full within seconds of launching. An
Archive Size Limit Reached window will appear with a number of options to
choose from – the best idea is to increase the size of the backup
archive. Add as much space as you can spare – start with an extra
gigabyte or two.

DocShield
limits the total backup size to just 10MB, which means it’ll probably be full
within seconds of launching