
Give your seasonal
landscapes a twist, using panning to get creative with blur.
There are two ways to create a creatively
blurred landscape. The first is to get the effect in-camera by panning
horizontally or vertically during a long exposure, and the second is to fake
the effect using Photoshop. If you're feeling experimental, you can even try
both!
This image was taken and edited by
photographer Dave Taylor in Alaska during autumn. Dave later processed the
image using the Motion Blur filter in Photoshop to get the final effect.
"The ghostly vertical white lines are the trunks of aspen trees, and the
colourful smear is created by the warm light of sunrise falling on the varied colours
of the leaves," Dave says. 1
Taken using his Canon EOS 50D and a
100-400mm lens at a focal length of 135mm, Dave set the aperture to f/11. He
kept the ISO low at 100, and used a slow shutter speed of 1.6 seconds.
"Learn all the rules so you know when
to break them," Dave advises. "It's critical that you understand
solid composition fundamentals before trying to tip them on their head! Keep
your eyes and your mind open to new concepts, because then you'll be able to
capture something that's different from everything else."
Get started today...
Pack a tripod. This will allow you to pan
smoothly for the best results.
Set your camera to Av mode and shoot using
a narrow aperture such as f/16 for maximum depth of field.
If shooting in a wooded area, fire the shutter
and pan vertically to blur the trees. If you need to reduce the shutter speed
further to get more blur, fit a Neutral Density (ND) filter to your lens to
reduce the light.
If you don't want to shoot the effect
in-camera, edit a standard landscape image in Photoshop, using the Motion Blur
filter to replicate the effect.
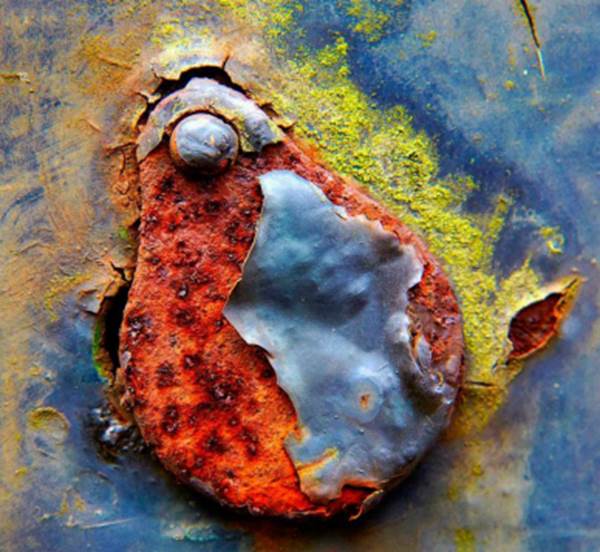
2. Rust never sleeps
Create fine art out of decaying surfaces.
Fine-art photographer Peter Defty shoots a
variety of subjects, from studio portraits to abstract images of rusting metal
out on location. Peter is experimental in his approach to the photographic
medium, and not wanting to restrict his practice he shoots on a variety of
cameras - from analogue to digital.
Colour
is important, so have a good look around before you start shooting to see what
images will work together.
"To get the most out of a place like a
scrap yard, you need to go in with an experimental approach," Peter says.
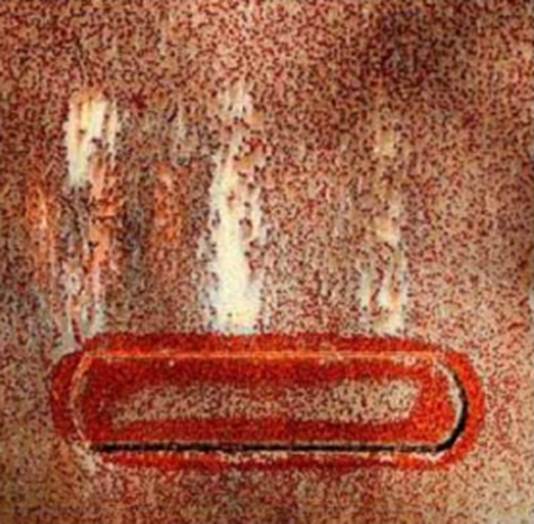
"I took these images using my Canon EOS 5D Mark II and 24-105mm lens. Each
shot was tightly composed to deliberately isolate the object in the frame.
These images have recorded the passing of time, and the bright colours of the
layers of metal peeking through show the erosion."

Present
the images as a set to take the project to the next level.
To set up his camera, Peter set the
aperture to f/8 and kept the ISO at the optimum setting of 100 to ensure the
quality remained high. He didn't need to use a tripod because he was shooting
in the middle of the day.
The way you present these types of images
also has an impact on the viewer. If, like Peter, you want to go one step
further, think about displaying them together as a set. You'll need to look for
different colours and shapes that complement each other.
Think
about shape and composition - you don't always need to place the item centrally
in the frame.
Get
started today...
Choose the right location: scrap yards,
garages and working yards are all perfect for this type of shoot.
Look for a few different images in the
scene that can work together as a set.
At the editing stage, make your images
square. To do this in Photoshop, select the Crop tool and hold down the Shift
key as you drag your crop marquee over the image.
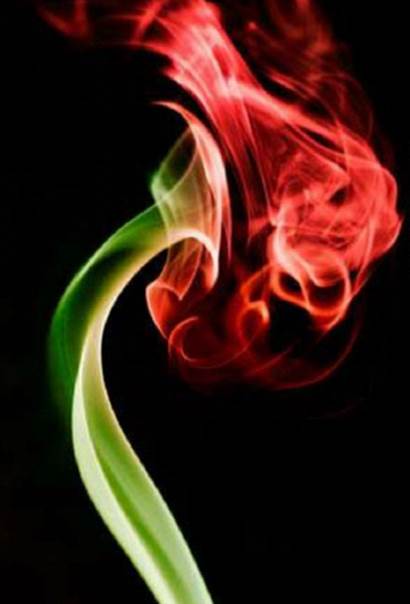
3. Take smoking shots
Where there’s smoke, there’s an opportunity!
Now that summer is a distant memory, why
not try some creative photography at home. For a very simple but effective way
to create abstract images, have a go at photographing smoke as it curls in
front of your lens.
Where
there’s smoke, there’s an opportunity!
To create the smoke, set up in a draft-free
room and place a lit incense stick in front of a plain dark backdrop, such as a
piece of plain material or card.
To light the smoke, use an external
flashgun attached to the hotshoe of your camera and set to its Auto setting.
Select your camera's Manual exposure mode, and set the shutter speed to 1/200
sec. You can then adjust the aperture or flash intensity until you get a
correct exposure - using the histogram as a guide.
Use autofocus to focus on the smoke as it
rises. You'll need to take plenty of shots until you get the focus right and
the exact shape you're after. For a more dramatic effect, light more than one
stick!
Get
started today...
Sync an external flashgun with your camera
to 'freeze' the movement of the smoke. Most lights will sync when the shutter
speed is set between 1/125 sec and 1/250 sec. Refer to your manual to check
this, as each flashgun varies.
Add colour to the image at the editing
stage, as shown below. One effective way to do this is to use Photoshop's
Colour Replacement tool, which is found under the Brush tool menu in the Tools
palette. Select a colour and paint over the smoke.