Lighting
What we’ve told you so far is nowhere near
as important as what we are about to tell you, so remember this if nothing
else: lighting is everything. Your styling, composition and props could be iffy
and still make a good picture, but if the lighting is wrong, you have not a
chance of making it work. Thankfully, a good lighting set-up isn’t hard to come
by and even the most basic arrangement can produce great pictures.

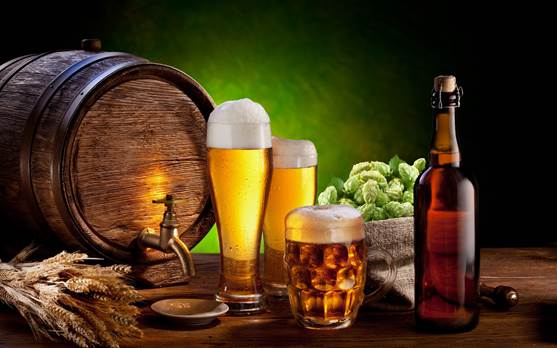
Beer
is a tricky subject to shoot but with practice is achievable
There’s nothing like soft window light and
a reflector for creating beautiful food photography: it’s all you need. Placing
a plate by a window can deliver stunning side lighting that accentuates
texture, while shooting with it backlit can produce crisp high-key results. As
long as you know how to control and work with the light, there’s really no need
to overly complicate your set-up, at least while you build on your skills.
Simply lit, simply composed and well-stylized food can produce the most
engaging and sumptuous pictures.

While
most good food shots are taken at 200 to 350, experiment
with viewpoints as overhead shots can work well too
There are only a few basic guidelines to
remember when working with window light: use a reflector to relieve shadows on
the opposite side of the subject and avoid direct sunshine; it’s too strong and
provides heavy contrast. Preferably opt for a south or west-facing window, pick
a time of day when the light is at its softest or diffuse the light with a net
curtain or scrim. Remember: the bigger the window, the softer and wider the
spread of light, and the reverse is true the smaller the window is. Once you
have the light you want, mold it to suit your subject and the style of image
you want to create using flags and reflective material.

Studioflash
is especially useful with images, like this, where rim lighting enhances the
silhouette of the subject
When working with available light, you’re
best off using aperture-priority mode and a wide aperture. Then you can
concentrate on setting the correct depth-of-filed and composition with your
camera fixed to a tripod so you don’t have to worry about the shutter speed.
Shoot in Raw + JPEG and set the White Balance to Auto or Daylight. Generally,
multi-zone metering should do the trick for any images where you want an even
tonal range, but if you want a clean, crisp and fresh-looking image that’s
biased to the highlights, you may want to switch to spot metering or employ a
stop or two of positive exposure compensation.
While natural light can’t be advocated
enough, in winter it’s not always ideal and you can be restricted creatively
with your lighting. This is where artificial light comes in along with a form
of lighting that’s not for the faint-hearted or photography novice: flash. For
the same reason that natural light is great for food photograph, artificial
light works best when it’s soft; you want to avoid strong shadows and blown-out
highlight, which are all too easy to achieve with artificial light. Very rarely
would you want to use a naked Speedlight or studio flash. White umbrellas, soft
boxes of all sizes and even honeycomb grids are there to help you shape and
soften the light for different, flattering effects.
This
is where artificial light comes in along with a form of lighting that’s not for
the faint-hearted or photography novice: flash.
Even if you have to introduce flash to your
lighting set-up, you can keep it simple and a substitute for window light. A
single studio flash with a soft box, or a Speed lite with an Ezybox, can
produce beautiful window-like light, and a large reflector or white foam board
to bounce light on to the opposite side could be all you need to complete the
set-up. Another option is to use alternate light sources, such as continuous
lighting or lamps like the Lowel Ego; they’re much easier to use than flash as
you can see how the light’s falling on the subject. Just watch your White
Balance. Mixed lighting can produce some horrible color casts that Auto WB
simply won’t correct in-camera: use a grey card to set a custom White Balance
shoot in Raw in case you need to make further tweaks.
If you do decide to work with studio flash
or wireless flashguns, you’ll need to set your camera to manual mode and take
total control over the exposure. First, dial in your camera’s flash sync speed,
normally 1/160sec-1/250sec depending on the model, and set a low ISO. As with
natural light, you’ll normally find a wide aperture of f/2.8 to f/5.6 gives the
ideal depth-of-field for food photography, by blurring the background and
keeping the eye focused on the subject of interest. Once you’ve got these basic
settings, it’s easy to assess the appropriate flash power using a handheld
light meter. Simply hold an incident light meter by the subject, pointing back
at each light source separately and adjust the power settings until you have
the requires aperture. From there you can refine the angles of the lights, if
still needed, and introduce appropriately sized black flags to help shape the
light, shadows and block reflections. Try to place the key/main light at the
side or slightly behind the subject, not at the front, to create depth and
emphasize texture.