Sweep Panorama
Sony pioneered the Sweep Panorama feature in 2009 with the
Cyber - shot DSC-HX1 ultra zoom. That feature can be found not only in all of
the Sony cameras, but also on most of their rivals these days.
It operates simply enough: select your start point, press
and hold down the shutter release button, and then pan the camera in the
direction of the arrow. You are able to follow in any direction (as long as you
tell the camera ahead of time), and you can select from standard (8,192 x
1,856) or wide (12,416 x 1,856) resolutions. Unlike the NEX-7, the NEX-6 is
unlikely to shoot 3D panoramas.
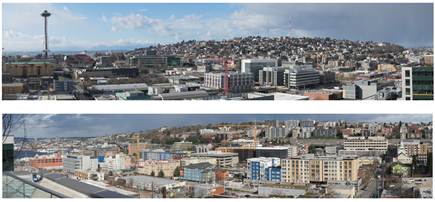
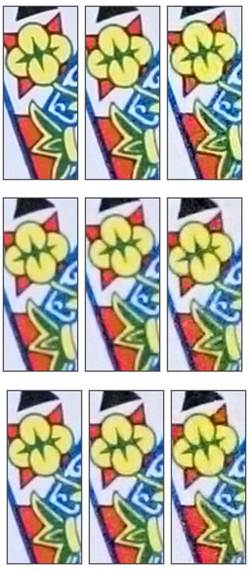
Sweep Panorama,
ISO 100, 1/250 sec, F11
The results obtained by using Sweep Panorama function are
really impressive. Seams are rarely seen, and the camera processes the changes
in exposure very well. We have been impressed by Sony's Sweep Panorama
function, and regardless of being imitated everywhere, but the original is
still one of the best features of this camera type around here.
Anti-Motion Blur / Hand-held Twilight modes
Anti-Motion Blur and Hand-held Twilight are two nearly
identical features that let you shoot usable images in challenging situations,
namely in low light. Both operate by capturing six exposure modes in a row and
then combining them into a single photo with - in theory - less noise and
blurry than those of the pictures that were not captured with these features.
The difference between the two features is that Anti Motion
Blur is going to generally use faster shutter speeds (and therefore higher ISO
sensitivities) to immobilize the moving objects. If the camera detects the
object’s movement, it will isolate that object from only one of the images, to
prevent ghosting or blur.
To test Hand-held Twilight mode, we captured the image that
you see below at two settings. First, in Program mode at ISO 12,800, which at a
focal length of ~45mm equivalent allowed a fast enough shutter speed for
acceptable sharpness using the stabilized power zoom lens. The second photo was
shot with Hand-held Twilight mode, which is a completely point-and-shoot experience.
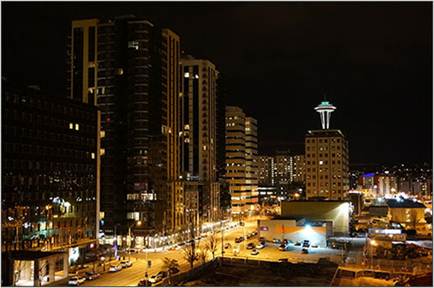
Hand-held Twilight
(1/13 sec, f/5.0)
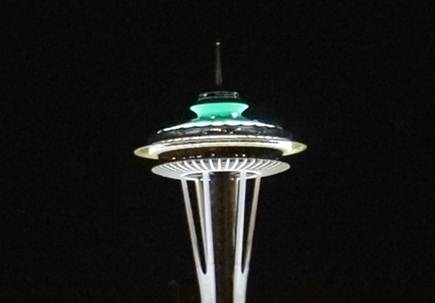
100% crop - high
contrast detail

100% crop - low
contrast area
The image shot in Hand-held Twilight mode is sharper, and
has less noise in both high and low contrast areas. The metadata of the image
shows an ISO sensitivity of 6,400, although this does not necessarily make
sense when it comes to multi-exposure mode. From our shooting, we'd say that
the images captured in in Anti Motion Blur and Hand-held Twilight modes have
the same amount of detail as ISO 3,200-6,400 images captured on a tripod,
making them useful for all except the largest print sizes. Note that, however,
you are unable to capture RAW images when using one of these features
JPEG noise reduction, including multiple-shot NR
There are two high ISO noise reduction settings on the
NEX-6: lower and standard. Additionally, you can pick up the Multi-Shot NR app
from the PlayMemories App Store, which has the function of ranking 6 exposure
modes into one, and promises to reduce noise without losing detail. Basically
multi-shot NR operates by 'averaging out' random high ISO noise over the six
frames.
From the photographer’s point of view, it works very
similarly to how the Hand-held Twilight and Anti Motion Blur features do,
shooting the six exposures very quickly and automatically linking them
together. Clearly, this is a mode best used when capturing relatively static
objects. In the table below, we captured everything by using a tripod to reach
a consistent comparison, but in fact, multi-shot NR is the handiest when
shooting hand-held (since it prevents you from having to use long exposures to
avoid high ISO noise)
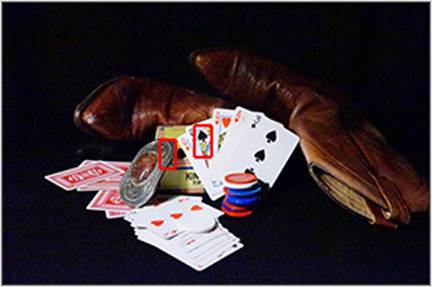
In this example,
we are comparing standard JPEG high-ISO noise reduction with low and multi-shot
NR at ISO 6,400, 12,800, 25,600. This scene was captured on a tripod, under low
white light.
The image was cropped
with different NR modes.
While the difference between Low and Standard NR is small at
ISO 6,400, it becomes more pronounced at the two higher sensitivities, which is
particularly evident in the crop taken from the card, Multi-shot NR is clearly
worth the $5, since it brings up the sharper images with more detail than
conventional JPEG images captured. You may not take notice it at smaller print
sizes, but it is advisable to use at high ISO sensitivities supposing that your
object (and the camera) are relatively static. We hope that Sony will integrate
this feature into the camera, rather than making it an optional addition.

PEG, ISO 12,800,
Standard NR, 100% crop

RAW, ACR 7.4 RC,
ISO 12,800, 100% crop
Multi-shot NR function is not the only way to get more
detail from the high ISO images. You can also capture by using the RAW format,
and handle the images until you have realized the right balance of detail and
noise. Above we have handled the ISO 12,800 image to match the 'taste', and
have improved color saturation and shadow brightness as well as restoring some
more detail to look more natural.