If you’ve recently upgraded to
Windows 8, you’ll have noticed more than a few changes. We explain how to
browse the new File Explorer
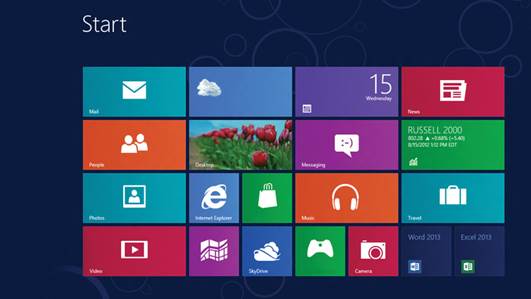
Although Windows 8 has a new user
interface, you’ll typically find that you use the traditional desktop for a
good proportion of the time. As well as removing the familiar Start menu,
Microsoft has overhauled File Explorer (previously better known as Windows
Explorer), and added new features.
File Explorer is where you can access and
manipulate all the content stored on your computer. You can copy, move, rename
and delete files.
With each iteration of Windows, File
Explorer has become more sophisticated. Previous refinements allow you to
preview files and create Libraries, for example.
In Windows 8, Microsoft has added to File
Explorer greater functionality. It’s built in its Ribbon toolbar, with which
users of Office 2007 or later will be familiar.
If
you’ve recently upgraded to Windows 8, you’ll have noticed more than a few
changes.
The Ribbon is very much like Marmite; you
either like it or hate it. Some people say it occupies too much screen space;
others enjoy the quick access to lots of features that it offers. The good news
for those in the former camp is that you can hide File Explorer’s Ribbon
toolbar. But for those who are willing to give it a try, manipulating files and
folders should become a lot easier.
If you don’t have any plans to upgrade your
OS just yet, but like the look of the new File Explorer, you can add to Windows
7 many of its features using a free utility called Better Explorer
(better-explorer.com). This software even adds a few extra features, such as
tabs, allowing you to have open a number of File Explorer windows and easily
switch between them.
In the following tutorial, we’ll guide you
through using Microsoft’s revised File Explorer, and show you how to manage
your files with the new Ribbon toolbar.
For more help in getting to grips with the
radically new operating system.
Get to grips with file explorer
Step 1
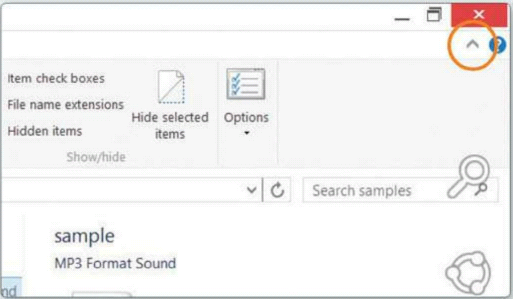
The Ribbon toolbar won’t be to all tastes,
but you don’t have to have it on display all the time. Simply click the small
arrow at the far right of the menu bar to maximise screen space by hiding the
Ribbon when it isn’t required.
Step 2
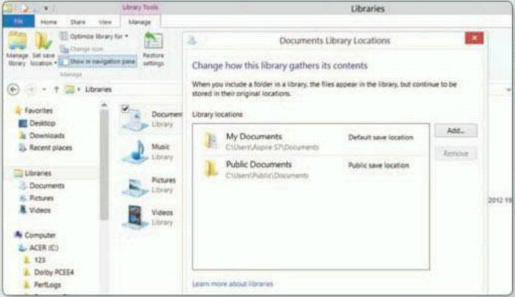
The Ribbon toolbar makes Libraries a bit
easier to manage - in Windows 8 than Windows 7. You can easily add folders to a
Library. The folders and their contents themselves don’t move - a Library is a
virtual grouping of files scattered in various folders.
Step 3
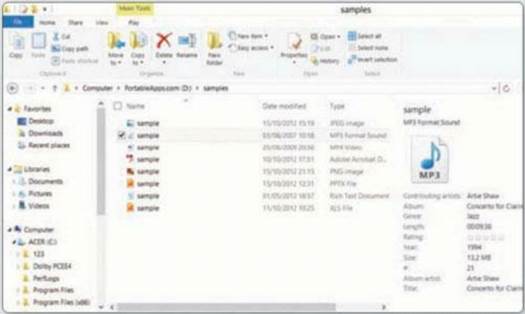
Functions dedicated to music can be found
in File Explorer. You can play single tunes or every track in an album, and
even manage playlists. Note how the music options are available only when a
music file is selected.
Step 4
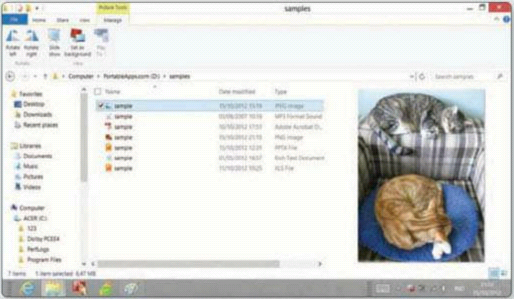
Selecting an image file brings up more
content-specific functions in File Explorer. Rotation comes into play when
viewing an image in the Preview Pane; you can also set a photo as the wallpaper
or view multiple images in a slideshow.
Step 5
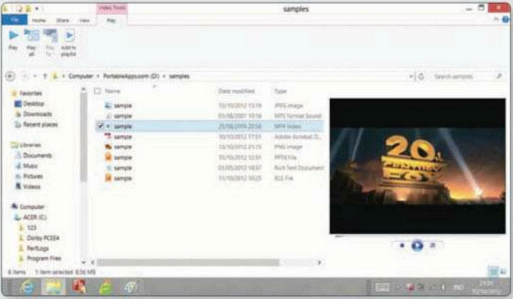
Video files also get their own controls in
File Explorer. As with audio, you can play a single video or all clips in a
folder, and add videos to a playlist. Note that Windows Media Player controls
are found in the Preview Pane.
Step 6
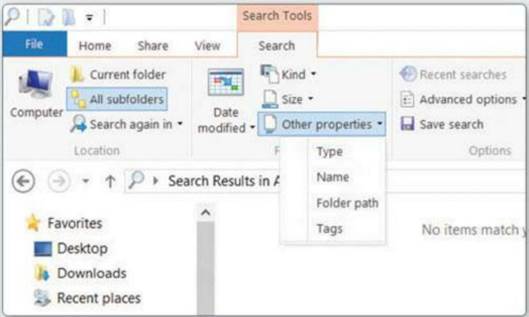
Sophisticated searching is possible, thanks
to the comprehensive set of options available on the Ribbon. These become
available as soon as you begin typing into the Search box. You can filter files
by type, date and size, for example.
Step 7
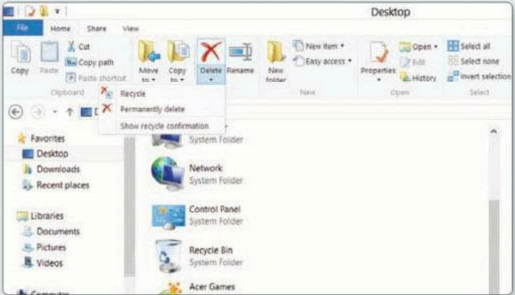
Folders are easily managed from the
Ribbon’s Home tab. Copy, Move and Rename options are here, and you can create
new folders, too. The Delete option lets you decide whether to permanently
delete items or send them to the Recycle Bin.
Step 8
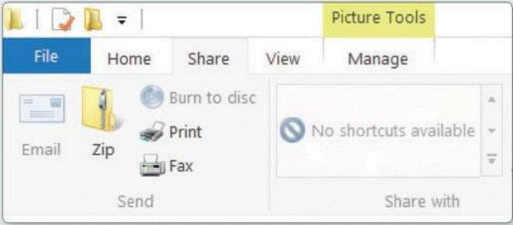
Some useful file-sharing options are also
available in the revamped File Explorer. Icons on the Ribbon let you email,
print or fax files, as well as burn them to disc or wirelessly share them with
selected people or groups.
Step 9
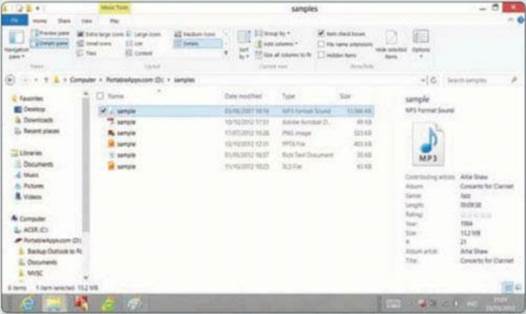
The Preview Pane has been joined on the
View tab by the Details Pane to provide file information. What you get varies
depending on the file format; videos display the framerate, bitrate, frame
size, video length and more, for example.