As we mentioned above, Scythe Grand Kama
Cross Rev. B can be installed onto any platform, including LGA 2011. The
installation process is very simple and doesn’t require removing the motherboard
from the case. First, you attach the brackets onto the base of the cooler by
tightening accompanying screws:
Intel
LGA 775/1155(6)/1366 bracket
AMD
Socket 939/AM3(+)/FM1(2) bracket
Intel
LGA 2011 bracket
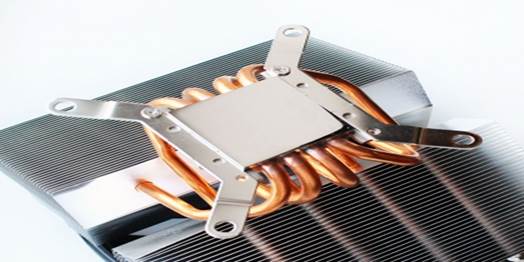
Then, you apply a layer of thermal glue
onto the processor’s radiator surface, install the cooler and push the plastic
pins up to fix it in place, or tighten 4 screws with the wrench (LGA 2011). The
entire process doesn’t take more than 5 minutes, which is an indisputable
advantage of Scythe Grand Kama Cross Rev. B.
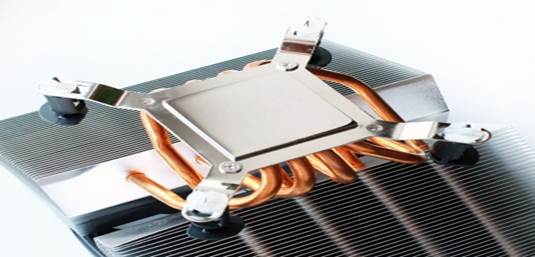
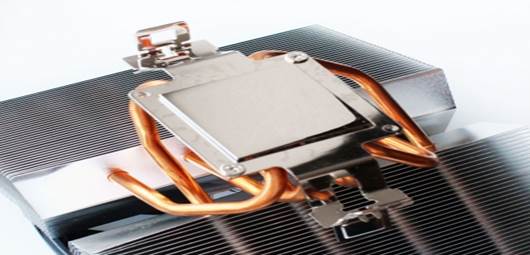
Thanks to the angled structure of the aluminum
heat-sink strips, Scythe Grand Kama Cross won’t intervene not only with the cooling
parts on the motherboard’s voltage regulator components, but also with the
tallest radiator range of the memory. To have the ideal orientation to install
the device, the manual installation instructions suggests that the cooler
should be installed with the heat pipes sit horizontally (or perpendicular to
the memory):
Installing
the device
This is also the way we install Scythe
Grand Kama Cross Rev. B. for today’s test.
Configuration and test methods
We test all coolers in a closed case with
the following parameters:
Testing parameters
·
Motherboard: Intel Sliler DX79SI (Intel X79
Express, LGA 2011, BIOS 0537 from 07/23/2012);
·
CPU: Intel Core i7-3960X Extreme Edition, 3.3
GHz, 1.2 V, 6x256 KB L2, 15 MB L3 (Sandy Bridge-E, C1, 32 nm)
·
Radiator surface: ARCTIC MX-4;
·
Graphics card: Gigabyte GeForce GTX 650 Ti 2 GB
(GV-N65TOC-2GI);
·
System memory: DDR3 4x4GB Mushkin Redline (Spec:
2133 MHz/ 9-11-10-28/ 1.65 V);
·
System hard drive: Crucial m4 256 GB SSD;
·
Drive for programs and games: Western Digital
VelociRaptor (300GB, SATA-II, 10000 RPM, 16MB cache, NCQ) inside Scythe Quiet
Drive 3.5’’ HDD silencer and cooler;
·
Backup drive: Samsung Ecogreen F4 HD204UI
?(SATA-II, 2 TB, 5400 RPM, 32 MB, NCQ);
·
Chassis: Antec Twelvw Hundred (front: 3
Noiseblocker NB-Multiframe S-Series MF 12-S2 fans with 1020 RPM speed; back: 2
Noiseblocker NB-BlackSilent PRO PL-1 fans with the speed of 1020 RPM; top:
standard 200-mm fan at 400 PRM);
·
Control panel: Zalman ZM-MFC3;
·
Source: Seasonic SS-1000XP Active PFC F13 1000 W
(with 120-mm default fan);
To prepare for today’s
tests we overclocked six-core processor with the clock operating speed set at
125 MHz, the multiplier at 34x and “load line calibration” allowed at 4.25 GHz.
The nominal processor Vcore was increased to 1.35 V in the motherboard’s BIOS. “Turbo
Boost” tech was disabled during this testing process, and Hyper-Threading tech
was used to increase the heat dissipation. The memory voltage was at 1.65 V and
its frequency was 2000 MHz with timing parameters at 9-11-10-28. All other parameters
available in the mainboard’s BIOS and related to CPU or memory overclocking
process remained the same.
All tests were performed under Windows 7
Ultimate x64 SP1 OS. We used the following software during our test session:
·
LinX AVX Edition 0.6.4 edition – to open the
microprocessor (memory -4500 MB, Problem Size -24234, 2 cycles, 11 minutes
each);
·
Real Temp GT version 3.70 – to control
temperature of the microprocessor core;
·
Intel Extreme Tuning utility version 3.1.201.5 –
to control and observe the parameters of the system during overclocking
process.
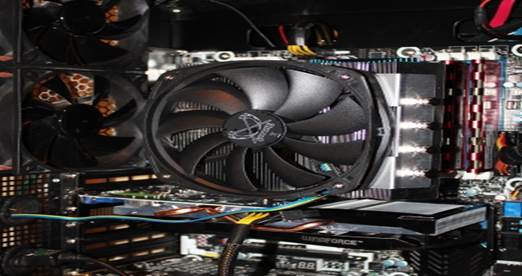
Therefore, the
complete picture in testing process looks as above:
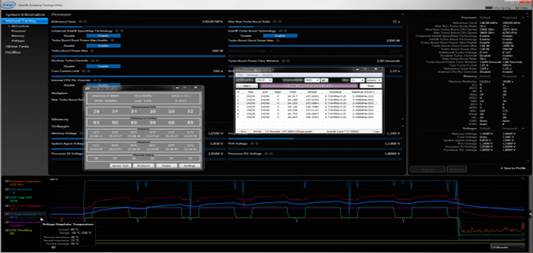
Pictures
of testing process
CPU was open with LinX AVX two consecutive times
with settings as indicated above. The period for the CPU temperature to be
stable between two testing time was about 8-10 minutes. We took the maximum
temperature of the CPU core to put on the results charts. Moreover, we also bring
up a table with the temperature index for all cores including their average
values. The surrounding temperature was checked by a case with an electronic
thermometer with 0.1 °C of accuracy that allows every-hour monitoring of the
temperature changes throughout the past 6 hours. The room temperature during
our testing time swung between 21.6-22.0°C.
The noise level of the cooler was measured from
1:00 to 3:00 AM in a closed room which is about 20 m2 by using
CENTER-321 electronic noise meter. The noise level of each device was tested
outside the system case when the only noise sources in the main body were the
cooler and its fan. The noise meter was mounted on a tripod and was 150 mm away
from the cooler fan rotor. The tested cooling systems were placed right at the
edge of the desk on a sheet of paper with polyurethane foam. The lowest noise reading
that our noise meter device can record is 29.8 dBA and the subjectively noise
level in this time’s testing conditions is 36 dBA (not mix it up with low noise
level). The rotor rotation speed was adjusted in the entire allowed-to-use
range with controller in the house by changing the voltage with 0.5 V.

Measuring
process
It will be easier to compare the cooling
noise-lowering efficiency of Scythe Grand Kama Cross Rev. B than other
top-cooling devices, but unfortunately, we only had one shot with this time of
testing. So, we brought out the retail price for Grand Kama Cross, which is 40
USD, as a competitive criterion and eliminated the competitions, except the
better design: Thermalright TRUE Spirit 120 with a 120-mm default fan.

Thermalright
TRUE Spirit 120
Rotation speed of all fans is controlled by
the same special controller I mentioned above with ±10 RPM accuracy and increase 200 RPM more.