Test and method
The tests are performed in a system case
with the removed side panel. The test is configured as follow:
·
Motherboard: Intel Siler DX79SI (Intel X79 Express,
LGA 2011, BIOS 0537)
·
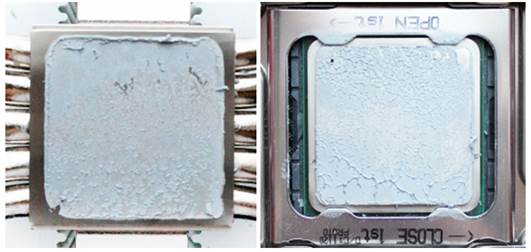
CPU: Intel Core i7-3960X Extreme Edition, 3.3
GHz, 1.2 V, 6 x 256 KB L2, 15 MB L3 (Sandy Bridge-E, C1, 1.2 V, 6x256 KB L2, 15
MB L3)
·
CPU cooler: Phanteks PH-TC14PE (2x140 mm Corsair
AF140 fans, 900 RPM)
·
Thermal interface: ARCTIC MX-4 (for all cooler)
·
System memory: DDR3 4 x 4GB Mushkin Redline
(Spec: 2133 MHz / 9-11-10-28 / 1.65 V)
·
Graphics card: AMD Radeon HD 7770 1 GB GDDR5 128
bit, 1000/4500 MHz with Deep Cool V4000 passive copper radiator
·
System drive: Crucial m4 256 GB SSD (SATA-III,CT256M4SSD2,
BIOS v0009)
·
Drive for programs and games: Western Digital
VelociRaptor (300GB, SATA-II, 10000 RPM, 16MB cache, NCQ) Scythe Quiet Drive
3.5” HDD inner silent cooler
·
Backup drive: Samsung Ecogreen F4 HD204UI
(SATA-II, 2 TB, 5400 RPM, 32 MB, NCQ)
·
System case: Antec Twelve Hundred (front panel:
3 Noiseblocker NB-Multiframe S-Series MF12-S2 fans leveled at 1020 RPM; back
panel: 2 Noiseblocker NB-BlackSilent PRO PL-1 fans at 1020 RPM; upper panel: 200-mm
standard fan at 400 RPM)
·
Controlling and monitoring panel: Zalman ZM-MFC3
·
Power source: Seasonic SS-1000XP Active PFC F3 1000
W (with 120-mm default fan)
For the priority
test and summary graph, we overclock a 6-core microprocessor with the
overclocking frequency set at 125 MHz, 35x multiplier and “Load-Line
Calibration” enabled to 4,375 GHz. The nominal Vcore of the processor is
increased to 1,385V in the BIOS motherboard. Then, we check the new cooling
system at even higher frequency and voltage settings. Turbo Boost is
deactivated though out the test, and Hyper-Threading tech is activated to
increase heat dissipation. The memory voltage at 1.65V and its frequency is
2,000 MHz with the times of 9-11-10-28. All other parameters are available in
the BIOS motherboard and related to the CPU or memory overclocking is
unchanged.
All tests were performed under Windows 7
Ultimate x64 SP1 OS. We used the following software in our test period:
·
LinX AVX Edition version 0.6.4 to load the
microprocessor (4,500-MB memory, Problem Size – 24,234, 2 11-minute cycle )
·
Real Temp GT version 3.70 – to monitor the
microprocessor temperature;
·
Intel Extreme Tuning Utility version 3.1.105.5 –
to monitor and control the images of the system parameters while overclocking
Thus, the
full-screen images in the test periods are as follow:

Full
screen image
CPU is loaded with 2 tests running
continuously with the settings as being indicated above. The CPU temperature
stabilization period during 2 testing cycles is about 8-10 minutes. We take the
highest temperature of the hottest CPU core for the result graph. Moreover, we
will provide a table with the temperature while reading for all cores including
their average values.
The ambient temperature is checked with an
electronic thermometer with an accuracy of 0.1° C that allows hourly testing of
the temperature changes during 6 hours. Room temperature though out this test
changes within 23.6-24.0°C.
The noise level of each cooler is measured
at about 1:00 and 3:00 a.m. in a closed room of about 20m2 using the
CENTER-321 electronic device to measure the noise. The noise level for each
cooler is checked outside the system case when the only noise source in the
laboratory is the cooler and its fan. The measured device is put on a tripod
and always at a distance of 150 mm compared to the fan rotor of the cooler. The
cooling system in the test was put at the edge of a table, on a polyurethane
foam panel. The lowest noise readings our noise-measuring device is able to
record is 29.8 dBA and the subjectively comfortable noise level in this testing
condition is about 36 dBA (don’t mistake it with the low noise level). The fan
rotational speed is adjusted in the entire supported range, using our
controller by increasing 0.5 V of voltage.
We intend to compare cooling performance
and the noise level of the systems participating in the test with Phanteks
PH-TC14PE with 2 default fans:

Phanteks
PH-TC14PE
Phanteks
PH-TC14PE
The rotational speed of all fans is
controlled by our special controller with the accuracy of ±10 RPM.
Besides the default fan that comes with the
cooling system, we have checked them with 2 alternative 120-mm Corsair AF120
Performance Edition fans installed on the radiator for intake/disperse air:

Corsair
AF120 Performance Edition
Unlike the images above, in our cooling
efficiency test, we install all the fans by the way we take the air from the
outside of the system case and push it inside. According to the preliminary
result, this air organization provides CPU temperature which is 2-3°C lower
than the air exhausted out of the system case through the radiator. Moreover,
this makes cooling better for the radiator on the components around the socket.
However, I have to add that this is not the common fan that is located for the
liquid cooling system and requires the additional fan of the case that exhausts
the air out of it (we use 120-mm and 200-mm fan).