BIOS Functionality
We are familiar with the ASRock’s new UEFI BIOS from our previous reviews, where we
showed that their interface seemed very convenient to use, and the
functionality was more than sufficient for system overclocking and fine-tuning.
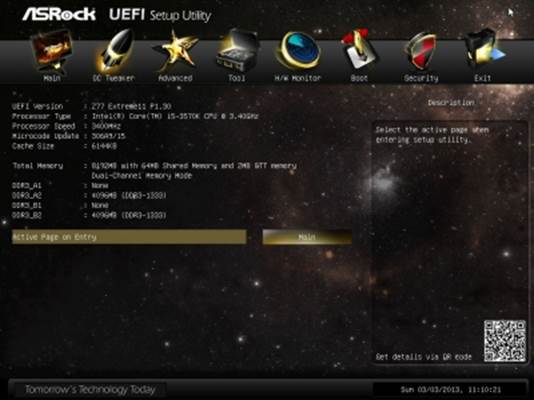
The first section we see upon accessing the BIOS is called “Main”, which
reports the basic information about our system. Now we can select the BIOS
section to be accessed upon entering the mainboard BIOS. A very useful option
allows saving a lot of time during system configuring.
New
UEFI BIOS
Most of the overclocking and fine-tuning
options are gathered in “OC Tweaker” section. This huge page is split into several
sub-sections with boundaries. The top part offers you options for automatic
overclocking of the CPU and the graphics core integrated into it, the next
group of options relates to processor configuring, the one after – to memory
sub-system configuring, and the last group rounds up all parameters dealing
with voltage adjustment. The voltages may be set above or below the nominal
value. They can be set at specified values, or adjusted by adding an offset to
the default settings. Here you can also see all current voltage readings right
next to the corresponding parameters, which is very convenient. The digital
voltage regulator circuitry allows selecting Vdroop values for CPU and the
graphics core integrated into it.

Some
parameters have be repositioned into individual sections
As usual, some parameters have been
repositioned into individual sections to unload the main page a little bit. In
particular, all the settings for memory timings configuring are split into a
separate page.

All
the settings for memory timings configuring are split into a separate page.
We were very familiar with the
functionality of the sub-section in the "Advanced" section: their
names speak for themselves. They allow configuring peripheral devices and
additional controllers. Here you can also enable and setup chipset's unique
technologies, such as "Intel Rapid Start" and "Intel Smart
Connect".

Configuring
peripheral devices and additional controllers.
The "CPU Configuration"
sub-section contains basic information about the processor and offers to
configure some processor technologies.

The
"CPU Configuration" contains basic information
The "Tool" section contains many
new features of ASRock's mainboard that we are already familiar with. The
"System Browser" sub-section is designed as a pretty precise
schematic layout of the board. By rolling your mouse over any parts on this
layout you can get information about it. ASRock OMG (Online Management Guard)
function allows denying Internet access at preset times and days of the week in
the BIOS. "Easy RAID Installer" automatically copy the RAID driver
from the bundled DVD onto a USB drive. We are also quite familiar with a
convenient BIOS updating tool called "Instant Flash". This utility
will analyze the contents of the plugged in USB drive and provide you a list of
compatible updates All what you need at this point is to choose the correct
BIOS version. We also note a few changes in another even more convenient BIOS
updating utility called “Internet Flash”: we can choose the server for
downloading the BIOS at the most convenient geographical location.

The
new "Tool" section contains many features
Every time you enter the BIOS, you hear
unique sound effects from the speakers connected to the mainboard. In addition,
the sound effects accompany navigation across the BIOS sections; a different
sound indicates switching between BIOS parameters or selection of a certain
parameter. If you are tired of continuous sounds, you can use the "Sound
Effect" option to turn them off. The "Dehumidifier Function"
technology will prevent boot failure caused by high humidity inside the system
case. Moisture can easily be lowered from 70% to 40% in a very simple way: by
powering on the system from time to time. This function allows you to set the
frequency of system power-ups, the length of the on-time and the rotation speed
of the CPU cooler fan. The last thing worth mentioning about the features of
the "Tool" section is the board's ability to save three profiles used
for each configuration and give each of them a detailed descriptive name.

The
"H / W Monitor" section allows monitoring temperatures, voltages and
fan rotational speeds.
The "H / W Monitor" section
allows monitoring temperatures, voltages and fan rotational speeds. Everything
here is simple: four 4-pin fan connectors allow you to adjust the rotational
speed of the 3-pin fans. Only the fan plugged into the “Power FAN” connector
cannot be adjusted in any way, but just be monitored.

The
"Boot" section allows choosing the startup system parameters.
The "Boot" section allows
choosing the startup system parameters.
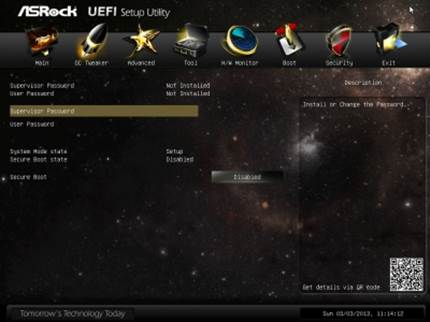
The
"Security" section will offer to create administrator and user
passwords.
The "Security" section will
offer to create administrator and user passwords. "Secure Boot"
parameter indicates that this mainboard is ready for Microsoft Windows 8.

Last
section called "Exit" allows you to apply all changes, cancel them or
reset all settings to defaults.
Last section called "Exit" allows
you to apply all changes, cancel them or reset all settings to defaults. At any
time and in any location you can use the F1 key to display the help topics and
the list of available hot keys.
Testbed Configuration
We performed all our tests on a testbed
built with the following components:
·
Mainboard: ASRock Rock Z77 Extreme11 (LGA 1155,
Intel Z77 Express, BIOS version P1.30);
·
Intel Core i5-3570K CPU (3.6-3.8 GHz, 4 cores,
Ivy Bridge rev.E1, 22nm, 77 W, 1.05 V, LGA 1155);
·
2 x 4 GB DDR3 SDRAM Corsair Vengeance
CMZ16GX3M4X1866C9R (1866 MHz, 9-10-9-27 timings, 1.5 V voltage);
·
Gigabyte GV-T797OC-3GD (AMD Radeon HD 7970,
Tahiti, 28 nm, 1000/5500 MHz, 384-bit GDDR5 3072 MB);
·
Crucial m4 SSD (CT256M4SSD2, 256 GB, SATA 6
Gbps);
·
Noctua NH-D14 CPU cooler;
·
ARCTIC MX-2 thermal interface;
·
Enhance EPS-1280GA PSU;
·
Open testbed built using Antec Skeleton system
case.
We use Microsoft Windows 8 Enterprise
64-bit (Microsoft Windows, Version 6.2, Build 9200) operating system, Intel
Chipset Software Installation Utility version 9.3.0.1026, AMD Catalyst graphics
card driver version 13.1.
You may notice that we have returned to
using a Crucial m4 SSD in our testbed. It really is the same SSD that we had
used until it was no longer to be identified any more. The Crucial website
offers rather odd recommendations on how to revive such dead SSDs. You need to
connect power, wait 20 minutes, turn it off for 30 seconds, and repeat the same
a couple times. The SSD can recover, and you have to update the software
immediately. It seems that the manufacturer doesn't know exactly why its SSDs
behave like that, but that recommendation really do help some users. Therefore,
we decided to try, but we don't even need to do that. After being set idle for
several weeks, the SSD awoke as soon as we connected it, just as suddenly as it
had gone dead despite having the latest firmware version (040H).
We had to replace the Crucial m4 (256GB,
SATA 6 Gbit/s) with a Kingston SSD Now V + Series (128 GB, SATA 3 Gbit/s) for
the review of the ASRock FM2A85X Extreme6 mainboard, noting that this change
only provoked a performance hit in Adobe Photoshop CS6. Even so, it doesn't
mean that the two SSDs are identical in performance. For example, we don't
install the OS and benchmarks every time we test a new mainboard. We just
deploy a system disk image with a set-up OS and applications, so we just have
to add drivers peculiar to the specific mainboard. And deploying the image to
the Kingston SSD takes 25-27 minutes while the same process takes only 5-7
minutes with Crucial.