Everything you need to know about the new
app
In iOS 6, it’s all change for the Maps app.
Previously, Maps used Google data, the richest mapping information on the
planet, providing well-tested direction, detailed satellite imagery and useful
street views. But Google’s data is out and Apple’s now rolling its own.
However, its offering isn’t terribly mature. Views are limited, data isn’t
always accurate, and transit information is now reliant on third-party
applications.
In
tests we’ve found the performance of the new Maps app to be excellent
But it’s not all bad news. In tests we’ve
found the performance of the new Maps app to be excellent – head-to-head, it’s
faster than the iOS 5 app. Although data is sometimes a little iffy, there are
ways to make it more accurate.
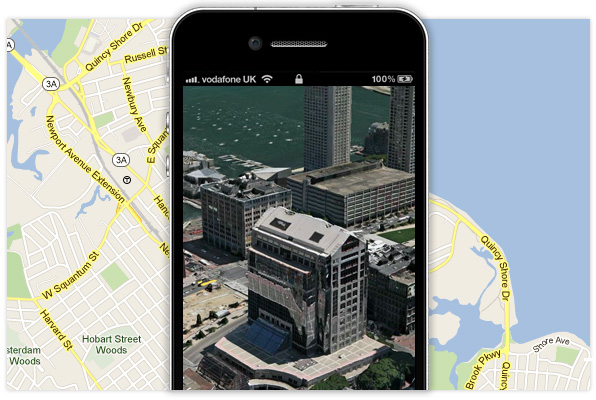
While satellite imagery is weaker, armchair
tourists will find new 3D flyover views pretty interesting – we reckon they are
more fun than Google Earth. And if you do find yourself staring aghast on
seeing that Apple’s positioned your town in the middle of the English Channel,
there’s a means of letting Apple know. With plenty of use and fast iteration,
there’s a good chance Apple’s Maps app can once again be an industry leader.
For now, our walkthroughs give you the lowdown on how to tackle its
shortcomings.
How to get directions
1.
Define a journey

Getting directions in Maps hasn’t changed
significantly, although the information is flakier and the maps aren’t as
clear. To start, click the directions button at the top-left and define Start
and End locations. Maps isn’t terribly smart, so for best results, be very
specific: add a county, post-code or other identifier, such as an airport’s full
name.
2.
Pick a route

Tap Route to see three alternatives. Tap
each to see its distance and estimated journey time. For full directions, tap
the directions button (the bulleted list icon) at the foot of the screen. The
standard map only differentiates between major routes (motorways and some A
roads, in orange) and other roads (white), so check routes carefully before
setting out.
3.
Follow directions
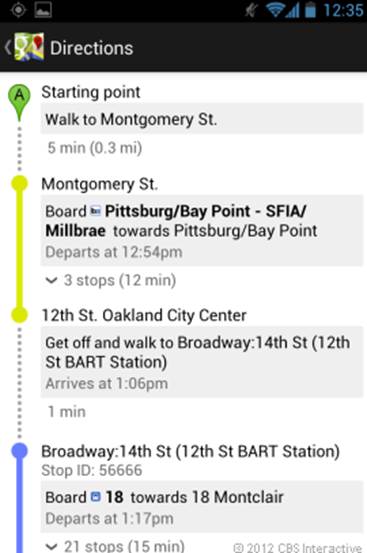
Tap Start and Siri will give you spoken
turn-by-turn directions and a 3D(ish) view. There are caveats here, too,
though. You’ll need a cellular connection for Maps to work – if you go into a
dead area, it can’t pinpoint your location – and we’ve heard reports about
issues with road information. But as long as you’re not relying entirely on
your iPhone, you should be fine.
How to explore a city
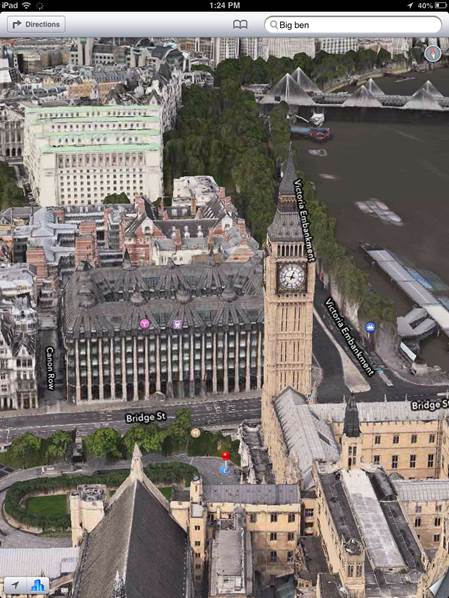
1.
Choose a landmark
Our favourite feature of Maps is Flyover,
which aims to one-up Google’s Street View by providing 3D city flyovers. It’s
more of a novelty than Google’s practical feature, but it’s fun for armchair
tourism. To start, search for a city or monument, bearing in mind that only a
handful of the largest cities and famous landmarks are so far supported.
2.
Go 3D
Activate the Hybrid or Satellite view by
tapping the relevant button under the page curl. Once you’ve done that, use
unpinch gestures to zoom in closer, and then tap the flyover button (it looks
like buildings). The entire view will tilt and you’ll have a 3D view of your
chosen monument. It’s not entirely lifelike, but what happens next makes it
worthwhile…
You
can use unpinch gestures to zoom in closer, and then tap the flyover button
3. Spin things round
With two fingers, do a route gesture to see
the entire 3D scene rotate, or rotate-flick to make it spin on the spot. As you
move, the compass tracks your direction; tap it to revert the scene to its
default. In Hybrid mode, roads and places of interest are overlaid. Outside of
supported cities, 3D is replaced by simpler images that incorporate land
elevation.
How to correct Maps’ mistakes
1. Unearth an error
At the time of writing, there’s a Tumblr
blog (theamazingio6maps.tumblr.com) outlining the many failings of Maps,
including misspellings, museums in rivers, and streets not existing. But we can
all make Maps better, by providing feedback to Apple. On finding an error,
tap-hold on the screen to drop a pin which will flag the location of the
problem.

We
can all make Maps better, by providing feedback to Apple
2. Report the problem
Tap the page curl at the bottom-right. Tap
the Report a Problem link and you’re given a number of options, such as ‘Search
results are incorrect’ and ‘Location is missing’. Choose the one that’s most
appropriate. You may be asked to tap another point on the map, before entering
information that will assist Apple. Once happy with your report, tap Send.
3. Move a site of interest
Maps displays sites of interest, such as
shops and restaurants. In some cases, these entries are incorrect. To inform
Apple, tap the location, tap the right-facing arrow to access its details page,
scroll down and tap Report a Problem. Choose the relevant option, tap Next,
make suitable changes, and then your report is sent to Apple for investigation.