Landscape photography is about the spirit of
spaces. The best landscapes don’t just show you what a place looks like; they
reveal what a place feels like.
Landscapes are often images of the natural
world with minimal people and animals, but they can also encompass urban
landscapes, with overlaps between architectural and nature photography.
Wake Up Early, Get Back Late
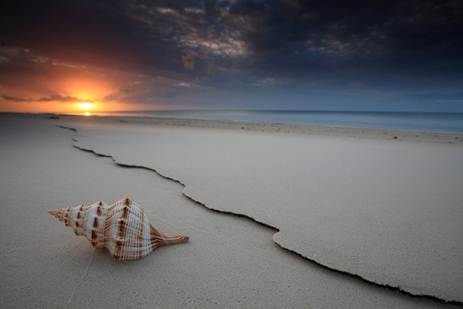
The difference between a good landscape and
a great landscape photograph is often in the quality of light. The ‘golden
hours’ – the moments during sunrise and sunset – offer gorgeous golden hues
with soft light. Early evenings – the moments after the sun sets – can offer
deep contrasts between the fading light and the cool hues of evening.
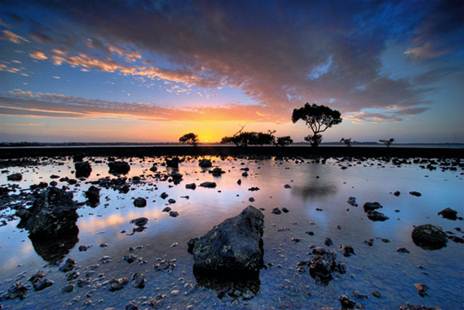
What this means is that you will often be
waking up early and leaving late in order to catch the best light. You will
also need to reach the area early in order to catch the best spot, since you
may not be the only photographer there looking to capture an arresting image.
You also need the time to set up your camera, since you will be shooting on
tripods in the dim light.
Have a Point of Interest
There are so many elements present in a
landscape that it’s easy to lose focus. What is it you want to communicate with
this particular landscape photograph? What is the main subject? What can be
removed from the frame so that the focal point is even clearer? What is
essential and cannot be taken out? Here’s where the principles of composition
help – arrange your main subject according to the rule of thirds and use
leading lines to bring the viewer in.
Have
a Point of Interest
Use a Tripod
The smaller your aperture setting, the
longer your shutter speed will become. Landscape photographers prefer to shoot
at as low an ISO setting as possible, in order to minimize noise and extract
maximum detail. This also lengthens your shutter speed, which means that you
will need to use a tripod to stabilize your shot. Even when you’re shooting at
a relatively fast speed, it can help to use a tripod, as even a little bit of
hand-shake can introduce a small amount of blur.
Mastering Focus
One of the biggest challenges in shooting
landscape is mastering focus so that everything looks sharp. Photographers
shoot landscapes with as small an aperture as possible to maximize the depth of
field in an image – usually f/8 and above. But they also have to be careful not
to shoot at too small an aperture, as image quality will deteriorate at the
smallest apertures due to diffraction range where the results are sharpest,
commonly in the middle.
Now where do you focus? You can use the
hyper focal distance technique to get everything from half the hyper focal
distance to infinity within focus. Today, we have the benefit of mobile apps
that help you calculate your hyper focal distance. Another general rule of
thumb is to focus about one-third into the depth of the scene. If your camera
sports a depth of field preview feature, you can use it to check your focus.
Some cameras have magnified Live View to help you further refine focus, while
others have a feature called focus peaking which shows you in outlines which
parts of your image are in focus and which are not.
“The
difference between a good landscape and a great one is in the quality of
light”.
Controlling Flare & Reflections
If you’re shooting with the sun to your
side or in front of you, you’ll need a lens hood to cut flare from appearing in
your photograph. A polarizer, a filter which you attach to the front of your
lens can enhance contrast and color, as well as reduce reflection and haze.
Polarizing filters are how photographers
shoot clear bodies of water and capture the details of objects beneath the
water, as they cut the amount of light reflecting off the water surface.
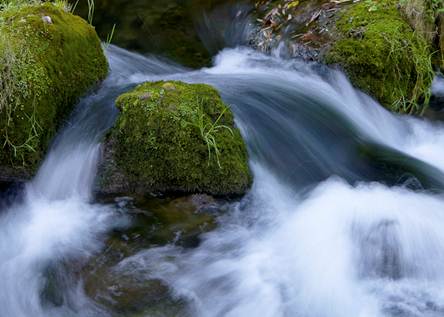
Vary the Speed
At the same time, shutter speed should be
an esthetic as well as technical choice. The longer your shutter speed, the
more moving objects will blur. This is sometime done intentionally to create an
effect, like turning choppy water into a silky stream.
How long you should shoot for to create the
motion blur you want depends on the subject and the amount of available light,
but generally speaking, shoot at least at 1/20 of a second on a tripod, and at
as low an ISO setting as possible to minimize image noise. When shooting long
shutter speeds, it’s best to set your camera on a timer, if it’s a DSLR camera
have the mirror lock-up before shooting to minimize camera movement.
Vary
the Speed
Blurring your subject works best when there
are contrasting still elements in your image, otherwise the entire image can
look like it was a blurry accident. Watch the wind, as elements which you think
are still can move in strong winds and cause unintentional motion blur.
Metering the Scene
To account for the vast amount of lighting
differences inherent in landscapes, it helps to set your camera’s metering mode
to multi-segment, also known as ‘matrix’ or ‘evaluative’, to get as even an
exposure as possible. There times, however, when your camera is fooled by a
scene with high contrast lighting, in which case you will have to watch your
histogram to make sure that nothing is clipped.
If you’re capturing in RAW, try to ‘expose
to the right’ of the histogram, which means that most of the histogram, which
means that most of the peaks and valleys in your histogram should be to the
right side without clipping. This is because more digital information is saved
when the camera ‘exposes to the right’. Your images may look unevenly exposed
in preview, but exposing to the right maximizes the amount of detail you have
to work with in post-production.