Project 5: Turn your raspberry Pi into a media center
Raspbian isn’t the only operating system
that runs on the Raspberry Pi, but it’s the best choice for general use.
However, to turn your Pi into a media center and share photos and music around
your home network, you should use the RaspBMC operating system. This will let
you stream everything you’ve stored on a USB drive attached to your Pi over
your local network. You’ll also be able to add extra services such as BBC
iPlayer (www.bbc.com/iplayer), 4oD (www.snipca.com/9329) and radio service
Tuneln (http://tuneirtcom).

Watch
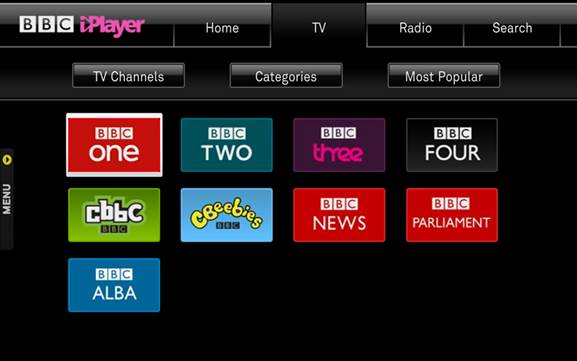
BBC iPlayer on your Raspberry Pi via XBMC
Start with a fresh SD card and copy NOOBS
to it (see ‘Install the operating system’). Insert the SD card into your
Raspberry Pi and start it up. When the boot menu appears, select RaspBMC and
follow the prompts to install it on the SD card. After several reboots, you’ll
be prompted to choose your language. The software will then finish loading. If
the picture overspills the space on your screen, go to System, Settings and
select Video Output, Video Calibration. Move your mouse off the top-left corner
and drag it into view. Do the same with the bottom-right corner until the
RaspBMC window fits properly.
If you’re using a wireless dongle, move
your mouse over Programs and click RaspBMC Settings. Go to Network
Configuration and change the network mode two wireless, Scroll down and type
your Wi-Fi network name into the SSID field and the password into the Wi-Fi key
field.
To use 4oD and iPlayer with your Raspberry
Pi you need to install XBMC add-ons. Adding 40D is easy because it’s part of
the standard RaspBMC installation. Go to Video/Add-ons and select Get More.
You’ll find 40D at the top of the list.
BBC iPlayer is not on the official list but
it’s easy to install. The most reliable method is to use PuTTY and open an SSH
session. Follow the instructions we gave there for remotely accessing your Pi.
Log in and double-click the LXTerminal. Now type wget--no-check-certificate
htps://xbmc-iplayerv2.googlecode.com/files/IPlayer-v2.4.18.zip and press Enter.
This will download the add-on file to your Raspberry Pi.
Double-click RaspBMC to launch it, go to
System, Settings, Add-ons and select the two full-stops at the top of the list.
This takes you up a level in the file structure. Click the full stops
successively until you reach the menu that includes the ‘Install from zip file’
option. Click it and select the Home folder in the window that appears. You’ll
see your zipped iPlayer file there. Click it and select OK. BBC iPlayer is now
installed. You’ll find both 40D and iPlayer on the main menu under
Video/Add-ons. To watch catch-up TV on your Raspberry Pi just click to launch
iPlayer or 4oD. You’ll need to have a Wi-Fi connection for it to work.
Tune into internet radio
To convert your Raspberry Pi into a web
radio player, download the TuneIn add- on. You’ll need to use PuTTY but this
time type wget--no-check-certificate https://github.com/downloads/brianhornsby/plugin.audio.tuneinradio/plugin.audio.tuneinradio-1.0.7.zip
then press Enter. Follow the same process as before to install the zip file.
TuneIn is listed in the Music menu.
Play music from a Pi on your PC or phone
To play music stored on your Raspberry Pi
USB drive, select Pictures, Music or Video from the main menu, click Add Source
to add your attached USB disk or network location then choose Music.
The easiest way to control RaspBMC is via
an app. There are free XBMC apps for Android (www.snipca.com/9247) and iOS (www.snipca.com/9248). Launch the app
phone or tablet, type the IP address and login details for your Raspberry Pi
then sit back on the sofa and control your new media center using your
smartphone or tablet.

XBMC
Play music on your Raspberry Pi
Project 6: Program and control a robot arm
Your Raspberry Pi can be used as a robot.
Yes, really. Maplin stocks a $68.5 self-assembly robot arm (www.snipca.com/9298) that can be
controlled through 32bit Windows XP or Vista. But you can also control it from
a Raspberry Pi and program it to carry out tasks. The arm can lift items
weighing up to 100g. We’ve found several of these robot arms on eBay for around
$30.5. Once you’ve assembled the robot arm, check you've set it up correctly by
testing it with a Windows PC.
Once you’ve got it working, connect the
robot arm to your Raspberry Pi via a powered USB hub and boot into Raspbian.
You’ll need to install the Geany code editor, Python programming language and
the USB library. Type these commands in sequence in LXTerminal and press Enter
after each.
sudo apt-gct
install python-pip
sudo pip
install pyusb
sudo apt-get
install geany
Launch the Midori browser and download the
files armtest.py and RobotArm.py from www.rpi-net.code/robotarm.
Create a folder on the Raspbian desktop, name it ‘robotarm’ and copy the files
to it. Now double-click LXTerminal and type sudo python
Desktop/robotarm/armtest.py.

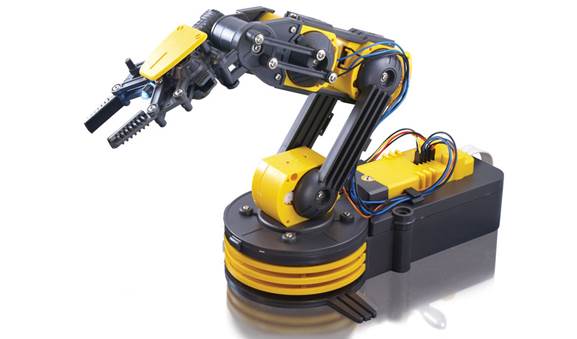
Robotic
controlled by your Raspberry Pi
The armtest.py file contains a sample
routine that moves every joint in the robot – it should be easy enough to see
how it moves the arm so try to work out how to get it to go through a set of
movements and then return to its original position. Maybe you could get it to
stir your tea.