See numbers in big type
Have you ever wanted to jot down a phone
number from the screen but found it difficult because you had to keep looking
back and forth from screen to page?
This is just the kind of thing Apple’s
engineers think about making easier. In TextEdit you can simply highlight the
telephone number, right-click it and select ‘Large Type’. This works in Mail
messages too, although you might also be able to hover the mouse over the phone
number until an arrow icon appears and click it, selecting ‘Large Type’ from
the menu that appears. Note that this works only for messages you’ve received
in Mail and not for ones you’re composing.
This also works when using Calculator, letting
you view the result of calculations - right-click the numbers on the LCD screen
and then select ‘Large Type’.
In each case, the text will then be
displayed in large floating text that fills the width of the screen. To get rid
of it, just click anywhere.
Check the health of apple online
services
iCloud not working for you? Just visit
www.apple.com/supportI system status to see which Apple services are up or
down. Unfortunately, iCloud reliability figures aren’t quite as stellar as
Apple aficionados would have you believe, so bookmarking the site isn’t a bad
idea.
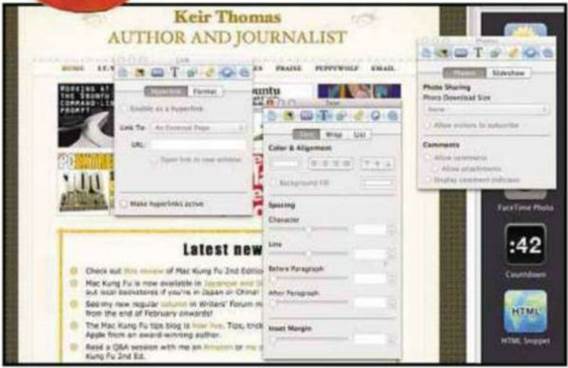
Create multiple inspector windows
In some of Apple’s own apps, like those in
the iWork or iLife suites, a separate pop-out window is used to let you view
and change settings. This is called the Inspector, and it usually appears on
either the Cmd+ I or AIt+ Cmd+ I keystrokes.
What’s not obvious is that you can have two
or more Inspector windows visible at any given moment. Just hold down Alt and
click one of the icons in the inspector’s tab bar.
Although Microsoft Word has something
similar in its Toolbox window, this trick doesn’t work there, unfortunately.
Rip music from video files
Want to separate the audio from a movie
clip so you can listen to it on your iPod or iPhone? Your Mac has it covered
with its built-in tools. Just open the clip in QuickTime Player, which is in
the Applications list in Finder, and then click File> Export and select
‘Audio Only’ from the Format drop-down list. This will create an .m4a file
compatible with all Apple devices and computers. Just import it into iTunes in
the usual way, by double-clicking the new file.
Need the files in MP3 format for your music
player? Just use an app like MediaHuman’s Free Audio Converter: www.mediahuman.
corn/audio-converter.

QuickTime Player can extract the audio
from a movie file - useful for those music videos
Tear off tabs
Some OS X apps, such as Safari and
terminal, make use of tabs. The standard keyboard shortcut in such apps to
create a tab is Cmd+T. In most cases, the tabs can be ‘torn off’ to create a
new program window containing just that tab - just click and hold the tab, drag
down, and then position the new window where you want before releasing the
mouse button.
Convert reminders into calendar events
Ever created a To Do in the Reminders app
but then realized it’d work better as a Calendar event?
Just drag and drop it from the Reminders
app onto the Calendar app window. However, this must be done a special way:
click and drag at the right of the entry in the Reminders list (just to the
left of where the ‘j’ icon appears). If you click and drag anywhere else, OS X
will assume you want to edit the text of the To Do.
This doesn’t work the other way around,
however; dragging an event from the Calendar app onto the Reminders window
won’t turn it into a To Do. Dropping an event onto Reminders’ Dock icon appears
to work, but nothing actually happens clearly a bug!

You
can open multiple inspector windows in apps like iWeb or iPhoto, allowing quick
access to core tools
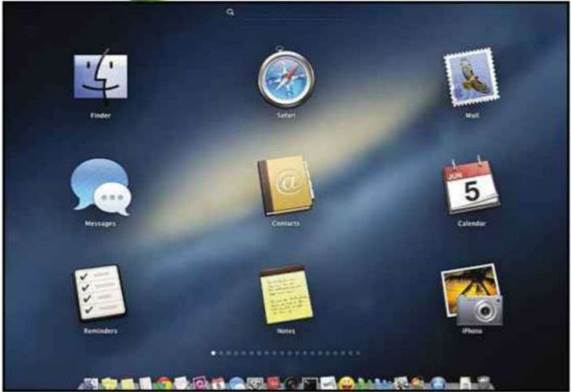
Make Launchpad useful
Launchpad is one of Apple’s big new
features in recent releases of OS X but it’s a love-it or hate-it affair. One
way to make it potentially more useful is to alter a secret setting to make the
icons bigger or smaller.

By
making the ¡cons in Launch pad bigger or smaller, you can customize and make
useful what is otherwise a feature many dislike
Let’s say you want to change the grid size
to three rows by three columns of app icons, which will make for significantly
bigger icons. Open a terminal window (open Finder, select the Applications
list, and then in the list of applications double-click terminal within the
Utilities folder), and type the following two lines, the first of which refers
to the number of icon rows and the second of which refers to the number of icon
columns:
defaults write com.apple.dock
springboard-rows -int 3 defaults write com.apple.dock springboard-columns -int
3;killall Dock
To make the icons smaller, we simply
increase the grid size. Increasing the grid size to 10x10 icons will shrink the
icons significantly into a compact layout but still leave them usable. It can
be done as follows by typing these two lines into a terminal window:
defaults write com.apple.dock
springboard-rows -int 10 defaults write com.apple. dock springboard-columns
—int 10; killall Dock
To restore the default icon sizes, again
open a terminal window, and type the following two lines:
defaults delete corn.apple.dock
springboard-rows defaults delete corn.apple.dock springboard- columns; killall
Dock
Sleep your mac with a remote
If you have an Apple remote control, you
can put your MacBook or iMac into sleep mode from a distance away by pointing
the remote at the computer and then pressing and holding the central Play/Pause
button for three to four seconds. Watch as a series of comic book-style Zs
appear on the screen to indicate snoozing!
The Mac can be woken from sleep in the
normal way — usually by hitting a key on the keyboard or moving the
mouse/touching the track-pad although you can also click the Play button again
on the remote.
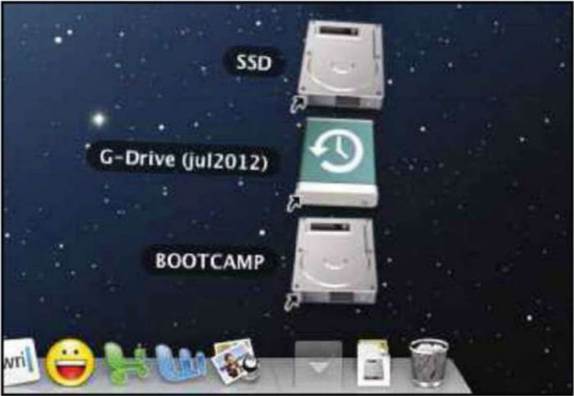
Create a ‘drives’ stack in the dock
Here’s a neat little trick that will add a
new stack to the Dock that, when clicked, will display any storage attached to
your computer (things like USB memory sticks, FireWirel Thunderbolt drives and
SD cards). As an added bonus, it will also show any installation .dmg files you
currently have mounted.
To set it up, open a Finder window, and
hold down Shift+Cmd+G. In the dialogue box that appears, simply type Nolumes.
Then click Go.
Ignore the contents of the Finder window.
Instead, look at the title bar, where the folder name is listed. Click and drag
this to the stacks area on the right of the Dock. The other stacks will slide
out of the way to make room for it. Don't worry you're not copying the folder.
You're just creating a shortcut.

You
can create a ‘stack’ on the right of the Dock that will instantly allow access
to any removable store, like USB sticks
See who you've emailed
Want to see a list of people you've emailed
over the last, say, two or three years and in date order, to boot? Open Mail
app, then click Window > Previous Recipients. In the window that appears,
click the 'Last Used' heading.
You can also select one entry (or several
using the usual Shift/ Cmd clicking) and click the Add to Contacts button, to
create an entry in the Contacts app using their name and email address. Note
that you don't get the chance to further edit the new card, although if you
then double-click the entry in the list, you'll open Contacts with the new card
showing.