If you’ve never built a PC before - or even
if you have - we have 15 helpful tips to make sure you do it better
Building a PC isn’t just about buying the
right parts - at some point, you have to actually get out the toolbox and put
them together. Putting together a computer isn’t half as difficult as people
seem to think it is, and anyone who’s done it will tell you that it’s actually
a lot easier (and more fun!) than you fear.
But that doesn’t mean it’s entirely simple
either and there are things you’ll learn the first time that will make it
easier for you the second time, and things you learn the second time that make
it easier for the third, and so on.
So rather than force you to put together
multiple machines in order to get the benefit of experience, we’ve compiled
this list of 15 practical tips to help you build a better PC. They don’t just
make it easier on you, some can genuinely improve the performance of your
machine as well!
Cables And Casing
1.
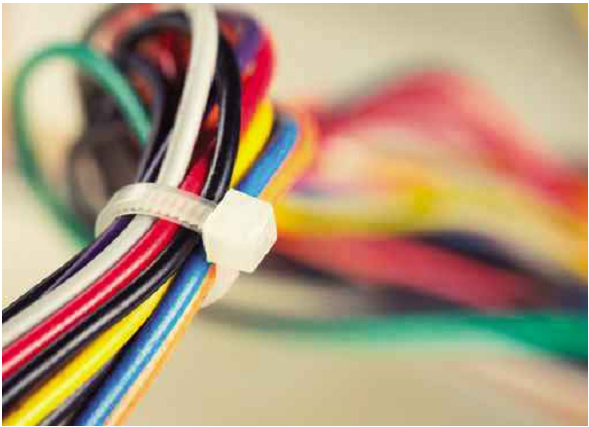
Use cable ties to organise
The inside of a computer can quickly get
messy and tangled, and once you have to that stage it’s normally too late to
salvage things. The best time to neaten up your system is when you build it.
That means getting a set of cable ties and making sure that everything’s neat
and tidy along the way.

Tidy
cables mean better airflow in your case, which helps components perform better
Cable ties let you group power and data
cables into bundles, making it easier to manoeuvre your hands and hardware
around them in the future. If your case has the necessary fixtures, you can
even tie them so that they run clean against the case’s exterior, maximising
air flow inside the case and getting rid of irritating dangling cables.
Don’t be tempted to cut corners by using
alternate materials, though – things like plastic tape, rubber bands will
degrade in the hot, dry air inside your PC and could cause serious damage (even
fires) if they get into fans or components. Use durable hard-plastic cable ties
only.
2.
Be careful of static shocks
You’ve probably heard horror-stories about
static build-up destroying computer components before they’ve even had a chance
to work, but don’t be obsessively concerned; in years of building PCs, we’ve
never had a static discharge wreck a component. Yet.
That doesn’t mean you can ignore the
problem completely, of course. Static electricity might be a little irritating
when it shocks you on a doorhandle, but it’ll be positively tragic if it zaps
your $320 processor. Despite years of successfully avoiding the problem, we’re
not about to get complacent and neither should you.
Discharging static electricity is as simple
as touching a grounded bare metal surface, such as a radiator pipe, a kitchen
tap, or your PC’s case (while it’s plugged in). Do it before handling any
component and you’ll be fine. If you’re really concerned, you can also buy an
anti-static wrist strap, which clips to the case and dissipates any charge the
moment it starts.
3.
Invest in tool-free fixings
The ability to use tools is undoubtedly one
of the evolutionary leaps that made humanity what it is. Unfortunately,
computer cases aren’t really designed to accommodate long, thin screwdrivers.
No matter how versatile your system, there always seems to be one screw positioned
in such a way that no screwdriver on the planet can actually get to it.

Invest
in tool-free fixings for your PC
To avoid these problems, don’t use the
screws that came with your system – buy a set of thumbscrews instead. These
aren’t the medieval torture device of the same name, but normal screws with
large, easily gripped tops that can be taken out and put back in using no more
tools than your thumb and index finger (although they do have slots for
screwdrivers too). They massively speed up a build and any future upgrades, so
what they cost in money, they repay in long-term stress reduction.
4.
Research the front-panel connectors
Probably the hardest part of any PC build
is getting the big pieces of hardware - the hard drive, the optical drives, the
motherboard - to talk to the small bits, like the PC speaker, the power LEDs
and the reset button. Without these tools, your PC will still work, but you’ll
lack valuable feedback and troubleshooting options.
The connectors for these devices are built
into the front panel of your case, and should slot into your motherboard. But
here’s the important advice: don’t think you can guess how. Unlike most
components, which only really slot into one place, it’s very difficult to read
how these auxiliary functions should be connected to the motherboard just by
looking at the hardware itself. Read and re-read your motherboard manual to
find out how the connectors should be positioned. No shortcuts here.
5.
Don’t be afraid to get a bit rough
Connecting cables is a normally an easy
process, but PC cables need to be stiff. If they were to fall out or work their
way free, they could cause serious damage to hardware and lose data. No one
needs that possibility hanging over every word they type!

PC
cables need to be stiff
Of course, the flip-side of this is that
sometimes it can be difficult to actually get the cables seated in the first
place. Don’t be afraid, then, to give them a bit of a push. Make sure they’re
lined up properly and press as hard as you can. Most go in further than you’d
expect!
Similarly, taking cables out can require
some surprisingly hefty pulls. If they won’t come out of the socket, make sure
you’re not trying to pull something that has a release button (some do) and if
all else fails, some well-placed pliers can give you the purchase you need to
get them free.