6.
Seat your RAM correctly
Installing RAM seems like one of the
simplest parts of building a PC. The slots are easy to access, and the modules
simple to install. There are other considerations to take into account, though,
if you want to get the optimum performance from it.
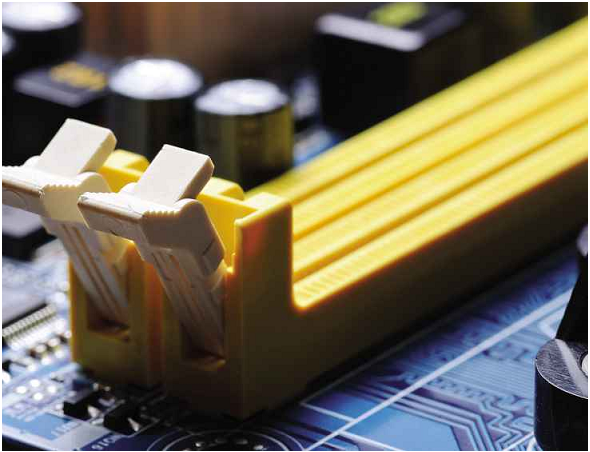
Take
care to seat your RAM in the correct configuration, but don’t be too gentle!
If you have single modules, always order
them, highest-capacity to lowest, from the lowest-numbered bank upwards.
However, if you have a pair of dual-channel modules, you need to keep them
paired up. That means putting them in similarly paired banks, which means the
two modules must go in either banks 0 and 1, or banks 2 and 3. You shouldn’t
leave empty banks between modules, so this may mean putting a higher-capacity
module in a higher bank than smaller, paired ones.
If you’re not sure, paired banks are
normally colour-coded to indicate that they’re capable of operating together,
and the information should also be represented on your motherboard’s
annotations.
7.
Take care with the CPU
Installing the CPU is always the most
delicate moment of building a PC. They’re fragile, easily damaged and
expensive, so the last thing you want to do it get it wrong. If you’ve never
seated a CPU before, there are a couple of quirks that might not be obvious.
The first thing to be aware of is the CPU
cover. This sits inside the motherboard’s CPU socket to protect it from damage,
and should be removed before you try and put the chip in. It might seem
obvious, but many a novice has spent too long figuring that out.
Installing
the CPU is always the most delicate moment of building a PC
It’s just an inert lump of plastic, you can
throw it away. The second thing to be aware of the ‘notch’ on the corner of a
CPU which indicates which way it should be seated. Miss this and you’re on a
one-way trip to disappointment city, because all you’ll do is break something.
Finally, be aware that - certainly for
Sandy and Ivy Bridge CPUs - the fixture bracket can require a lot of force to
close properly. There’ll be a certain amount of creaking and cracking, and
it’ll generally sound like something’s gone horribly wrong, but that’s just the
final test of faith you have to pass. If the orientation is correct and the CPU
is sitting comfortably, everything’ll be fine.
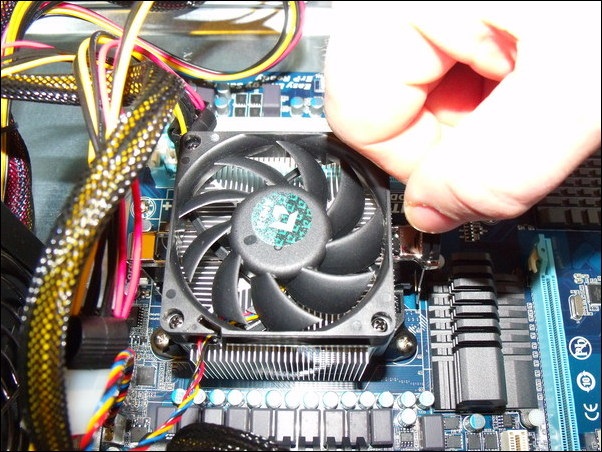
8.
Install the CPU, fan and RAM first
When building a PC, it’s a good idea to
start with the essentials first, just so you can make sure they’re fine before
you start installing additional hardware. Indeed, if you’re building a system
from scratch, it’s a good idea to install the essentials before you even screw
in the motherboard. As long as you’ve still got the space to slide the board
into the case afterwards, install the CPU and attach the CPU fan before you
seat the motherboard. If you like, you can put the RAM in too. This stops you
from having to try and work around the immovable case supports when performing
some of the more delicate installations, and is a great stress-reliever as a
result.
9.
Put the GPU in the right slot
Motherboards have multiple PCI-E slots, but
not all of them are as good as each other. For most components, it doesn’t
matter which PCI slot they go in, because the full bandwidth is never used.
Although the interface can theoretically go up to x16, it’s unlikely that every
slot is wired to do so. Some will be 8x or 4x, and some may be or even lower.
If you’re installing a graphics card, you
should make sure it goes in a high-speed x16 slot. Normally, this is the one
closest to the top (when the case is oriented vertically) but check your
motherboard manual to make sure. You really don’t want to find your expensive
graphics card has been running at half capacity because it’s in the wrong place!
10.
Plug in your GPU’s power supply
High-end graphics cards also need something
most PCI devices don’t: a separate power supply. The majority of PCI devices
draw power from the motherboards main supply, but if you have a particularly
hefty card, it simply won’t be able to get the power fast enough that way.
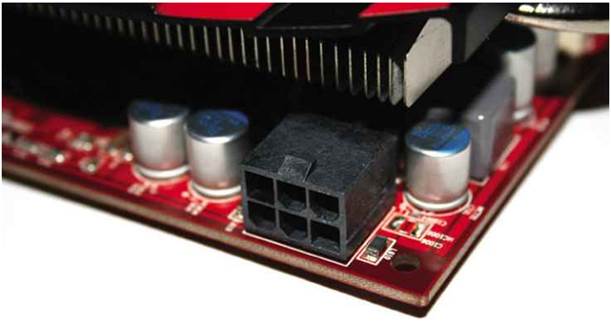
If
you need a converter for you graphics card’s power provision, make sure one’s
at hand!
The workaround is that graphics cards can
accept power directly from the PSU, using a dedicated 6- or 8-pin connector. If
you have a reasonably recent PSU, these will probably be available to begin
with, but certain models may require you to attach a converter to provide them.
The graphics card will probably come with the relevant converter, but don’t
rely on that being the case. At worst, it’ll only cost a couple of quid, but
it’s really frustrating not to have one at hand when you need on, so check what
plug you’ll need and whether you have it before you get started on a build!
Cooling And Heat Management
11.
Leave space between components
When you’re building a PC, there’s no rule
that says you have to clump everything together as tightly as possible, or in
certain slots (except in the case of RAM, of course). In fact, the opposite is
often the better option! If you’re installing multiple hard drives or expansion
cards, it’s a good idea to leave as much space between them as possible. This
will give the heat generated by components more space to dissipate without
negatively affecting their neighbours (and it’ll minimise potential
interference, too).
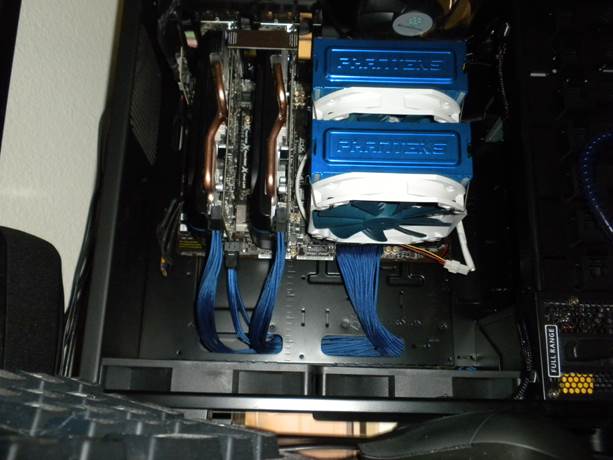
Leave
space between components
The colder components are, the better their
performance and the longer their lifespan, so there’s no real downside too
keeping them as far from one another as you can.
12.
Position fans for better airflow
If you have a separate exhaust fan to
install, don’t just shove it anywhere – try and think about what the air inside
your PC will be doing when all of its fans are switched on.
For example, if you put an exhaust fan
below the graphics card, it might counteract the graphics card’s fan, rather
than help it. Ideally, you want the exhaust fan positioned at the top of the
case (where warm air collects) with all of the other fans blowing towards it.
If you have two, devise a system that ensures they’re sucking air from
different places. If you’re feeling especially daring, you could even add vent
holes. Good airflow keeps systems cool and efficient, so take care to manage
where additional fans draw air from and where they send it!
13.
Install fan filters
Fan and case filters probably aren’t as
popular as they should be, as you’ll know if you’ve ever had a look at the
thick carpeting of dust inside even relatively young PCs.

Think
carefully about fan positioning
It goes without saying that dust is bad for
computers - it can heat them up by reducing fan efficiency, plugging vents, and
acting as a layer of insulation on top of already-hot components. You should
clean the dust out of a PC regularly, but a better option is to simply prevent
it from entering at all.
You can do this by fitting filters across
fans and vents. They’re cheap to buy, and washable for easy cleaning. You may
need to do a little customisation so that they fit your specific system, but
it’s worth it for how much easier they make keeping your computer tidy.
14.
Fasten coolers properly
When installing a CPU cooler or heatsink,
there’s a special trick to making sure they’re fitted properly, but’s it’s not
wizardy! Quite simply, you should ensure that you install them by doing the
diagonals in pairs.
First and foremost this ensures that the
cooler is fastened nice and tight, which also means it’s efficient in sucking
heat out of the processor. If you try to install it any other way, you’ll end
up with potentially loose fittings on one side that might pop out at any given
moment - with appropriately disastrous consequences for your processor!
15.
Tighten fans
Fans are necessary for good computer
operation, but they also produce the bulk of the noise in any system. If you
have fans to install, make sure they’re screwed in tight to prevent the kind of
noisy vibrations that can drive even the most serene computer user to the
brink..
Better yet, use rubber screws or washers to
absorb the fan’s noisest vibrations. You’ll have to buy them separately, but if
you’re after a PC that’s nice and quiet, it’s one of the easiest ways to reduce
the amount of noise a system produces. You can thank us later.