PC “blue-screening” or mysteriously
shutting down? Don’t panic – Darien G. helps you diagnose and solve common
problems
If you can recognize the tell-tale signs
that your PC’s health is failing, you have a good chance of being able to
remedy the situation with little upheaval. The difficult part is recognizing
where the problem lies, since it isn’t often obvious which component or part of
the operating system is misbehaving. On these pages we show you how to identify
some of the most common technical problems, and discuss how you can resolve
them.

What
to do when your PC is about to die
Software vs. hardware
When a computer isn’t behaving properly,
the first task is to work out whether it’s the hardware or software that’s at
fault. This isn’t an exact science, but a major clue is whether or not Windows
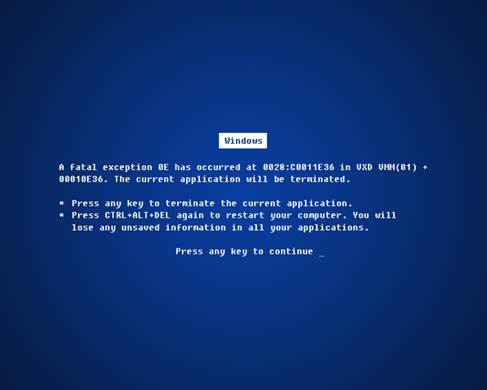
throws up the notorious “blue screen of death”. If you see a blue error screen
appear momentarily before your Pc restarts, it indicates that Windows detected a
problem and was able to shut down the system in a managed way. This wouldn’t
have been possible if, for example, your CPU or hard disk had abruptly failed –
so the presence of the blue error screen suggests that your system has a
software problem.
In this context, “software” probably
doesn’t mean applications and games. Windows is designed in such a way that
it’s usually impossible for regular programs such as these to crash the whole
system. When we talk about software faults, we principally mean within Windows
itself. Although the core OS is impressively stable, third-party device drivers
are easily able to take down your system.
If your problem is a fault driver, you may
be able to identify it simply by watching what happens when things go wrong:
for example, if your computer crashes every time you try to change screen
resolution, there’s a good change that your graphics driver is to blame.
The information shown on a blue screen may
provide a lead too, but by default it doesn’t appear on screen for long enough
to be legible. You can make it remain visible until you reboot by opening the
System Control Panel item, clicking on Advanced system settings, choosing
Startup and Recovery, and un-ticking the “Automatically restart” box.
The next time your computer crashes you’ll
be able to read the information at your leisure: you may see a reference to a
particular file such as ATIKMDAG.SYS or NVLDDMKM.SYS. You can look up this file
on the web to work out what it is – in these cases, the letters “ati” and “nv” give
strong clues that they relate to ATI or Nvidia graphics card drivers.

The
blue screen can reveal useful information about PC crashes
If it’s a dodgy driver that’s causing
system instability, you have plenty of options. Check the manufacturer’s
website for an updated version of the driver, as the problem may have been
fixed. Alternatively, you can try installing an older version of the driver,
either by again going to the manufacturer’s website or by right-clicking on the
device in Device Manager and selecting Driver | Roll Back Driver. If you have
the option, look for a driver certified by WHQL (Windows Hardware Quality
Labs). This tells you that Microsoft itself has tested the driver on a wide
range of hardware.
If switching drivers doesn’t help, it’s possible
the driver failure is being caused by an underlying problem with the hardware.
In this case, we’re afraid there’s no simple solution, short of replacing the
device or, if it’s built into your motherboard, disabling it in the BIOS or
from the Device Manager.
If your problem doesn’t appear to be as a
result of a driver, or if you can’t isolate the cause, you can always use
System Restore to try rolling back your PC to an earlier state and see if this
solves the problem. The most drastic measure is to completely reinstall your
OS. However, before resorting to this, try booting into a different operating
system such as Ubuntu Linux (perhaps from a live CD if you don’t want to set it
up semi-permanently on your hard disk). If complications occur here to then you
know the problem isn’t specific to your Windows installation, so it’s time to
shift your focus to possible hardware issues.
Memory errors
Sometimes Windows will crash with a
blue-screen error, yet there won’t be a driver identified – or, perhaps, different
crashes will report different filenames. In this case your underlying problem
could be fault memory causing the operating system to try to execute impossible
instructions or operate on invalid data, and to crash when it can’t.

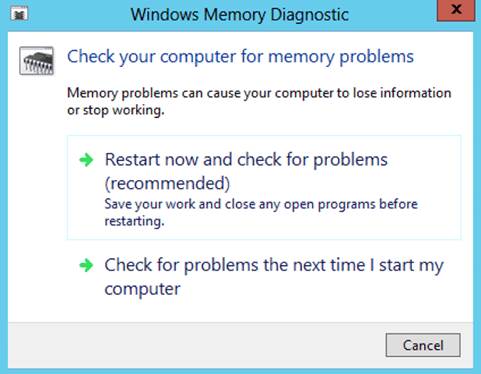
Windows’
built-in memory diagnosing tool can help to establish if you have a fault DIMM
Diagnosing this type of memory error can be
difficult because, by nature, the error is intermittent. (On the rare occasions
when a DIMM fails completely, the computer will normally refuse to start until
it’s removed.) In fact, your best clue to a memory error is the seemingly
random nature of the crashes your experience. If you suspect your RAM is
playing up, you can test it by pressing F8 as Windows boots to access the
Advanced Boot Options screen, then press Escape to see the list of operating
systems available, use the Tab key to move down to the “Windows Memory
Diagnostics” item and press Return. The standard test should take less than
minutes if all is well – you can change the testing options by pressing F1 at
the main test screen. You can also launch the Memory Diagnostic tool from the
System Recovery options on a Windows installation DVD.
If the problem is a memory error, you may
assume you simply need to buy new RAM. This isn’t expensive, so if you’ve been
intending to upgrade anyway, you may as well consider this an opportunity to
take the plunge.
However, you may not need to splash out on
new DIMMs to restore your system to stability. We’ve often found that when
memory modules appear fault, it’s because the BIOS is trying to run them above
their rated speed, and they can’t reliably keep up. (This is a particular risk
if you’re combining DIMMs of different types, a practice that enthusiasts often
advise against for precisely this reason.)
To remedy this situation, check the
frequency and timings of each of your DIMMs, either by examining the label or
by looking them up on the manufacturer’s website. The former will be a speed,
such as 1,333MHz, and the latter will be a series of numbers, such as 7-7-7-21.
Then access your BIOS, disable automatic RAM settings and manually enter the
correct settings. If you have lots of different DIMMs, choose the lowest quoted
frequency and the slowest quotes timings – that is, the highest numbers. You
won’t be extracting the maximum possible performance from every DIMM, but you
may well find that, magically, you have a stable system once more.