As
with a modern PC, the ZX81 needs a heatsink - but it isn't the CPU we'll be
protecting.
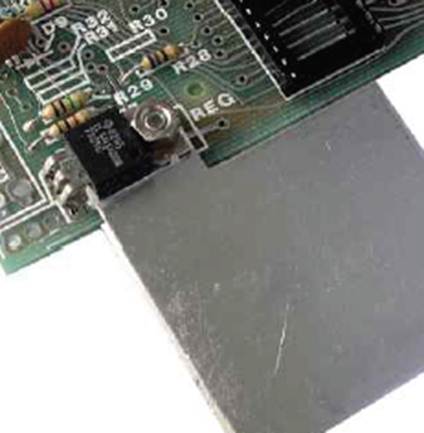
As with a modern PC, the ZX81 needs a
heatsink - but it isn't the CPU we'll be protecting. A 5V regulator takes the
incoming 9V feed from the power supply and turns it into power the logic
circuits can use, but in doing so, it becomes very warm indeed. A sharp-edged
slab of metal bolted to the regulator provides some cooling - and more so when
we deviated from the instructions a little by adding some silicone thermal
paste. Just three solder joints required this time, meaning that we’ve now had
256 so far.
Step 9

A
trio of 3.5mm jacks provide connections for a tape recorder - as an input
device for loading software and a storage device for saving software - and the
9V power supply.
A trio of 3.5mm jacks provide connections
for a tape recorder - as an input device for loading software and a storage
device for saving software - and the 9V power supply. While we'd question the
logic of having a power supply that uses the same plug as a set of headphones,
we're trusting Clive on this one. At the same time, we're swapping out the
Sinclair-supplied RF modulator, which provides an analogue video signal for
older TV sets, for a ZXVid. Designed by Andy Rea, and built by Ian Gledhill,
the ZXVid provides a high-quality, stable composite video output, providing a
much cleaner picture and support for modern LCD TVs. Another 13 solder joints
in this step brings the total to 269 - and we can finally shut down the iron
and mop our fevered brows.
Step 10
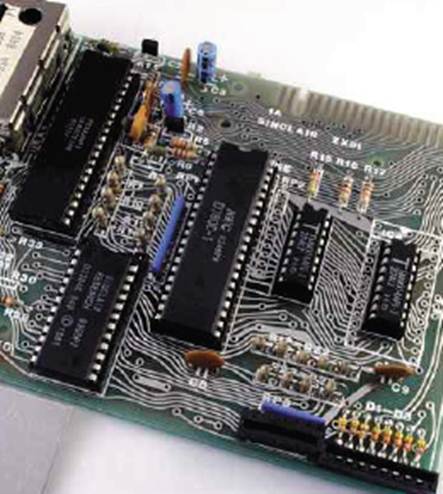
It’s
finally time to put in the chips.
It’s finally time to put in the chips. The
‘workhorse’ ULA is placed next to the modulator, followed by the ROM towards
the bottom of the board. Meanwhile, the Z80 CPU is situated in the middle, and
the two RAM chips sit towards the right-hand side of the PCB. Each needs to
have its legs carefully bent inwards by pushing against a flat surface -
they’re manufactured with slightly splayed legs, a trait continued by ICs today
- before being pushed firmly into the socket. Bend a pin, and it’s game over.
At least there’s no more soldering.
Step 11
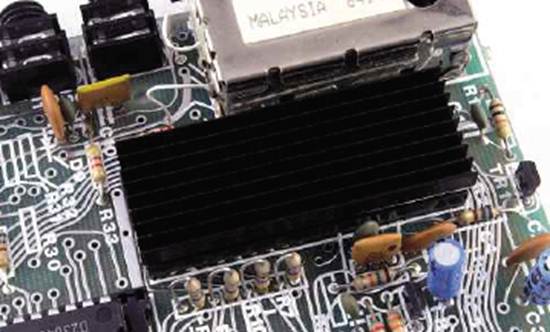
Officially,
it's now time to install the ZX81 in its case.
Officially, it's now time to install the
ZX81 in its case: but this is Custom PC, so we can't resist a little mod.
Ferranti designed the ULA to run at around 50 percent utilisation, but the ZX81
runs it closer to 75 per cent – meaning that it gets extremely hot. This leads
to premature failure, and we don't fancy forking out for the plutonium needed
to make another trip to 1981 to pick up a replacement. Some thermal tape and a
low-profile heatsink should head trouble off at the pass.
Step 12
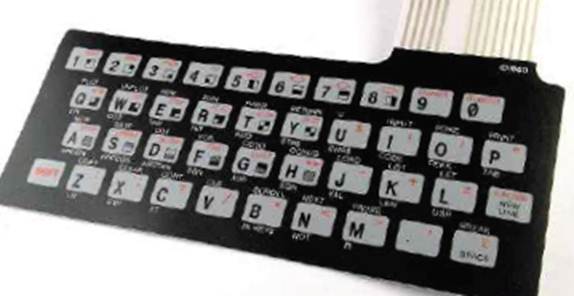
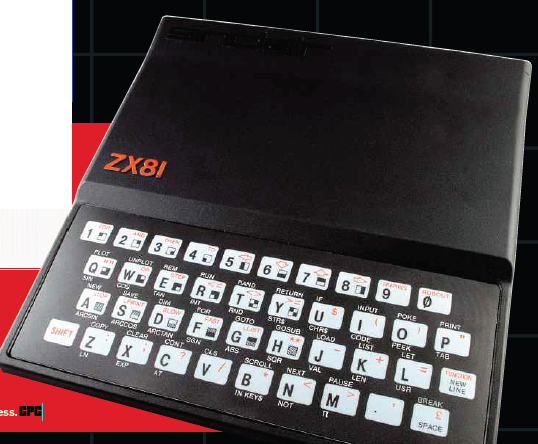
It's
now time to connect the keyboard.
It's now time to connect the keyboard.
Sinclair had what we're going to generously call an 'original' approach to
keyboard design, and the ZX81 is no exception. The sealed membrane keyboard
means that it was cheap to manufacture and reasonably resistant to spills, but
it creates a typing experience described by the BBC's Micro Men as 'like trying
to read Braille through a pair of gardening gloves'. Third-party replacements
were popular, but we'll stick with the original, which slides through the case
and connects to the PCB through a pair of very fiddly – and fragile - cables.
Step 13
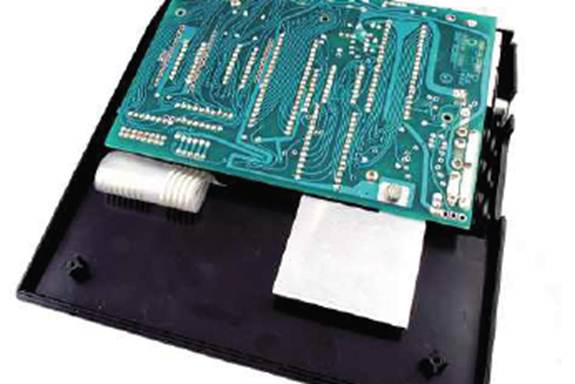
Finally,
it's time to assemble the case.
Finally, it's time to assemble the case.
Unlike a modern PC case, the ZX81's housing is made entirely from lovely cheap
plastic. The PCB is placed onto the lid – not the base - of the case face-down
and secured with two screws. The bottom half of the case is then attached with
a further five screws, and the system can be flipped over into its correct
orientation. At this point, it's easy to see why the ZX81 earned the nickname
'doorstop'.
All done
With power connected, and a composite video
cable running to a classic CRTTV, the ZX81 flickers into life some years after
the kit was placed in its box. There’s no whirr of fans or hard drives, or even
the reassurance of a glowing LED to let you know it’s functioning, but the
machine is working hard nevertheless. Our efforts are rewarded with a blank
white screen, and a cursor awaiting our instructions. What better way to
christen the device than a short program designed to duplicate – albeit rather
clumsily – the Custom PC logo, we thought? Well, aside from Crysis – and if you
can figure out a way to make that work, be sure to let us know at the usual
address.
With
power connected, and a composite video cable running to a classic CRTTV, the
ZX81 flickers into life some years after the kit was placed in its box.