Besides SkyDrive and Dropbox, there are many
other choices for those who demand to store data in the cloud, such as Copy or
Ubuntu One. One of them, the Copy cloud enables downloading a file to your
computer easily.
The Copy cloud
If you do not want to pay for using the
Copy cloud, you just need to sign up a free account to have a 5GB storage
immediately. The Copy has many installation versions for Windows, Mac OS X,
Linus, Android and iOS.
The user can upload the data to the Copy
cloud by their web browser simply without installing any program or app into
the device. However, without the Copy application, users cannot use the data
synching function.
The platform of the Copy cloud has a simple
interface, fast operating speed, and its design is also quite similar to that
when using on smartphone. Each account will have two important folders which
are Copy Folder (the folder which contains data of the user) and Share With Me
(the folder that contains data that the user want to share with others). These
are also default original folders and the user does not have the authority to
delete or rename. However, it is possible to create new sub-folders in the Copy
Folder by pressing Actions, choose New Folder, name it and click Save.

The
Copy’s interface
The manipulations on the Copy cloud are
also very easy. Users just choose the files that need to be uploaded, and then
choose Actions, Upload to (file’s names). Now, the File Upload window will
appear and you just need to point out the files that you want to upload.
For the Copy application that needs to be
installed into Windows or Android and iOS smartphones, the Copy will requires
users to choose a folder to be the synching folder between the Copy and the
computer. Therefore, you should choose important folders that you wish it to be
modified and synched usually in the cloud. If you ignore this step, the Copy
will automatically create a new folder. Then, if you want to synch data in this
folder, you just need to copy the data into the chosen folder. This solution is
much more efficient than the Upload feature of web platform as you can synch
many folder and file very quickly instead of loading respectively into the
cloud.

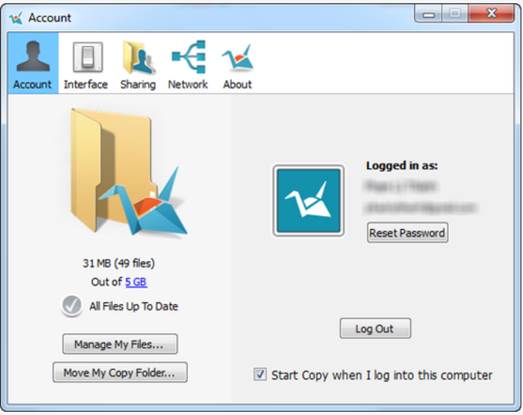
The
account tab on the Copy cloud interface
Besides, in order to prevent the Copy to
occupy to much space on the bandwidth of the Internet line when uploading and
downloading data, right click on the Copy app’s icons in the bottom right
corner of the screen, choose Preferences, entering the Network tab and type in
the limited speed respectively for the uploading and downloading process in
Upload rate and Download rate.
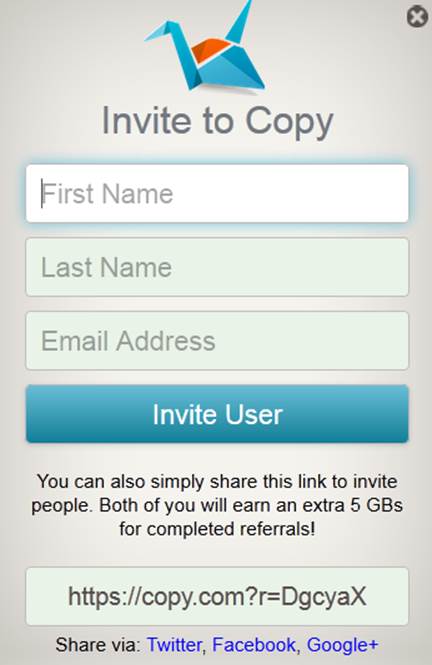
Especially, The Copy now has an event to
encourage the users by giving each user account a 5GB additional storage for
free when introducing it to a new member. In order to take part in this event,
you need to click on the account name on the right corner of the web, choose
Invite to Copy, and then type in the name and email address of the one you are
inviting; or take the link appearing below the window, send it to your friends
to sign up a new account.

To
take part in the event, you need to work with this window
The Ubuntu One cloud
The Ubuntu One cloud is a very familiar
service for Ubuntu’s users because on the Ubuntu operating system, this app has
been built in for users to store and synch their data quickly. Not only on the
Ubuntu OS can this service be used even on Windows, Mac OS X Android and iOS.

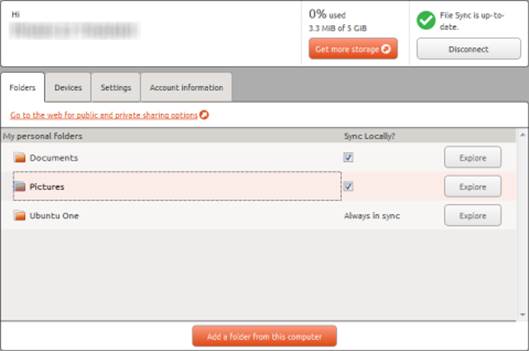
Ubuntu
cloud interface
Just similar to the Copy cloud, users can
upload the data into the Ubuntu One cloud from a web browser, but in order to
use the synching function, the installation of the Ubuntu One applications for
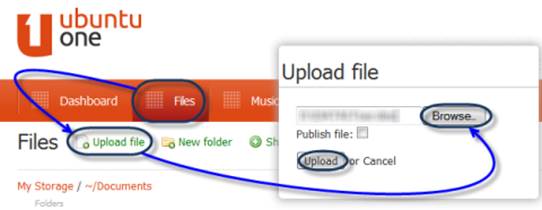
the corresponding platform is required. To upload the data into the web
platform, click Files, Upload Files, Browse, and identify the link to the
folder or file that need to be uploaded, check the Publish File box if you want
to make this file or folder public, and then click Upload.

How
to upload file in the Ubuntu One cloud
For the Windows’ Ubuntu One app, click
Explore that lies below the Ubuntu One folder’s name. The Windows Explorer
appears, you just need to save the data that you want to upload into this
folder. To use the data synching function in the Ubuntu One, click Add a folder
from this computer, and then choose the folder that need to be synched.