Use Tasker from the Google Play store to
turn off your notification sounds at night
You know what it’s like, am in the morning
and your phone suddenly shrieks out an alert to let you know that a spam email
has somehow crafted its way into your inbox. It’s annoying and it ruins a good
night’s sleep. However, by the grace of developer Crafty Apps, there’s a way to
make sure it never happens again.
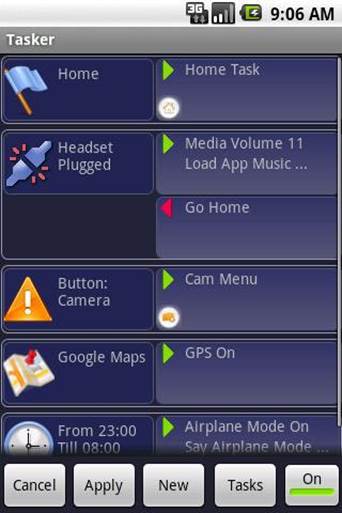
Use
Tasker from the Google Play store to turn off your notification sounds at night
Using Tasker, a powerful customization app
available for $6.49 from the Google Play store, you can set up a profile that
automatically switches on at around bed time, and turns itself off when it’s
time to wake up, letting you take a much stronger hold on your sleep time than
ever before. More advanced users can even create white lists, which let certain
callers get through while turning others off, but for this tutorial we’re going
to focus on making sure those pesky mailers never wake you or your Android from
your beauty sleep ever again.
1.
Name the profile
Once you’ve grabbed and downloaded the
application from the Play store, it’s time to start taking control. First up,
give your new profile a memorable name. You’re probably going to add different
ones at a later date, so something like Night Time is perfect for the task
ahead.

First
up, give your new profile a memorable name.
2.
Choose the context
Tasker offers different contexts, or rules,
depending on the sort of profile you want to make in the app. For our purposes,
you obviously want to choose the Time option, because we want to create a
profile that switches itself on when you head up to bed.
3.
Bed time
Now you need to set the time you want the
Time profile to kick in, and the time you want it to stop working. Work out a
time you’re likely to be heading to bed and a suitable time to disable the
feature. Don’t worry, you can always turn the profile off if you’re burning the
midnight oil.
4.
Name your action
Name the action you want the profile to
make. This lets you add more than one group of actions, and means ¡f you ever
need to change anything on the profile in the future, everything’s easily
identifiable and you won’t get confused. Everything is accessed from the
Profiles menu.
5.
Edit your actions
Tasker gives you a host of options and lots
of different ways to use those options. We want to silence our notifications,
so tap Audio Settings, find the Notification Volume option, then set it to O.
You’ve created your first Tasker action.
6.
Sit back and wait
Make sure the box that says On in the
bottom-right of the screen is checked, and you’re good to go. There’s a lot
more to play around with on Tasker, but we’re all set to turn notifications off
for a good night’s sleep. Have a look around the rest of the app — it’s an
intuitive system.
Customize LED alerts with Light Flow
Take complete control of every
notification that appears on you Android device
Unless you have a keen eye for detail, you
may not have noticed the pulsating light that appears on your device when you
receive a notification of some kind. The light appears in different places and
by default shows a different color, depending on your device. With so many
varieties of notifications that appear on your phone, using the Light Flow app
will help you recognize the type of notification you’ve received, without
needing to turn the screen on while in sleep mode.
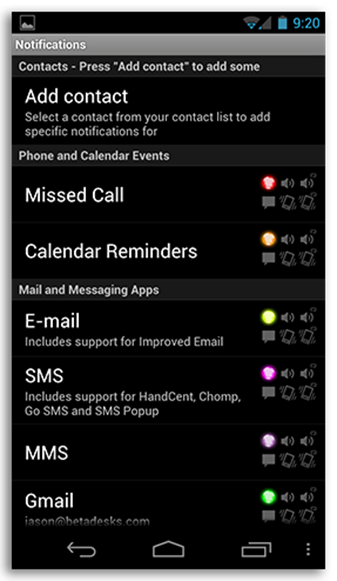
Take
complete control of every notification that appears on you Android device
Light Flow Is an ingenious app that allows
you to manage every notification on your device. You can change the color of
the LED light that shows when you have a new notification, as well as alter the
sounds and types of vibrations. All the changes take place immediately and the
level of control you have is phenomenal. In this tutorial we’ll guide you
through setting up the various aspects, from changing the color of your LED
light, to altering the style of vibration you set when you receive a message.
1.
Enable Light flow
Download and install the application from
the Google Play store. When you first open up Light Flow, you’ll be required to
enable it from the Accessibility menu on your device. The app will take you
directly to the section of the settings where this option can be found for you
to enable.
2.
Where to go?
Take a couple of minutes to get used to the
layout of the Light Flow app, as there are plenty of menus that you’ll need to
go through to find everything you require. When you’re ready, select the
Notifications option in the top-right of the interface’s main menu.
3.
Select a notification
You’ll now be shown an expansive list of
all the notifications you can customize with Light Flow. Select the one you
want to customize, and then press the Enable notification option from the next
screen you’re shown. This will now enable you to start customizing it.
4.
Change the color
The first option you’ll come across is the
color options that give you permission to after the LED light on your Android
device to align with the corresponding notification. Select the color option
and choose a color from the drop-down menu that appears.
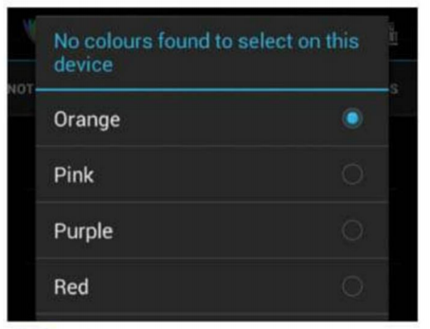
Select
the color option and choose a color from the drop-down menu that appears.
5.
Add a sound
Using the tabs at the top of the
application, scroll across until you reach the Sounds tab. From here you’ll be
able to set a sound or tone that plays for the notification. As well as that,
on the same menu you can choose how long it plays for, and the overall volume
of it.
6.
Choose vibration pattern
Scroll along the tabs 4am to find the
Vibration option. Here you can customize often and the ‘style’ of vibrations
you want to set for the notification you’re editing. Make sure to disable the
recurring option or else your phone will constantly vibrate until you unlock
It!
7.
Repeating sounds
The Repeat Sounds tab will let you customize
the extra bits related to the sound attached to your notification. If you
scroll to the bottom, you’ll find the Override silent mode option, which when
enabled will play the sound attached to the notification when your phone is
silent
8.
Control all notifications
Navigate back to the main menu of the
application and work your way through all of the notifications you want to
customize, repeating some of the steps we’ve shown you. Once you back out of
the app, the customized options you’ve put in place will immediately take
effect.
2 min guide: How to customize your contacts
Use Light Flow to personalize
notifications connected to some of your favorite contacts
1.
Select a contact
While you’re on the notification select
screen, press on the add contact symbol in the top-right of the interface.
You’ll now be taken to your phone directory to choose someone from your phone’s
contact list. Once you have chosen, the contact will now appear as a
notification on your list.

Use
Light Flow to personalize notifications connected to some of your favorite
contacts
2.
Choose an option
Each contact you select will be presented
with three main notifications you can customize within the Light Flow
application. You can select from either SMS, MMS and Missed Call. Each of them
has the same options available as standard, so select the one you want to start
with.
3.
Add customizations
As with any other notifications you select,
you can now go through all the pages mentioned previously and apply all the
customizations you could dream of. Go through each of the SMS, MMS and Missed
Call options you see on the main screen until you’ve edited dl the changes you
wish to make.

Go
through each of the SMS, MMS and Missed Call options you see on the main screen
until you’ve edited dl the changes you wish to make.
4.
Remove a contact
If you want to remove all the notifications
attached to a contact, or want to remove the contact completely from the
application, all you need to do is to go back to the main screen of the contact
and select the remove icon from the top-right of the interface. It’s a simple
process to make customizations in Light Flow.