How To Get More Loops
If you find yourself limited by the
built-in range of Apple Loops, you can make your own or get some from third
parties. The first option is more useful than it might appear seeing as you
can’t open multiple GarageBand projects at the same Lime, creating loops from
common chunks of audio is a way of sharing tiffs, beats or vocals between
songs, To add a piece of audio to your Loop Library, select the audio region
and go to Edit > Add To Loop Library You can’t add multiple audio regions at
once, but you can merge adjacent regions into one by selecting them and
choosing Edit > Join (or pressing C + J)..The other means of expanding your
Apple Loops collection is to get new ones from elsewhere. Type ‘Apple Loops’
into your search engine and you’ll discover several websites with free or
affordable Apple Loops, including Macloops (macloops.com).
If
you find yourself limited by the built-in range of Apple Loops, you can make
your own or get some from third parties.
Apple used to provide a selection of loops
via its Jam Packs — Voices, Rhythm Section, World Music, Remix Tools, and
Symphony Orchestra. These were standalone products but together they worked out
a little expensive. However, if you now purchase Apple’s MainStage 2 app ($31.5
from the Mac App Store), you will get 15.000 royalty-free Apple Loops included,
and this is in addition to 1,700 sampler sounds. 1,000 acoustic spaces, and
4,500 presets.
Add Some Vocals
Sing your heart out with GarageBand,
and create multiple takes
Vocals are tough to get right at the best
of times, but GarageBand provides many essential tools for budding singers,
including a range of vocal effects for added depth and interest. You should
never add too many effects to vocals - otherwise they can sound muddy - but a
little reverb, echo and chorus can enhance singing. GarageBand doesn’t burn
effects into recordings, so you can adjust them at any time until you’re
satisfied.
GarageBand also offers multi-take
recording, so you can select a song region and sing a part over and over. You
can then audition the takes, keep the best and discard the rest. That might
sound like cheating, but most professional singers use multiple takes to build
vocal tracks.
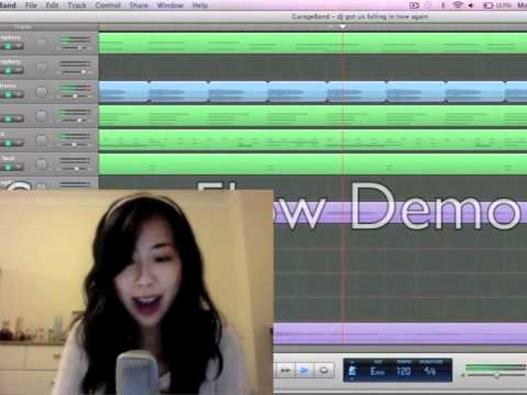
Sing
your heart out with GarageBand, and create multiple takes
Environment is also important when working
on vocals. Microphones pick up ambient sound, so when recording vocals, ensure
that your headphones don’t ‘leak’ sound and that everything around you is quiet
(i.e no barking dogs or engines turning over, in the background). Make sure you
warm up before you start, to avoid damaging your voice a few minutes of fairly
loud humming can work wonders.
Finally, microphones can be used for
recording things other than vocals, but always be aware of natural reverb when
attempting this - try to create a set up where the sound is recorded as ‘dry’
as possible, with little echo.
How To Record With Multi-Take
1. Sound setup
Start with the project you created
opposite. Connect your microphone to your Mac or audio Interface, and monitor
your recording with headphones. Change the Output setting in the System
Preferences> Sound pane to silence your Macs speakers.
2. Get ready
Create a real instrument track (Real Instrument
> Create). In the Track Info pane, select input source (Mono), and set
Monitor to On to hear yourself as you sing. If the Recording Level slider isn’t
greyed out, set a level otherwise, use your interface to do so.
3. Get region
Click the Cycle button and drag out a
region just below the timeline - you’ll see an area highlighted in yellow. When
you record, GarageBand will loop through this region. enabling you to sing the
same part multiple times. Enable Control > Count In.
4. Start singing
If you require a metronome, tick Control
> Metronome if not, click Record. GarageBand will loop through the selected
region until you click Record a second time. The number of takes is shown at
the top left of the recorded audio region.
5. Play back
Click the number to access your takes, and
select one to make it active. To remove a take, select it and choose Delete
Take [number] from the menu. To delete all takes other than the currently
selected one, click Delete Unused Takes.
6. Vocal tweaks
You can refine a track using the Track Editor.
Drag the Enhance Tuning slider to the right to fix tuning but don’t go too far,
or you’ll get a bizarre result. Enhance Timing can be used to improve the
timing of, for example, drums recorded via microphones.
How To Set Up A New GarageBand Project
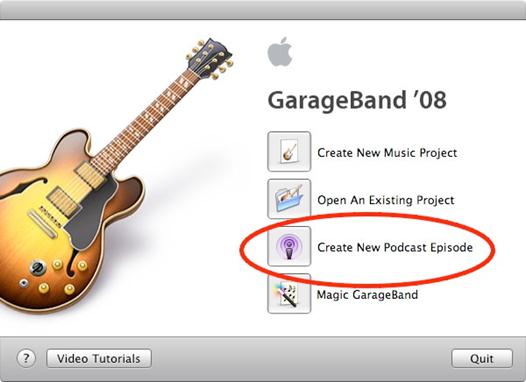
1. Get started
The New Project screen is clearly set out
and offers plenty of options to get things going. You will even have the choice
of a few bask tracks toy around with. For now, let’s begin with guitar. Select
Electric Guitar from the choices in the main panel and click the Choose button.
How
To Set Up A New GarageBand Project
2. Project setup
In the Save As field, give your project a
name this can be changed later in Finder. Below this, define your song’s tempo,
time signature and key. if you’re new to this, 4/4 is the most common signature
for rock and pop, so just set a tempo (the speed at which your music is played,
in beats per minute).
3. Main window
Click Create to set up a new project. To
the left are your tracks. The central area is the timeline, for housing audio,
and the right pane is mostly for instrument selection and editing. The bottom
toolbar houses the control - transport and buttons for adding tracks, accessing
the Track Editor and toggling panes.
How To Record A Guitar
1. Connect up your guitar
Select your interface in the
Preferences> Audio/ MIDI section. In the Guitar Track pane, select the Amp
click Edit and select your input source: Mono for most guitars. Set Monitor to
On, and ensure the Recording Level isn’t silent.
2. Setup the amp
Choose an amp/stomp box combo from the
drop-down menu. The arrows enable you to switch amps. To add more stomp boxes,
click Edit and drag a box to an empty slot. Click Done and select stomp boxes
or amps to change settings, then click Save Setting.
3. Rock out
Select Control > Count In and click
Record in the toolbar. A metronome counts you in and you can start playing. Hit
Record to stop. Drag the play head to the start and click Play to play back. If
the level is wrong, use the amp’s dials in the Track Info pane.
Here we aim to get you started with
recording and basic audio-editing. Like previous versions of GarageBand, the
current release differentiates between instrument and track types, so you must
alter your approach to them accordingly. First, there are software instruments.
These are MIDI-based, meaning that GarageBand records your input in terms of
notes, length, pitch and velocity and uses software to render playback using
the sound of your selected instrument. Although we use piano- orientated
instruments In the guides here, the range of instruments you can use is diverse
and includes synths, brass and even drum kits.
Next there are’ real instruments’ that
encompass recordings using a microphone most notably vocals. After recording a
real instrument, you get a standard audio waveform that can be manipulated. In
early versions of GarageBand, this kind of track was also used for electric
guitars, but GarageBand ‘09 introduced a specific Electric Guitar track type.
Although guitars can be recorded as ‘real instruments’ in the old way, the
Electric Guitar tracks boost the scope for GarageBand guitarists. Instead of
fiddling with sliders and menus, you get a selection of classic amp and stomp
box combinations.
Some of our guides require that you connect
instruments to your Mac. USB keyboards can be plugged into your Mac; guitars
require a third- party guitar interface such as the AxePort Pro (from
centrance.com/roducts/ap) or an audio interface such as Mbox (from
digidesign.com/products/mbox). It’s important to set the levels carefully too
low and you won’t have anything to work with; too high and you’ll get
distortion.