How do you make the most of seasonal
textures and tones? The answer is to get in close, as explains...
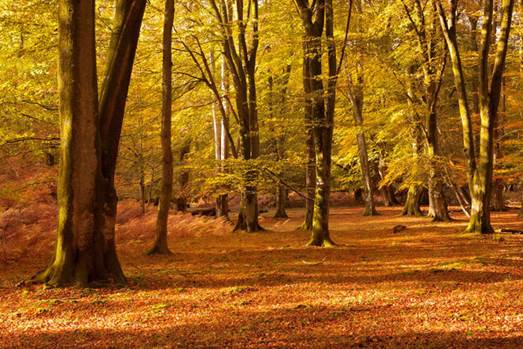
Fallen leaves, frost, ice... it's the
season where close-up photo opportunities are abundant. Do I need a macro lens
to do them justice?
Not always, no. Many lenses allow you to
get close enough to small subjects in order to fill the frame. But only true
macro lenses will enable you to get 1:1 reproduction; that is, the subject can
be captured at the same size by the camera sensor as it is in real life. A
subject that’s 2cm long will be reproduced at 2cm on the sensor when a macro
lens is used at its closest focusing distance.
Fallen leaves will be everywhere in the
autumn, Do I need a macro lens to do them justice?
An APS-C sensor is just over 2cm wide, so
you can see the potential for capturing richly detailed close-ups that ‘true’
macro lenses provide.
OK, I'm convinced. Is there anything
I need to watch out for when shooting autumn close-ups?
When you’re shooting at the large
magnification offered by a macro lens, the choice of aperture and shutter speed
becomes crucial. Switching to Aperture Priority or Manual mode and dialling in
a small aperture (represented by a large f-number, such as f/16 or f/22)
increases the depth of field. This means that more of the picture will appear
sharp.
Small apertures let less light into the
camera, and as a result the exposure time becomes extended. If the shutter
speed becomes too slow to hold the camera steady, then you’ll end up with a
blurred photo. The solution is to use a sturdy tripod, and this will ensure
that you retain the sharpness that you’ve worked hard to achieve through
careful focusing and choice of aperture.
Of course, a tripod won’t help if the subject’s
moving around all over the place. The gentlest of breezes might as well be a
hurricane when it comes to close-up photography it doesn’t take much to make a
dew covered web shake, for instance. The answer here is to use as fast a
shutter speed as possible for the aperture you’ve set. In order to do this,
you’ll need plenty of light, and you might need to consider using a higher ISO
setting.
Our tip is to photograph delicate subjects
early in the morning, when the air is generally more still. This time of day
usually coincides with the best light too, which is a bonus. It isn’t just
landscape photographers who need to set their alarm clocks...
You mentioned accurate focusing. Do
you have any tips for using autofocus with close-up subjects?
Yes: try switching it off. When you’re
dealing with macro photography, it’s best to use manual focus. You may only be
dealing with a depth of field - the area behind and in front of the point of
focus that looks sharp that extends for just a few millimetres. If the autofocus
system latches onto the tip of a leaf, for example, then this could result in
the rest of the leaf being thrown completely out of focus.
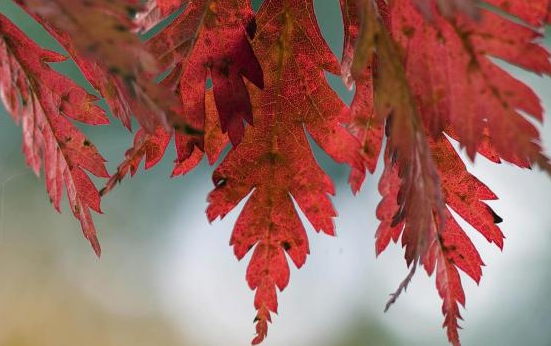
Up
close shot of some red leaves, a classic symbol of Autumn.
There’s a technique you can use to ensure
you get the sharpest focus possible with close-ups. First, switch the lens or
camera focus control to M or MF for manual, and twist the focus ring. You’ll
notice that the subject changes in size in the viewfinder as you do so. Once
you’re happy with the magnification, gently rock the camera backwards and
forwards to fine-tune the focus point.
Live View is another useful option that
takes the stress out of macro manual focus (see above). This is because it
enables you to zoom in on a specific area of the subject to make sure that it’s
pin-sharp as you manually focus. You’ll find it easier to use this technique
with the camera fixed to a tripod or monopod.
This shallow depth of field business
sounds tough. Should l just set the narrowest aperture my lens offers to keep
everything sharp?
Actually, you should avoid the narrowest
aperture on your lens. Due to something called ‘diffraction’ (caused by the
light passing through such a small hole), you’ll actually end up with soft
pictures. The ‘sweet spot’ of a macro lens’s aperture range is normally around
f/16.
To maximise the depth of field and prevent
parts of your subject appearing blurred, keep the back of the camera parallel
with the subject. It can be hard to judge what will appear sharp and what will
appear blurred at the aperture you’ve set, because the image you see through
the viewfinder is always displayed at the lens’s widest aperture. So, press
your camera’s Depth of Field Preview button to close down the aperture to the
one you’ve dialled in. The image will be much darker, so your eyes will need a
little time to adjust.
Using the Depth of Field Preview in this
way can also help you to spot any distractions that you might have missed in
the background of a shot. Bright patches of sky, branches and other clutter can
be brought into sharp focus with a small aperture, and can ultimately ruin a
shot. By turning the camera dial to select a wider aperture as you keep the
Depth of Field Preview button held down, you’ll be able to judge the point at
which these distractions become soft enough to be insignificant, while the
subject stays sharp.

Start
in your own garden. From cobwebs to grass, you’ll find a wealth of ‘micro
landscapes’ to explore in close-up.
If I buy a macro lens, can I only use
it for taking close-up pictures?
Dedicated macro lenses aren’t just for
close-ups. They focus right through to infinity like any other lens, and their
razor-sharp optics can deliver brilliant results with countless subjects. For
instance, a 100mm macro makes an ideal short telephoto lens on a full-frame
camera body, and can be used for photographing everything from landscapes to
portraits. Fit the same lens on an APS-C SLR and you get the equivalent field
of view of a 150mm lens. Throw in the wide maximum aperture, and you’ve got a
useful, fast telephoto that can be used for approachable wildlife and low-light
action photography. Autofocus performance can be slower at these greater
distances, but macro lenses often feature a Focus Limiter switch so you can
reduce the distance (and time) that the lens needs to focus.