Image editing software
There’s a lot of choice when it comes
to apps, so which is best for you?
One name dominates digital photo editing,
and that’s Adobe. Its flagship Photoshop software is the professional industry
standard – it’s used to help make the magazine you’re reading now, and it costs
more than $900. Happily, there are alternative applications that won’t break
the bank and that can do everything the photography enthusiast could ever need.
The following is an overview of your top options.
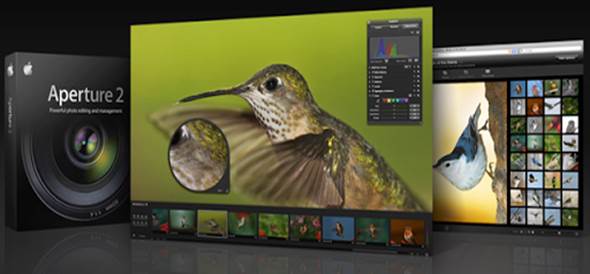
Aperture
Aperture is Apple’s pro-level raw image
editing and organization tool, but it doesn’t come in at a pro-level price.
It’s $82.5 on the Mac App Store, and although it’s tailored for dealing with
raw images, it will happily edit your JPEGs and TIFFs too. Editing is
completely non-destructive and the sheer number of sliders and variables means
every aspect of your image is under your control.

When
it comes to the high-end photo editing market, Apple’s Aperture regularly
tussles with Adobe’s Lightroom for top spot.
iPhoto
a part of the iLife suite, iPhoto has been
through many incarnations over the years but has settled into a comfortable
niche as the Mac’s do-it-all, easy-to-use photo editor. iPhoto hides its
complexity behind a host of one-click processes and an auto-enhance tool that
will do all the work for you, even if you may not be 100% happy with the final
result. That’s where its Adjust palette comes in – allowing you to deconstruct
iPhoto’s editing choices and use only the ones you like, while adding your own
until you’ve got a final image everyone will want to see. Apple’s new unified
libraries mean that your iPhoto library is now the same as your Aperture
library, so as long as you don’t have them both open at once, you can use the
strengths of each to complement each other as you work.
Lightroom
Lightroom, from Adobe, can be seen as
roughly analogous to Aperture. They both import and organize your photos, they
will both edit your raw images as well as JPEGs, and they both represent a step
up from iPhoto. In many reviews, Lightroom just edges Aperture in terms of
final image quality, but it’s a close thing, and the choice between them
generally comes down to your personal workflow preferences. Aperture will let
you edit a thumbnail in your library if you want, while Lightroom separates
itself into modules: you select an image in eth Library module, and take it
into the Develop module to work on it. Like Aperture, Lightroom’s editing is
non-destructive, and the price of about $13.5 isn’t too steep.
Image editing terms explained
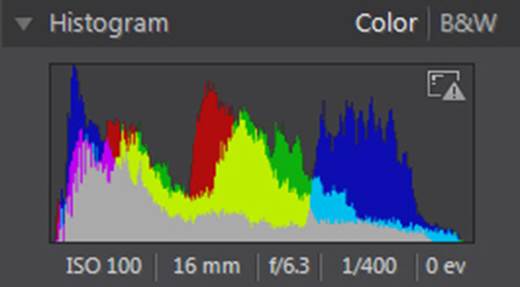
Histogram
In an image editing program, or on the back
of your camera, the histogram is a graphical representation of the tines in
your image. Brighter colors are to the right, and anything that falls off the
right edge becomes pure white. These are called clipped highlights, and are
usually undesirable. The same can happen with black shadows on eth left-hand
side.

The
histogram is a graphical representation of the color tones that comprise the
image you are viewing/editing.
Levels
An editor’s Levels window allows you to
manipulate the histogram. Moving the central midtone slider will brighten or
darken the image, while moving the outer sliders in will alter contrast by
spreading the tones more evenly between pure black and pure white. You can also
clip highlights this way if any part of your image needs to be white. The
Curves palette does a similar job, but is represented in a different way.
Sharpening
Skilled use of sharpening tools can improve
an image greatly, most sharpening works by finding edges in your image and
exaggerating the contrast between them. This makes the image appear more
clearly defined to the human eye, but if taken too far can make a photo look
harsh and unnatural. Use the Radius control to affect how sensitive the edge
detection is.
Non-destructive editing
Many image editors keep your original image
separate from the list of edits you make, which are only finally applied to the
file you export from the editor. This means you can go back to the original
photo you shot at any time and begin from scratch, or undo edits you made
earlier but are no longer happy with. In Aperture, this is a simple case of unticking
a box.

There’s
an unalloyed freedom involved in non-destructive editing – you can revert to
the original image at any time.
Photoshop Elements
Elements is Photoshop’s little brother, but
punches far above its weight. Smart sharpening, content-aware fill, layer masks
– all the headline Photoshop photo editing features are present. What Elements
lacks are the professional printing, color management, vector drawing and 3D
tools of the full-fat edition? It’s about a tenth of the price, though.
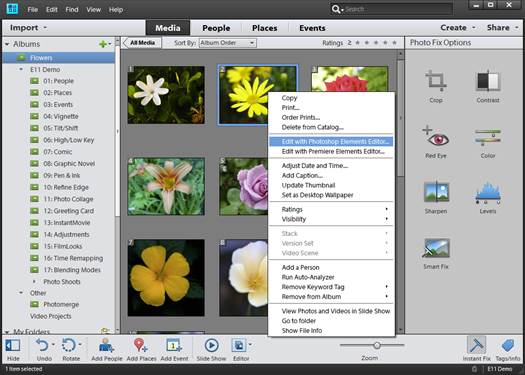
Elements also includes basic organization
tools, as well as Quick and Guided modes that work rather like the automated
features of iPhoto and allow simple color correction, blemish and red-eye
removal plus a host of other commonly used tools. Expert mode, however,
unleashes the full power of the software, although it leaves you on your own to
experiment and, maybe, make mistakes. Judicious use of the Save As command is
particularly important, as unlike the other apps we’ve mentioned, Elements does
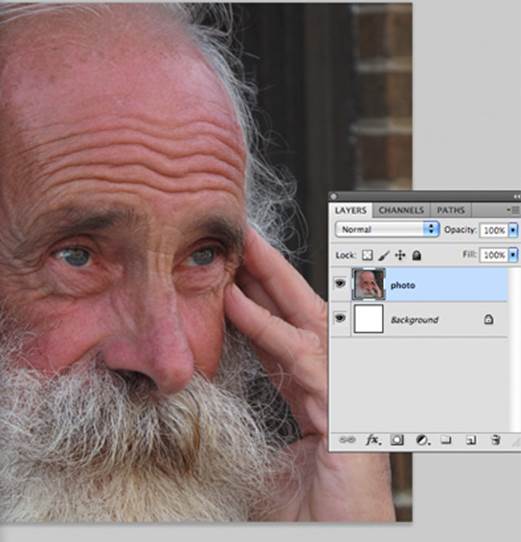
not offer non-destructive editing. However, switching into Expert mode will
allow you to see all the edits made in Guided or Quick mode as a series of
layers, allowing you to learn exactly how the software works.
Photoshop Elements also comes with the
Adobe Camera Raw plugin, so if you’re shooting that way, you won’t need to
convert your images in another application first.

Adobe
Elements is the younger, leaner brother of Photoshop, but is still a powerful
image-editing application in its own right.
Others
Many camera manufacturers bundle editing
software with their cameras. Nikon DSLRs come with View NX2, with an option to
upgrade to its paid-for Capture NX2; Canon puts a Digital Photo Professional CD
in with every DSLR; and Sony bundles a raw image converter too. Leica cameras
often bundle Adobe Lightroom 4, and similar offers can be found from
manufactures such as Samsung and Panasonic if you shop around.
Capture One is the offering from Phase One,
a manufacturer of remarkably expensive medium-format digital cameras. Its
software still works with consumer models though, and the cheaper Capture One
Express comes in at a wallet-friendly $90. It claims to have a particularly
fast workflow coupled with the best image quality of all editing software, but
Aperture and Lightroom don’t trail too far behind.
DxO Optics Pro, which has a rather
scientific approach to image editing, will set you back around $112.5, and its
selling point is that it claims to correct the flaws introduced to images by
camera lenses better than other software. Free trials of all these programs,
except Aperture, are available online, and iPhoto may have come with your Mac,
so it’s easy to decide which one suits you best, and if they live up to their
claims.
The Gimp is completely free, and more like
Photoshop Elements in Expert mode than any of the others. It has in eth past
suffered from poor documentation and an unintuitive layout, but it now has
built-in help, a downloadable manual, online tutorials and a customizable
interface. The Mac version of the app even comes bundled with a raw image
processing plugin.
Don’t forget Preview
Every Mac since the dawn of OS X has come
with an application called Preview. It doesn’t get much attention, but it
contains image editing tools that shouldn’t be ignored, especially as they come
for free.
For a start, it can import form cameras and
scanners directly from its File menu. Once your picture is open, drop down the
Tools menu to find options to resize your image rotate and flip it and even
make adjustments to exposure and color.
Choose the Adjust Color option from Tools
and a palette will appear that looks very similar to those in Aperture or
Lightroom. It has a histogram at the top to show your image’s levels, and
sliders underneath to things like contrast, saturation and sharpness. Pushing
the Saturation slider all the way left is a quick way to change an image to
black and white, while the dedicated Sepia slider will give your picture a
vintage look.
The Annotate option on the Tools menu lets
you add a basic level of graphics to your image. Shapes and text can be
overlaid on it and styled to your taste. It’s not Pages, but it’s reasonably
easy to use.
The rectangular selection tool can be used
to crop your images – drag out a selection and select crop from the Tools menu
or press … + [K]. Remember that, in all cases, to preserve your original image
you need to select Save As from the File menu rather than Save, and save your
new image under a new name, as Preview does not offer non-destructive editing.
Be sure to investigate Automator too, which
can do great batch-processing.