Share and import calendars in
Microsoft’s revamped webmail service
The latest part of Microsoft’s redesigned
webmail service to get a facelift is the calendar. The tool makes better use of
screen space and it’s now easier than ever to share calendars with friends and
family. You can also import other people’s calendars, to see what they’re
doing, and keep up to date with your calendar on the move. Apple and Windows
Phone devices can connect to Outlook accounts and there’s a free Android app (www.snipca.com/8847).
Step 1

Visit
www.outlook.com and access your calendar
Visit www.outlook.com and access
your calendar by clicking the top-left down arrow, then Calendar. You’ll be
asked to choose your time zone. Leave it set as ‘(GMT) Greenwich Mean Time’
then select and click ‘Continue to Calendar’. The default view shows a month at
a time. When you first open the calendar it will only show a five-day weather
forecast based on your current location.
Step 2
Creating
an appointment is easy
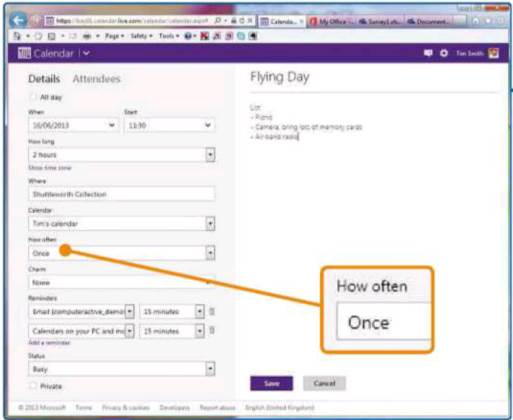
Creating an appointment is easy. Click the New button at the top and the appointment page
will appear. Enter the date and duration of the appointment on the left. Enter
a title and more information on the right-hand side. You can save time by
creating recurring events in the ‘How often’ menu. Events can repeat forever, a
specific number of times or until a given date. Once you’re done here, click
Save.
Step 3
To
add birthday reminders
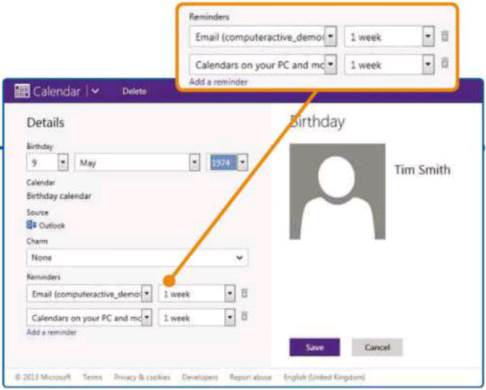
To add birthday reminders click the down arrow next to New in the blue bar and click Birthday.
Enter the name and date. Notice that the Calendar setting is fixed to ‘Birthday
calendar’ so they are kept in one place. It’s best to set the reminder to a few
days ahead, so click the dropdown menu and select! week’. Click Save. You’ll
need to do this even if you already have the contact in your list.
Step 4
Sharing
calendars is one of the best new features
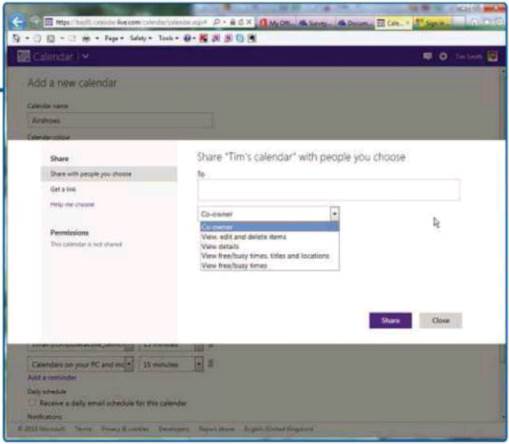
Sharing calendars is one of the best new features in www.outlook.com. Click the down arrow
next to New and click Calendar. To make the calendar stand out more, give it a
name and color. You can also add small icons, called Charms. Click ‘Edit
sharing’ and save the changes. Enter the email addresses of the people you want
to share the calendar with separated by a comma, and set what they can do with
the calendar in the dropdown menu below. Repeat this if you want people to have
different privileges. They will be sent an email with a link.
Step 5
You
can open calendars from other people
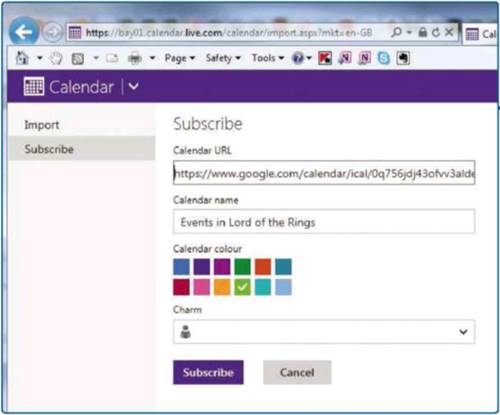
You can open calendars from other people
even if they are not using www.outlook.com but only if they are published as
ics or ical files. Copy the link, return to Outlook.com, click Import and then
Subscribe. Paste the link into the top box and give the calendar a name, color
and charm. Click Subscribe.
Step 6
www.outlook.com
has improved access on mobile devices
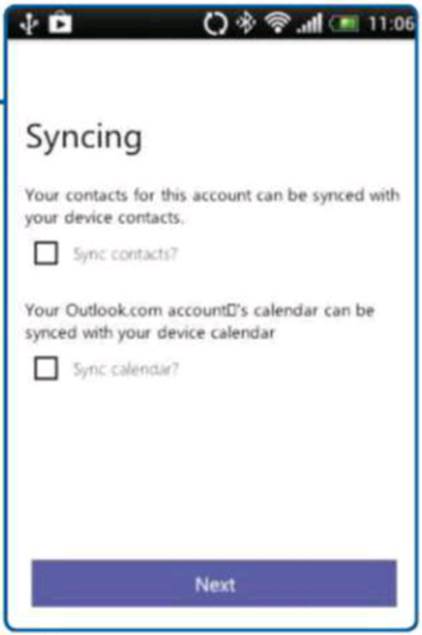
www.outlook.com has improved access on mobile devices, so you can check dates and get reminders
when you’re on the move. The quickest way is to visit http://rn.mail.live.com.
Alternatively Android users might find it easier to install the app from www.snipca.com/8847.
It shows your Outlook.com email but more importantly, it synchronizes your
contacts and calendar items with your phone. If you own an iOS or Windows
Phone, there are instructions for adding your Outlook.com account at www.snipca.com/8828.