Discover how to manage two displays
with the free Multi Monitor Tool for Windows
Having extra monitors connected to a single
PC can make it that much easier to work with multiple program windows. Windows
does afford a level of control over multiple displays, allowing you to
configure where the screens are in relation to each other – but that’s about
it. Multi Monitor Tool is a free program that offers much more to those who
like to work across more than one display. Read on to find out what it can do.
Step 1
To begin, download a free copy of Multi
Monitor Tool from www.snipca.com/7871. Scroll down to the bottom of the page
and click the link to download either the 32-bit or 64-bit version of the
software, depending on which version of Windows you are using (if you are not
sure, choose the 32-bit version). If the File Download Security Warning
dialogue box appears, click Save and then choose a location for the downloaded
file. Firefox users should select Save File to save the download to Firefox’s
default download folder.

To
begin, download a free copy of Multi Monitor Tool from www.snipca.com/7871
Step 2
The downloaded file, multimonitortool.zip,
is supplied in Zip (compressed) format. To extract the contents, right-click
the file and select the Extract All option from the menu that appears. Click
the Browse button to choose where the files should be stored and click OK
followed by Extract. When the files have been extracted, launch the program by
double-clicking MultiMonitorTool.exe.
Step 3
When multi monitor tool is running, you
will be presented with a window that is divided into two sections. The top
portion of the screen lists the monitors connected to the computer, replete
with details about settings, while the bottom pane displays a list of the
programs and windows that are running on whichever monitor is currently
selected. Click a monitor entry in the top pane and whatever application
windows are being displayed on this screen will be listed in the lower pane.
Step 4
Before exploring multi monitor tool in more
depth, visit the usual Windows Control Panel to ensure its settings are as you
want. In Windows 7, right-click an empty area of the Windows Desktop and choose
the Screen Resolution option. Click each monitor image in turn and use the
Resolution dropdown menu to configure settings, as well as choosing between
portrait and landscape modes. If necessary, drag and drop the monitor icons
into a position that reflects their physical positions – their respective heights
can be slightly offset, if appropriate. Click OK and return to Multi Monitor
Tool.

In
Windows 7, right-click an empty area of the Windows Desktop and choose the
Screen Resolution option.
Step 5
The first thing to try with Multi Monitor
Tool is to disable a display. This might be useful if you want to minimize
distractions, for example. To do this, right click an entry in the top pane of
the Multi Monitor Tool window and choose the Disable Selected Monitors option.
To reverse the action, select it again and choose Enable Selected Monitors. To
change which display serves as the main screen, right click it and choose Set
As Primary Monitor, or use the keyboard shortcut: Control (Ctrl) and F9.
Step 6
One of multi monitor tool’s best features
is the ability to quickly move programs and windows between displays, without
dragging and dropping. To try this, right-click an application’s entry in the
lower pane and choose either Move Window To Next Monitor or Move Window To
Primary Monitor, as appropriate. Alternatively, use the F8 and F7 keys, or
click the second and third toolbar buttons.

To
try this, right-click an application’s entry in the lower pane and choose
either Move Window To Next Monitor or Move Window To Primary Monitor, as
appropriate
Step 7
There may be times when you have decided to
save energy by switching off one of the monitors. If you do this after Windows
has launched, the operating system won’t detect that the monitor is off, so any
application windows on the affected display will continue running, albeit it
out of sight. Multi Monitor Tool has a preview feature that will let you peek
at what is happening on the powered-down display without having to switch it
on. To try this, open the View menu and choose Monitor Preview Window, or press
F2. The window can be resized to make it easier to see what is happening on the
other monitor - just drag the bottom-right corner of the preview window.
Step 8
Multi monitor tool can save and load
monitor configurations. This can be handy for restoring a favorite arrangement
of windows, or for having different layouts when using more than one display.
We will explain how to save and load arrangements next but, as switching
configurations is made easier with the Notification Area icon enabled, first
click the Options menu and click to tick the Put Icon On Tray option.
Step 9
Arrange program windows to your liking,
then right-click the Multi Monitor Tool icon in the Notification Area and
choose Save Monitors Configuration, or use the keyboard shortcut Control (Ctrl),
Shift and S. Choose a suitable location to save the configuration file, type in
a name and click Save. When you need to switch configurations, select the Load
Monitors Configuration option from this same menu and choose whichever one you
wish to use.

Arrange
program windows to your liking, then right-click the Multi Monitor Tool icon in
the Notification Area and choose Save Monitors Configuration
Step 10
Finally, multi monitor tool can also be
used to view a wealth of information about open programs and windows. The
bottom pane lists details such as the size of a window, the location of the
associated executable file and much more. To customize which details are
displayed, right click one of the column headings and select the Choose Columns
option. To view details about an individual program or window, right click its
entry in the list and select Properties.
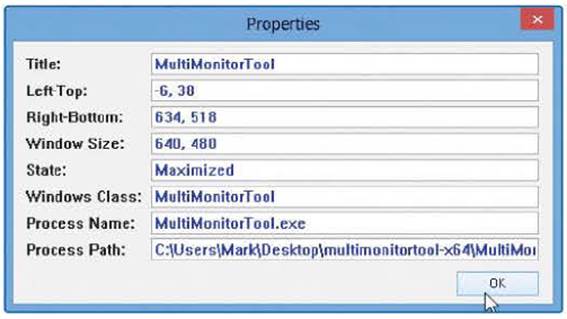
To
view details about an individual program or window, right click its entry in
the list and select Properties