Graphics cards
Graphics cards do some serious work and
therefore need plenty of cooling. In other words, they can make a right old
din. Manufacturers such as HIS and Gigabyte offer specially designed quiet
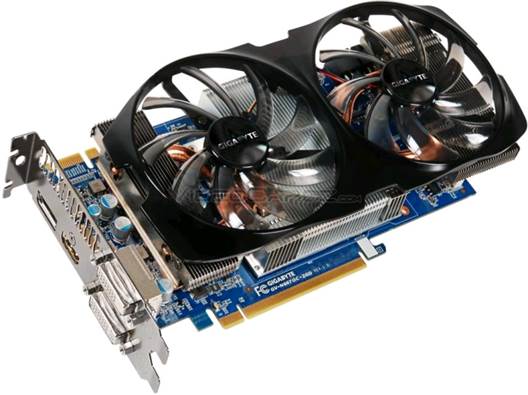
models. An example is the Gigabyte nVidia GeForce GTX 660 Ti Windforce ($378,
tinyurl.com/c4p2st9).

Gigabyte
nVidia GeForce GTX 660 Ti Windforce
If you don’t want to change your graphics
card, instead consider adding a quieter fan. The Arctic Cooling Accelero
Extreme GTX Pro ($50, tinyurl.com/bL8sne4) is a quiet cooler for nVidia GTX
graphics cards, while the Gelid Solutions Icy Vision Rev 2 ($48,
tinyurl.com/boxcr7s) works well with a range of AMD and nVidia cards.
PSUs
Don’t even contemplate opening up your PSU
to replace its fan. You’ll need to exchange the entire unit for a silent
version, of which several options are available.

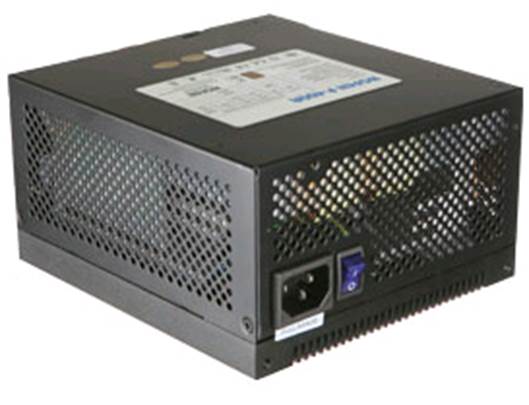
NoFan
P400-A
If your computing demands aren’t
particularly intensive, but your need for silence is utmost, opt for something
like the NoFan P400-A ($218, tinyurl.com/aoyn3oo). Gamers should look to models
such as the AeroCool Strike-X ($74, tinyurl.com/azgm7Lf), which offers 600W of
power and has a quiet 139mm fan and a striking design. Those who just want a
simple, affordable PSU for everyday use would appreciate the Zalman GS-500w
($60, tinyurl.com/cs6ywcz), which is a fine budget model.
Fan controllers
If your Bios doesn’t allow you to tweak the
fan speed, another manipulation method is offered by a fan controller. These
devices allow you to monitor and adjust the RPM of each connected fan, and let
you keep an eye on the internal temperature of your machine.
The Scythe Kaze-Master ($59,
tinyurl.com/atfdoqo) fits in an optical drive bay and offers control over up to
four fans. It also notes the spin speeds and internal temperatures on a built-in
LCD.
If you don’t want to go down the hardware
route, a solid software solution is the free SpeedFan (almlco.com). As well as
allowing you to control your PC’s fan speeds, SpeedFan can also cleverly read
the temperature sensors that are built into the motherboard/processor.
Silence your PC for less than
Our trusty old office machine can be rather
voluminous at times, so it was the perfect candidate for our attempts to
silence a PC for less than $135. The noise it generates is typical of a
three-year-old PC, so the upgrades we explain here will apply to many a system.
We selected four items from quietpc.com to
help us in our quest to silence the machine. First up is dual-layer
soundproofing material, which will be attached to the inside surface of the case’s
side panels to effectively insulate any rattling and absorb the various noises
emitted by the internal components.
The old rickety fans will be replaced by a
pair of Dustproof AcoustiFans. Thanks to their sealed motors, dirt and dust
will be unable to clog things up, making them both durable and quiet.

AcoustiFan
DustProof PC Case Cooling Fan 3Pin
Vibrations on the inside of the case will
be dampened by AcoustiFoam blocks, which fit into empty drive bays and help to
alleviate the sonic emissions that spinning optical and storage drives add to
the overall tone of a PC.
Finally, we’ll fit a set of anti-vibration
feet. These simple additions are made of a softer compound than most standard
case feet and are designed to reduce the amount of vibration transferred to the
floor. This might not be an issue if you have soft carpets, but those with
homes and offices sporting wooden floors will welcome the reduction in noise
they offer.
Step 1.
Before fitting the soundproofing sheets, measure the size of the panel you want
to insulate. You may need to cut them to size, and should be careful not to
cover any ventilation holes. Next, simply remove the backing paper and gently
press the material into place. If you make a mistake, immediately remove the
sheet and try again.
Step 2. The
foam blocks are very easy to fit. The pack includes a single 3.5in- and two
5.25m blocks, which will slide into empty optical and storage drive bays.
Simply open the case, decide which drive bays you want to fill, then gently
push the foam bricks into the relevant gaps. Be careful not to snag the
material on any sharp edges inside the case.
Step 3.
Unscrew your existing fans. Using the provided soft mounts, affix the
replacement fans. You can either plug each fan into the normal three-pin socket
on the motherboard to run at full speed, or use the provided cable to plug them
into four-pin Molex connectors from the power supply. You can then choose one
of three speed settings via the coloured leads: Full (black), Medium (blue) or
Low (white).
Step 4. To
attach the feet to the bottom of the case, simply unscrew or peel off the
originals. Clean the surface and dry it with kitchen towel to ensure the
adhesive will have something to hold on to. Take the four new feet, remove the
backing paper, and press them firmly into place. Hold for a few seconds and
you’re done.
Having reassembled our machine, there is a
noticeable difference in the amount of noise it creates. It isn’t silent, of
course. If it’s still causing too much racket, a further reduction in noise can
be achieved by replacing the power supply and/or CPU cooler.
The problem with starting a project such as
this is that it becomes rather addictive: already, we’re eyeing up one of those
fancy cases and a new CPU cooler. We wonder whether the budget would stretch to
a water-based system...
Fit a fan-speed controller
If you like to manually control your
computer’s fan speeds, a fan controller is a simple and effective addition. You
simply attach the fans to the controller, bypassing the motherboard, and can
then adjust their RPM via control dials on the outside of your machine.
Some controllers also have temperature
gauges that can be positioned in discrete locations around the inside of your
system case (on the hard disk or the outside base of the processor cooler, for
example). These report the current temperature in critical areas of your
system.
Fan controllers such as the Scythe
Kaze-Master controller, which we explain how to fit here, can control up to
four fans.

Scythe
Kaze Master Fan Controller
Step 1.
Connect the power cable to the four-pin socket on the back of the controller
marked ‘Power1, but don’t plug it into the PSU connectors just yet. Also fit
any of the included fan adaptor leads into the four sockets marked ‘Fan1,
‘Fan2’ and so on. They’re a little tight, so be careful not to damage anything.
Step 2. Fit
the leads for the temperature gauges. They’re numbered in relation to the fans.
You’ll want to place the gauges close to their relevant fans to accurately
monitor and control the internal temperature. They can be positioned either way
up and secured using the provided yellow stickers.
Step 3. Now
slide the control panel into an empty 5.25in drive bay and secure it with the
provided screws. Attach the other ends of the fan adaptor leads and power
supply. Now reassemble the side panels of the case, turn on the power and watch
for the LED display on the controller to come to life.
Step 4.
Above each dial on the panel you’ll see the fan’s RPM and the temperature. To
adjust the RPM simply turn the relevant dial and the fan will speed up or slow
down, either of which affects the temperature. As a general rule, we recommend
running machines below 500C to help preserve the components.