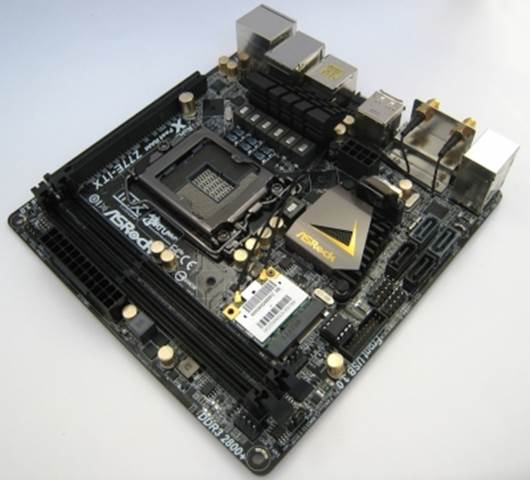
As mSATA slot is placed on the opposite
sides of the PCB, it becomes quite clear that the front of the PCB is really
stuffed with components. And we must also recognize that the layout of the
components are not particularly convenient in this case. LGA 1155 socket has
been moved too close to the PCI Express x16 slot, which means we can never use
any of the powerful processor air-coolers. The best thing you can do is use a
mini tower with a 80 mm or 92mm fan. Also, when you install the cooler, you'll
have to watch the shape and position of the retention plate. Many SMD parts on
the back of the Z77E-ITX PCB as well as mSATA slot cause serious obstacles for
high-performance coolers with massive bakplates. Therefore, you are better off
with a cooler that doesn’t have a backplate and uses plastic push-pin
retention.
You
are better off with a cooler that doesn’t have a backplate and uses plastic
push-pin retention
However, ASRock engineers have settled
their mainboard as a solution for PC enthusiasts. The clear indication of this
intent is the use of a six-phase digital processor voltage regulator, which can
be tweaked meticulously, including multi-step load-line calibration, and uses
only high-quality electronic components. Specifically, it is built with
Japanese polymer solid state capacitors and has DrMOS chips for transistors.
The voltage regulator is cooled by a very simple heatsink with a spring-screw
retention, but this proves that it is more than enough. The voltage regulator
operates at comfortable temperatures.
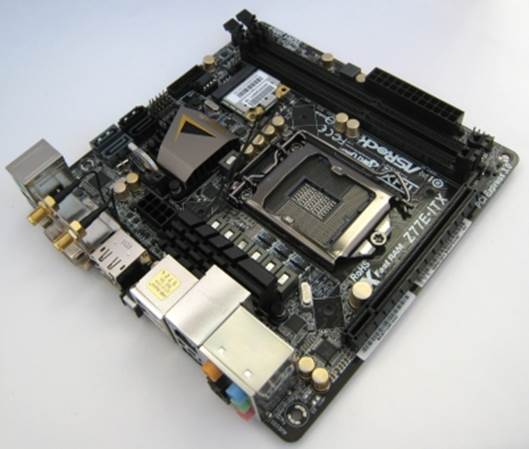
It
is built with Japanese polymer solid state capacitors and has DrMOS chips for
transistors
The chipset is placed right next to the
regulator's heatsink, but it uses its own dedicated heatsink for cooling, which
is not connected to the VRM heatsink next to it in any given situation. Cooling
was obviously not the primary focus for ASRock in this case, which also affects
the number of fan connectors that Z77E-ITX has: there are only two fan
connectors on this mainboard - one for the processor, and another additional
one. Both of them are 4-pin fan connectors, but they also support 3-pin fan. In
addition, the board is capable of adjusting the rotation speed of both these
fans depending on the current temperature readings.
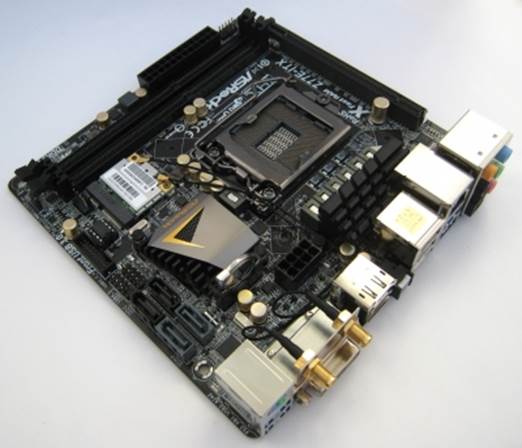
Generally ASRock Z77E-ITX seems to have
everything you can think of, even if it is an unexpensive Mini-ITX mainboard on
Intel Z77 Express chipset. For example, it uses a very good Broadcom BCM57781
Gigabit network controller and a popular eight-channel Realtek ALC898 codec.
The only thing that we were not particularly happy about during this review,
was the bundled WiFi antenna, which is not strong enough for the job. But it
can easily be replaced, if necessary.
The
bundled WiFi antenna is not strong enough for the job
The ports and connectors on the mainboard
back panel are also quite impressive. There are two USB 2.0 ports, two chipset
USB 3.0 ports, with two similar ports implemented via the ASMedia controller.
They even remembered to add the gamers favorite PS/2 port (it's common in Z77E-ITX,
allowing to connect either keyboard or mouse to it), which is very popular
among gamers. There is also one of the chipset SATA 3 Gbps channels in the
back, implemented as an eSATA port. There are DVI-I HDMI and DisplayPort video
outputs, as well as 5 analog audio jacks and an optical SPDIF output for audio.
There you can also find a Gigabit network port and two connectors for wireless
antennas. The last but not least is the Clear CMOS button.
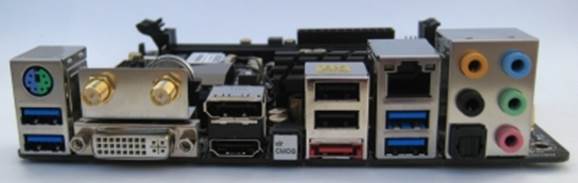
The
ports and connectors on the mainboard back panel
The bundled accessories are quite typical.
Among them you can find an I / O Shield for back panel, two SATA cables, a
wireless antenna adapter and a DVI-to-D-Sub adapter.
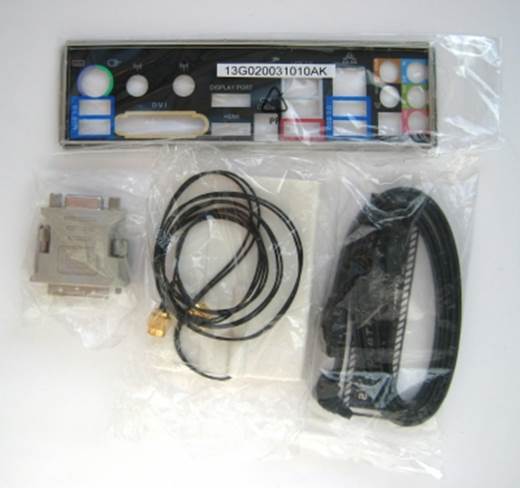
The
bundled accessories are quite typical
Contemporary full-size ASRock mainboards
started using graphics BIOS interface with the “starlit sky” background. The
Z77E-ITX uses the previous generation blue and light blue colored interface,
but the interface design does not affect functionality.
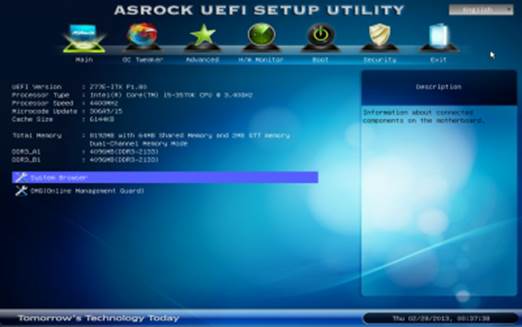
Graphics
BIOS interface with the “starlit sky” background
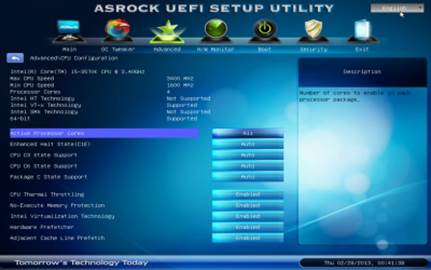
The section dedicated to processor
overclocking welcomes us with the preset profiles, but they will hardly be
relevant for Mini-ITX systems, where performance is not the only concern, but
power consumption and heat dissipation matter as well. Therefore, the manual
configuration seems much more reasonable in this situation, especially when
ASRock has everything that you may need. The processor Vcore may be adjusted in
absolute as well as relative values, there are options that allow adjusting the
VTT and the system agent voltage. The load-line calibration functions are also
right here: the digital VRM offers very granular approach to selecting the
load-line calibration intensity and Vdroop levels.
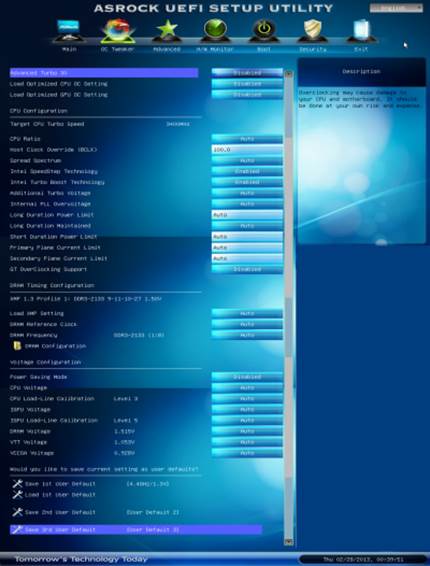
The
digital VRM offers very granular approach
The memory settings are singled out into a
separate sub-section, although you can automatically configure XMP directly
from the main overclocking section. The timings can be adjusted individually,
and all the remaining timings may be left at Auto in this case.
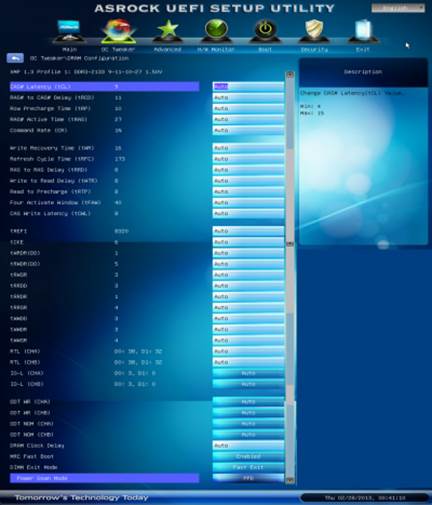
The
memory settings are singled out into a separate sub-section
You can configure Turbo Boost and Enhanced
Intel SpeedStep processor technologies in the same section as the rest of the
overclocking-related options, but all other similar settings are separated into
individual pages.
You
can configure Turbo Boost and Enhanced Intel SpeedStep processor technologies
There are a few little things about ASRock
Z77E-ITX BIOS that make working with it a very pleasant and rewarding
experience. The settings can be saved in profiles, and BIOS can be updated from
a file stored on external storage devices as well as via the Internet without
leaving the Setup interface.
CPU Overclocking on ASRock Z77E-ITX created
many ambigous results. On one hand, it is quite difficult to find a suitable
cooler, which could fit onto this mainboard and at the same time would be more
efficient than a boxed one. We decided to choose CoolerMaster Hyper TX3c but it
was barely enough to cool our Ivy Bridge processor overclocked to 4.4 GHz. On
the other hand, we managed to easily configure all settings for overclocking
this time. Although we noticed that the mainboard automatically increased the
processor Vcore when we raised its frequency above the nominal values. And it
means that it is difficult to achieve a desirable result as expected by
changing the processor core voltage in the offset mode: multiple system reboots
will be necessary to ensure success.
|
ASRock
Z77E-ITX’s specs
·
Manufacturer: ASROCK
·
Socket: Intel Socket 1155
·
Form Factor: Mini ITX
·
Chipset: Intel Z77
·
CPU onboard: None
·
Supported CPU: Intel Core i7; Intel Core i7
Extreme; Intel Core i5; Intel Core i3
·
Memory slots: 2
·
Maximum supported memory: (Gb)16
·
Type of Ram that being used: DDR3
·
OC: 2800MHz OC
·
Internal connectors: USB 2.0; SATA; 24-pin ATX
Power; 8-pin ATX 12V Power; S/P DIF input/output; SATA 6Gb/s; USB 3.0
·
Rear connectors: External SATA port; LAN
(RJ45) port; USB 2.0/1.1 ports; IEEE 1394a port; PS/2 port; LPT / Parallel
port; Audio I/O; VGA onboard (D-sub); DVI-D port; USB 3.0/2.0 ports
·
USB ans SATA ports: SATA II 3Gb/s x 2; SATA
III 6Gb/s x 2;
·
Expansion Slot: PCI Express x16 (x1)
·
Other supported technology: RAID
·
Associated assessories: Quick Installation
Guide, Support CD, I/O Shield; 2 x SATA Data Cables (optional); 1 x ASRock
WiFi 2.4GHz Antenna (optional); 1 x DVI-to-D-Sub Converter (optional)
|