EVGA Z77 Stinger
As usual, an EVGA mainboard seems perfect
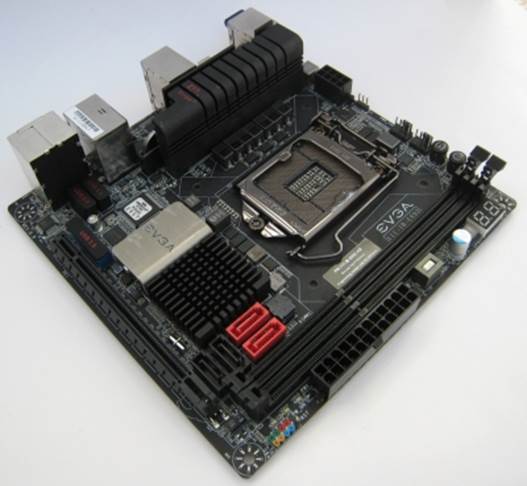
at first sight. The Z77 Stinger features an almost perfect component layout.
Although it's often difficult to arrange all the parts properly on a compact
PCB, this mainboard is a good illustration that miniaturization doesn’t have to
be inconvenient. The Z77 Stinger also seems to be a perfect overclocking
platform with a lot of space around the CPU connector, meaning you can easily
install giants CPU coolers. The recipe is simple: as the above-mentioned Asus
P8Z77-I DELUXE, the chipset is placed between the PCI Express x16 slot and the
LGA1155 socket.
The
mainboard is overclocker-friendly in other respects, too
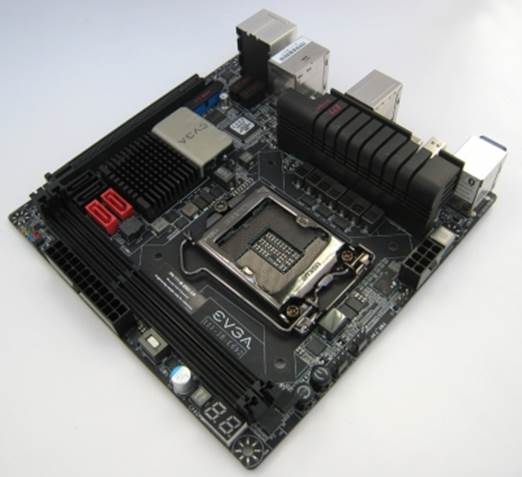
The mainboard is overclocker-friendly in
other respects, too. For example, it has hardware Power and Reset buttons, so
you can use it as part of an open testbed. Its full-featured POST indicator is
quite a rare thing to see on a mini-ITX product. The indicators does double
duty, reporting CPU temperature after the mainboard has started up.
There
are hardware Power and Reset buttons
The CPU voltage regulator incorporates
seven power phases, using an integrated circuit IR3550 PowIRstage and solid
capacitors. It highlights high efficiency, which is confirmed by the low
temperature of the regulator’s components at work. Anyway. EVGA install a
rather large heatsink, securing it with screws. The same heatsink is mounted on
the chipset, thus the Z77 Stinger is blameless in this respect.
Mainboard offers not only two but three
four-pin fan connectors, which is more than enough for a Mini-ITX mainboard.
Unfortunately, they only support PWM-based regulation so the three-pin fan will
always operate at maximum speed.
The
CPU voltage regulator incorporates seven power phases
For these advantages, the Z77 Stinger is
not really perfect. There are a few minor flaws in its design. Firstly, the
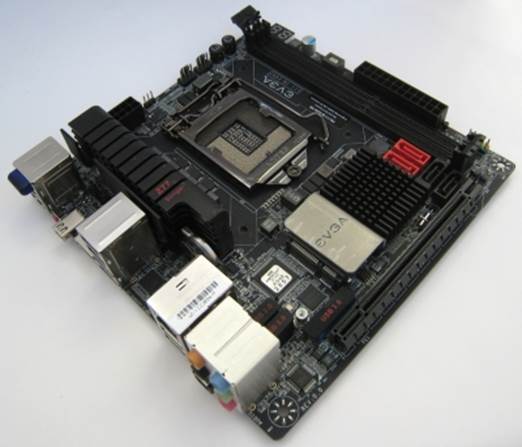
DIMM slots are too close to each other. Overclocker-friendly memory modules
like Corsair’s Dominator Platinum may feel cramped and will be pushing each
other with their plump heatsinks. Secondly, the onboard USB headers are located
in the mainboard's back panel, so the cables are going to trail through the
entire computer case from the latter’s front-panel connectors. And thirdly, the
Z77 Stinger lacks a connector for the computer case’s audio sockets. All of
them are minor downsides, though. The good news is the ATX power connector is
placed in such a way that you can easily access them while assembling your
computer configuration.
We feel more frustrated when we look
through the detailed specifications of the mainboard. The Stinger Z77 is
positioned as a high-end solution, priced at $ 200. That’s much more
expensive than any other Z77-based mini-ITX product. But EVGA mainboard does
not offer anything special. It does not even come with a bundled WiFi
controller, instead providing an emptry miniPCIe slot. In contrast, the Z77
Stinger can be compared with the universal Mini-ITX mainboards which you can
see in this review. Its ability is determined by the chipset and two extra
controllers: an ASMedia ASM1042 for additional USB 3.0 ports and a Marvell
88SE6121 for eSATA 3 Gbit/s.
The
Stinger Z77 is positioned as a high-end solution
Despite the extra SATA controller, the Z77
Stinger has only four SATA ports: two 3 Gbit / s and two 6 Gbit /s ones. It has
two USB 2.0 headers and one USB 3.0 header. All ports are implemented via the
chipset.
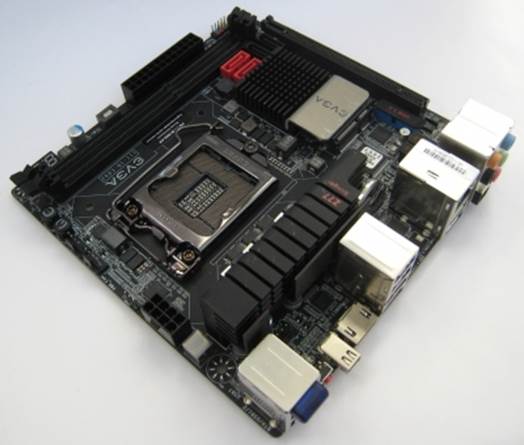
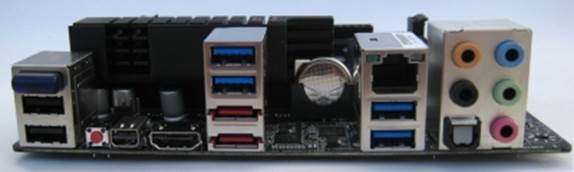
Its back panel looks empty because the mainboard
lacks DVI and Wi-Fi antenna connectors. It only provides two video outputs:
HDMI and mini-DisplayPort. The following can also be found on the back panel:
two USB 2.0 ports, four USB 3.0 ports (two of which are based on the ASMedia
controller), a Gigabit Ethernet port (based on an Intel 82574L controllers) and
two eSATA ports (based on the additional Marvell controller whereas two of the
chipset’s SATA channels remain unused). Analog speaker systems can be connected
to the mainboard’s five audio sockets. An optical SPDIF output is also
available. Finally, we can see a Clear CMOS button and a miniature Bluetooth
adapter BTA3011M01 with USB interface.
Its
back panel looks empty
The accessories to the EVGA Z77 Stinger
include four SATA cables and two SATA power adapters. The included I / O Shield
has unneeded openings for Wi-Fi antenna connectors.
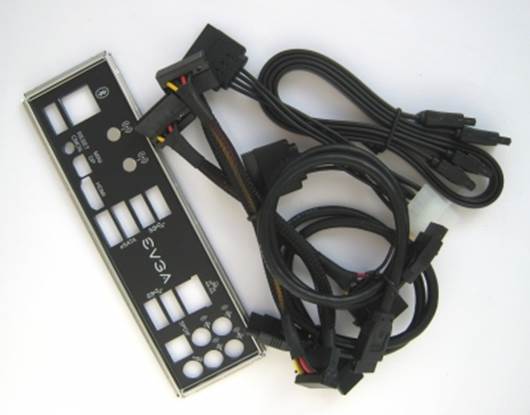
Accessories
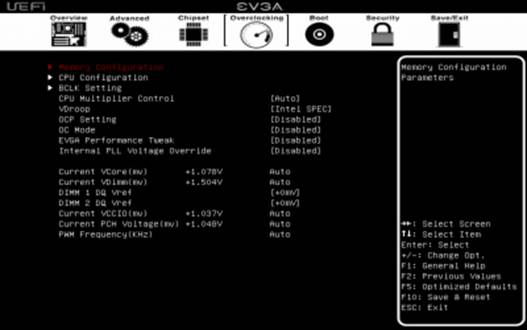
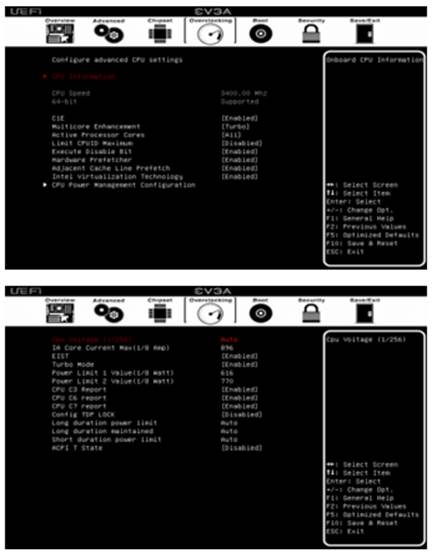
However, the mainboard BIOS is the biggest
disappointment. Even its user interface does not bode well. While other
manufacturers have switched to a graphical BIOS Setup, the Z77 Stinger provides
an archaic text-based one with just a few graphical icons.

The
mainboard BIOS is the biggest disappointment
The list of settings is not impressive,
too. The Overclocking section contains CPU configuring options, but the voltage
can only be set as an absolute value. It means that you can not overclock in an
energy-efficient way. The fixed voltage can not be changed, so the CPU loses
its ability to enter power-saving states at low and zero loads.
The
list of settings is not impressive, too
Memory configuring is done is done in a
special section where you can find lots of options but no XMP support. The
highest supported memory mode is only DDR3-2133.
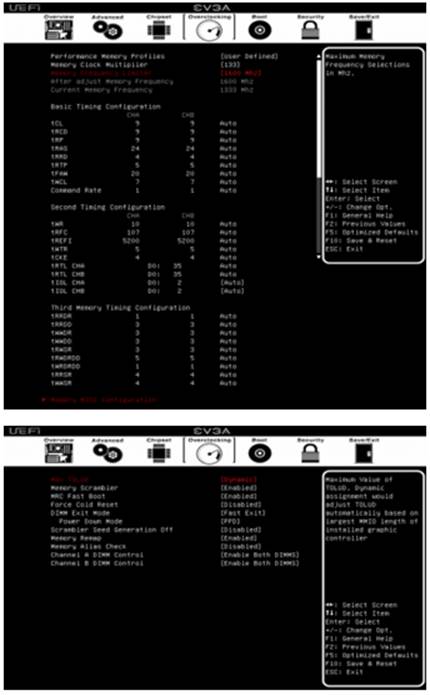
Memory
configuring is done in a special section
The CPU technology is also controlled from
a dedicated section. Everything here is normal. Like any overclocker-friendly
platform, the mainboard supports multistep counteraction to CPU voltage drop
under high loads.
The
CPU technology is also controlled from a dedicated section.
The Stinger Z77 is inferior to its
opponents in terms of extra BIOS tools. It can not update new firmware without
booting OS, for example. The BIOS does not provide any information about the
memory modules’ SPD or XMP profiles.
All of the mentioned downsides are pale
before the Z77 Stinger’s behavior in practice. We must admit that we can not
normally test it at the default as well as overclocking settings.
At its default settings the Z77 Stinger
refused to set the CPU clock rate up properly. Because we use a Core i5-3570K,
the mainboard increased its frequency multiplier by one step without our
intervention. We can not turn this off, so the mainboard imposes this
overclocking on you without asking. Another problem is the Z77 Stinger is not
compatible with any memory faster than DDR3-1600. In other words, this rather
expensive and enthusiast-targeted mainboard only allows using slow entry-level
modules of DDR3 SDRAM.
A new problem appears when you try to
overclock. Increasing the CPU multiplier above the default level disables all
power-saving technologies, so CPU operates at a constant clock rate regardless
of load. Of course, its voltage remains constant. However, this is true until
a certain load. In heavy applications, the CPU multiplier drops back to its
default level for some reason and we can not check out the stability of the mainboard
at overclocking settings because every stability test is a heavy application.
|
EVGA Z77
Stinger’s specs
·
Efficiency: based on Intel Z77 chipset.
·
Memory: 2 x 240-pin
DIMM sockets, up to 16GB of DDR3 2133MHz
·
Storage I/O: 4 x
Serial ATA 300MB/sec (2x Internal + 2x E-SATA) support RAID 0, RAID1, RAID
0+1, RAID5, RAID10 and JBOD; 2 x Serial ATA 600MB/sec (2 Internal) support
RAID 0 and RAID1
·
Form-factor: Mini-ITX
Form Factor; dimensions: 6.7in - 6.7in (170.18mm - 170.18mm)
·
Supported Operating system: Windows 8 32/64; Windows 7 32/64bit; Windows Vista 32/64bit;
Windows XP 32/64bit
|