Step by step: Snares and claps
- Our snare fill plays across two bars and
can be quantized in 12/8 so that each beat plays a three-note triplet. To
get the sound, our 909 settings include the shortest settings for Tone
and Decay, the longest setting for Tune Depth and a
half-setting on Snappy for brightness. (SC 1.mp3)
- The low conga can be sampled to provide
the pitched aspect of the drum fill. We’ve made up one key span so we can
play the one sample at any pitch, then copied over the snare fill part. We
need to shift the notes to play the downward fill part (SC 2a.mp3);
blending in the snare gives us the full part. (SC 2b.mp3)

- The snare sound is a straightforward 808.
To get the tight, bright sound we want, we’ve set the Decay halfway
and the Tone and Snappy parameters very high. Tweaking the Snappy
setting gives us further control (SC 3a.mp3). With the sound set
up, we put it in the sampler to bring the pitch up further. (SC 3b.mp3)

- For the super-high sound we start with an
808 snare, but this time shorten the Decay right down. To get the
right brightness, set the Tone and Snappy settings to the
max (SC 4a.mp3). To complete the sound, stick it in the sampler and
pitch it up – here we’ve gone for a whole octave. (SC 4b.mp3)

Rounding out the beats
Given the clattery onslaught provided by
the snares and claps, you could easily ignore the more subtle kick and tom
parts. Even so, the bouncy kick and long, tuned tom act as a perfect foil for
the busy snares and claps. Then, when things need to go up one level further,
it’s the fast hat that does it.
The main kick and tom sounds are typical
808/909 jobs, pitched to work with the track and with long decays resulting in
ringy, pitched sounds. The most flexible way to achieve these is to work with a
drum machine emulation, although if you do find a suitable sample, pitching and
stretching it to fit is also an option. We’ve gone for a 909 kick, and the Mid
Tom sound from the 808.
The kick and tom work together in their own
eight-bar pattern, with the kick dropping in bars 4, 7 and 8. The tom,
meanwhile, fills in the gap left by the kick in bar 4, and the drop at bars 7
and 8 makes way for a snare fill. This basic pattern is used over the second
half of the intro and repeated twice in the main horn and beats section. The
only slight difference is that the pattern drops out completely for bars 5 to 8
of these 16-bar sections.
Hi-hats are used sparingly in this track,
only appearing in the second half of the horn and beats section. This features
a typical offbeat house-type hi-hat, but because of the fast and is playing
16th-notes (again, the tempo is deceptive).
The first ‘pea soup’ hat sounds ringy and
metallic and is very much like the open hat on an 808. For the shorter sound, a
closed 808 does the perfect job. Other than that, there really isn’t anything
complex about the hat patterns, with not obvious accents in there.
Step by step: Hats, kicks and toms
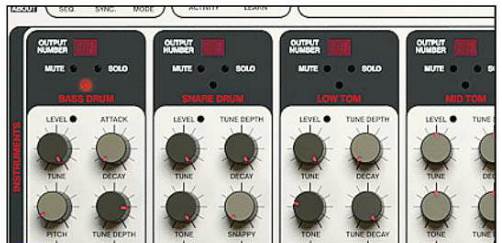
- Using a 909 emulation, we can tailor our kick sound very
accurately. First, extend the Decay so you get a ringing pitched
sound, then find the right pitch for the track by adjusting the Pitch
knob – here we’re just below 9 o’clock. Finally, fine-tune the Attack,
Tune and Tune Depth to taste. (HKT1.mp3)

- Let’s turn to the 808 for the tom sound.
We’re using the Mid Tom with the highest Decay possible. The key
here is to get the pitch to work with our kick, and you’ll see that the Tuning
is set at about 12 o’clock, although this was achieved by trial and error.
(HKT2.mp3)

- The main hat is very typical of an 808 open hi-hat. The Decay
can be very long if required, but we only need it set to about 9 o’clock,
so it fills up about one beat. Our 808 emulation also includes a Tone
setting that affects the frequency. We’ve set this to just above 12
o’clock, so it’s bright but not too thin. (HKT3.mp3)

- Sticking with the 808, we can fashion the
fast 16ths hi-hat from the closed hi-hat sound. As noted, the part is
straight 16ths with no accents. We’ve got the Tone and Decay
settings at 12 o’clock. We also set HH FRQ to 1 o’clock (HKT4.mp3).
putting all the parts together, we now have the basic beat. (Full
part.mp3)
