For several years now, I have produced the
weekly Macworld.com podcast. Over time, I have adjusted some of the tools and
techniques that I use to do this, but the basic workflow has changed very
little.
Gear and location
We typically record from one of two places.
One location is the “Podcave”, a studio in the Macworld offices equipped with
four Shure SM58 microphones (go.macworld.com/sm58) with pop-filters
suspended from Heil HB-1 boom stands (go.macworld.com/hb1), Sony MDR-V6
headphones (go.macworld.com/mdrv6) for each participant, a PreSonus
FireStudio Project multichannel audio interface (go.macworlkd.com/presonus),
and an iMac running GarageBand to record everything. The other location is my
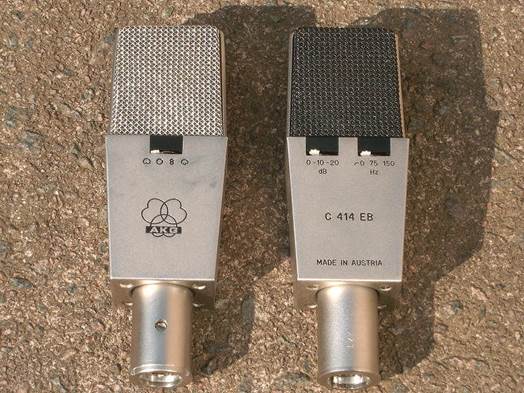
home studio, where I use a vintage AKG 414 microphone along with an Apogee One
USB interface (go.macworld.com/one) plugged into my Mac Pro.

AKG
414 microphone
The locations have in common a measure of
isolation and prophylaxis. The office studio is well insulated from outside
noise, and we’ve taken various steps to prevent people inside the room from
adding unwanted noise. For instance, the table-mounted boom stands are padded
at the base to keep tabletop taps from traveling up the stand and getting
picked up by the mic. Likewise, cables are strapped well out of the way. And
the top-filters are placed far enough from the mic’s business end that it’s
nearly impossible for a speaker to be so close to the mic as to overdrive it.
Because my home is in the country, I have
little outside noise to deal with other than an occasional rooster crow or
horse whinny. A Do Not Disturb sign keeps family members out of the area. I use
as many fan less devices as possible. And I have a floor-standing tripod
mic-stand equipped with the same kind of pop-filter arrangement as at the
Podcave, so I can’t overpower the mic.
Remote recording
Because of my home’s out-of-the-way
location, in-studio guests are extremely rare. Instead, I record remote guests
over Skype, the free Internet voice messaging application. To do this, I use
Ecamm Network’s $20 Call Recorder (go.macworld.com/ecamm). You can reach
Call Recorder, when it’s installed, directly within Skype: Open Skype’s
preferences, click the Recording option, and create your own recording
settings. Once you’ve done so, a small Call Recorder window will appear
whenever you launch Skype. To begin recording both sides of the conversation,
click Call Recorders’ red Record button.
When you’re done recording, Call Recorder
creates a stereo QuickTime movie file: One channel holds your audio track, and
the other the contents of the Skype track. Call Recorder comes with a set of
tools for splitting and converting the resulting file into separate audio
tracks, which you can then drag into GarageBand for editing.
The primary files

QuickTime
movie file: One channel holds your audio track, and the other the contents of
the Skype track
When possible, we don’t use the Skype
recording. Skype can be unreliable – cutting out, dropping calls, or producing
unattractive audio artifacts at times. And even when it behaves itself, in a
multiple-participant podcast, a Skype track leaves you to deal with various
voices recorded at volumes that may differ wildly.
Instead, we ask participants to record
their parts separately and then upload them to server where I can retrieve them
and incorporate them into my GarageBand project. The result (usually) is a
clearer recording. But if participants can’t record their side of the
conversation, or if guests don’t have time to do more than talk and run, or if
something goes wrong at their end, we cross our fingers and fall back on the
Skype track.
Cleanup time
One big challenge of using guest-recorded
tracks is that you have no control over their gear, their microphone’s gain or
the room they record in. The recording levels may look great, and audio may
sound fine on the Skype track; but when you receive each participant’s
recording, the volume may be too hot or too low, distracting hack-ground noise
may intrude, or the guest may have spent the whole podcast drumming on a desk –
a habit the mic faithfully picked up.
At one point I tried to fix the worst of
these problems by adjusting GarageBand’s controls and effects plug-ins. But the
built0in tools can be a little broad in their abilities, and you won’t find a
command that tells GarageBand, “Make sure that every track’s level is about the
same, even when someone whispers or shouts.”

For
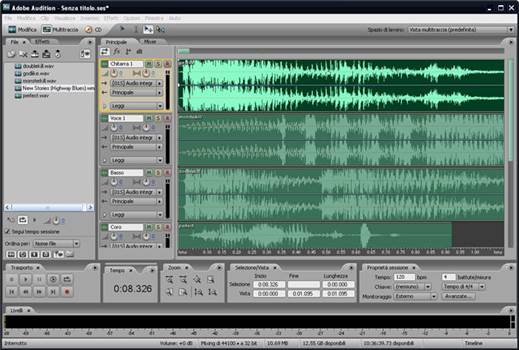
really tough edits, you’ll want to switch from GarageBand to Adobe Audition
When I’m faced with a particularly challenging
mix, I turn to Adobe’s $349 Adobe Audition CS6 (go.macworld.com/audition).
Audition is specifically designed with audio editing and cleanup, not music, in
mind. As such, it contains a lot of solid tools that can help make podcasts
sound professional.
One command can balance volume among
tracks. Removing constant noise is a matter of first sampling the offending
sound and then applying and tweaking a filter to exclude it.
If I have to deal with a Skype track that
suffers from poor equalization, I have several controls on hand that can help
make the track sound more natural. If a participant lacked a pop-fitter and the
recording has loads of plosives, Audition gives you a couple of ways to tackle
them. In addition, unlike GarageBand, Audition has a ripple-delete feature.
Select a portion of the recording that you want to delete, and then impose the
ripple-delete command; at once, the problem audio will vanish, and the content
following will automatically appear at the spot where you marked the cut. GarageBand
requires several steps to do the same thing.
Export business
After cleaning up the recording’s audio, I
export the mix as a single mono track. Then I import the track into a new
GarageBand Podcast project.
Why not just export from Audition and be done
with the job? The reason is simple: enhanced podcasts. The two basic categories
of audio podcasts are audio-only and enhanced. In order to make a include
graphics and chapters. Chapters enable listeners to skip to the portions of the
podcast they wish to listen to.
If you include three topics in your
podcast, for example, listeners can easily skip directly to the chapter (topic)
that interests them most. For many podcast listeners, chapters are a welcome
courtesy.
Most audio-editing applications are clueless
about producing enhanced podcasts but fortunately, GarageBand isn’t. Creating
an enhanced podcast takes a bit more time, but it’s time well spent.
After adding the chapters, graphics, music,
and podcast information, I choose Share ª Send Podcast to
iTunes and then export the podcast as a 64-kbps
mono file, which delivers good enough sound quality for a spoken-word podcast
while also maintaining a reasonable file size. A script in our content
management system takes the podcast, prepares it for streaming and downloading
from our site, and sends the iTunes Store the information necessary to enable
our podcast subscribers to obtain it there.
When I’ve completed all of those steps, I’m
generally ready to start planning the next week’s podcast.