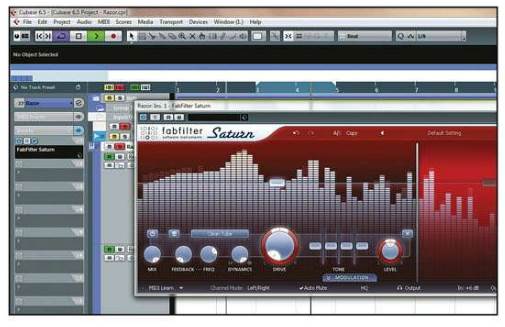
Nasty house bass with Razor
With Razor’s additive synthesis
capabilities, you can take a big step away from the venerable and familiar
subtractive synthesis and toward quirky, modern timbres with a nod to the
iconic FM flavors of yesteryear. Here we’ll explore Razor’s potential by making
a house bassline with a nasty twist. Razor’s unconventional synthesis engine
will facilitate our goals and there’ll be more than a few opportunities along
the way for you to stamp your own mark on the sound. The additive approach is a
breath of fresh air, as nearly every module and parameter is a platform for
taking your patch into uncharted territory. Once the bare bones are laid down,
you’ll have the knowledge to bend this bass sound to your will.
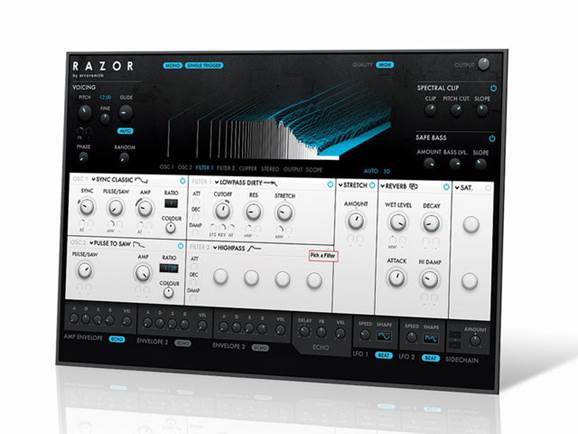
Razor’s
unconventional synthesis engine will facilitate our goals and there’ll be more
than a few opportunities along the way for you to stamp your own mark on the
sound
We’ll use a vanilla analogue waveform for
the first oscillator, but for the second we’ll the abusing the soaring sync
waveform. This will instantly set our patch apart from traditional analogue
offerings and add some real character to it. The thing about Razor’s filters is
that even the humble low-pass has a few tricks up its sleeve for our patch. The
low-pass filter will play a more traditional role to give us a plucked bass
effect, but we’ll hijack the second filter by putting it into comb filter mode
to add even more texture to our already unashamedly un-analogue patch. The comb
filter settings we’ll use are quite conservative, so feel free to knock those
dials out of whack for instant oddness and charm. You can even borrow the
modulation techniques we practice with Filter 1 and try them out on filter 2’s
comb filter.
Although Razor offers a ton of effects and
tone-shapers, we’ll keep things minimal by adding just a touch of reverb and
distortion. As pretty much every parameter can be modulated, we’ll add life and
interest to our bass with some basic filter and effect modulation, just to give
you a taste of the possibilities on offer.
Step by step: FM-style bass patch
- This patch will be a nod to the classic
house sound of the late 80s and early 90s that’s been enjoying a bit of a
resurgence in recent years. Using Razor’s additive synthesis we’ll create
an FM-style bass with a modern twist.
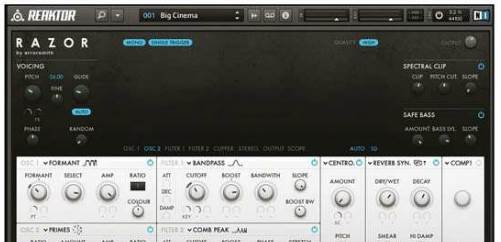
- Drop CM_Razor_Bassline.mid into
your project and fire up Razor. In the patch menu, go to the Errorsmith
folder and select the first patch, cunningly named INIT. For
reasons unfathomable to us, Filter 1 is turned on by default with some
‘nasal’ settings, so switch it off for the time being. (Raz2.mp3)
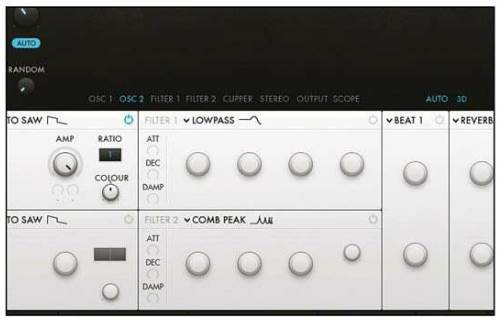
- Turn on Oscillator 2 and set the mode to Sync
Classic. This lets us use the oscillator sync effect without having to
actually sync Oscillator 2 to another oscillator. Set the Sync
amount to 31.2 so we get a metallic square effect setting on the
perfect fifth. (Raz3.mp3)
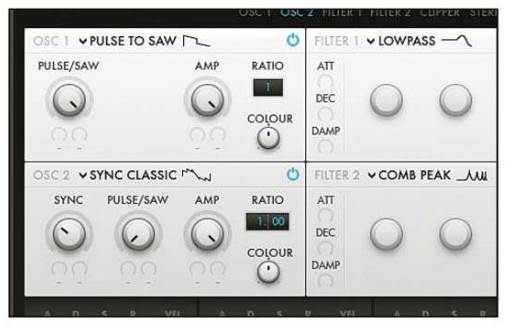
- The low end of Oscillator 2 is bloating
up the patch – we don’t need all of this frequency content, as Oscillator
1 is providing the bulk of the spectral content. Turn the Color
dial up to 4.2 to get a much brighter and less weighty timbre. (Raz4.mp3)

- Switch Filter 1 back on and leave it on Lowpass mode.
Pull the Cutoff down low to around 38 and turn the Boost
down to -0.14. The Boost is a bit like the resonance on a
standard filter but can also act like a cut from a bell EQ with negative
boost amounts. (Raz5.mp3)
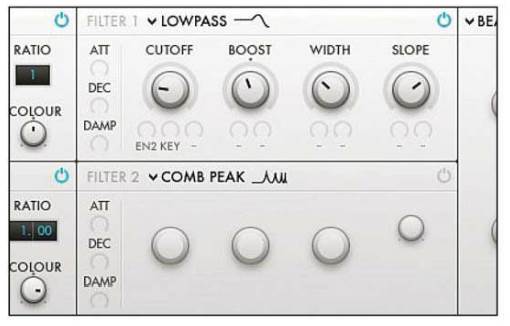
- Turn the Width dial up to 44.
This acts like the Q of a conventional bell EQ so by turning it up we’ve
made a very broad and gentle cut around the filter cutoff. Now turn the Slope
down to -36 to really steepen the angle of the filter. (Raz6.mp3)

- Set Filter 1’s first modulation source to Envelope 2 and push
the Amount way up, to 80. Now head over to Envelope 2 and
pull the Decay down to 38. This should give us a bright,
tight plucked sound as the cutoff starts off open and then rapidly decays
down to the low cutoff point. (Raz7.mp3)
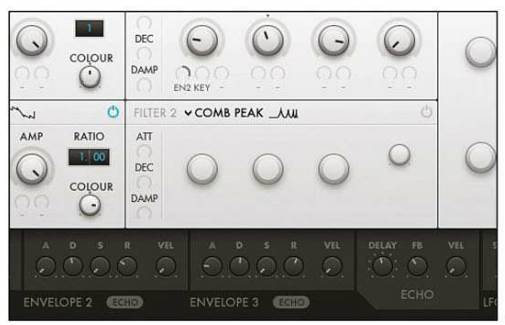
- Push the Sustain dial of envelope 2 up to about 0.22.
The sustain level determines the resting point of the filter cutoff and is
different to changing the actual filter cutoff value, as it can subtly
affect the curve of the attack and decay stages. Now set the Release
of this envelope to maximum so we can hear the amp release. (Raz8.mp3)

- Set Filter 1’s second modulation source to Key Track and
turn it all the way up. This ensures that the filter cutoff stays in sync
with the notes we press, so fi we press C3 it might be at, say, 100Hz, but
if we press C4 the cutoff will move up an octave to 200Hz. (Raz9.mp3)
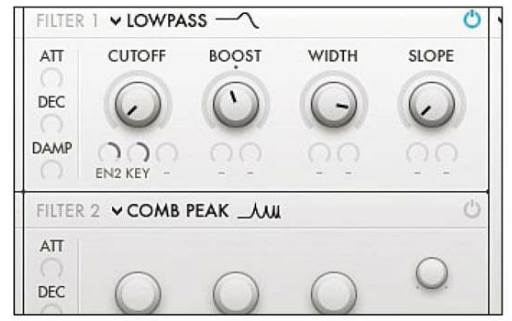
- Switch on Filter 2 and leave it on Comb
Peak. Set the Cutoff to 9 and the Boost to 23.4.
Notice how this has completely changed the timbre to a more FM-like tone.
Have a play with the Cutoff and Boost dials to get a feel
for the spectrum of timbres this filter can offer (save your project,
though!) (Raz10.mp3)
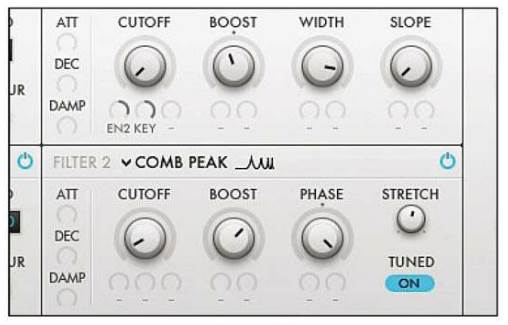
- In the Dissonance section, select Beat
1 (if it’s not already selected) and turn it on. We could change the Amount
and Partial settings to alter the flavor, but we’ll leave them
where they are for now. You should hear a very subtle metallic “plink”
added to the upper frequencies of the patch. (Raz11.mp3)

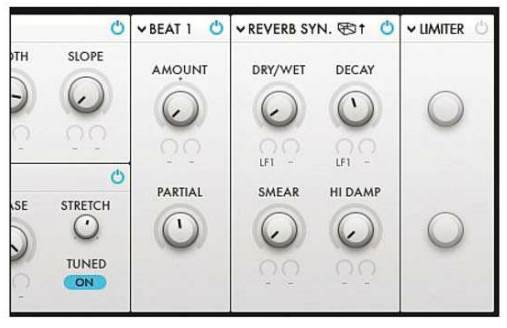
- Now go to the Stereo Effect section and select Reverb
Synced. Pull the Dry/Wet dial all the way down to 0.06 for
a very subtle effect, and the Decay down to 45 for a short
but airy reverberation. If you find it’s too long and wet, just pull the Decay
down by about 10 units or so. (Raz12.mp3)

- Pull the Smear down to 0.
This dial is like the diffusion amount on normal reverbs, so higher
amounts are more, well, smeared and less defined than lower amounts. Out
patch isn’t very bright, so let’s also pull the Hi Damp dial down
to 0 to prevent the high frequencies of the reverb being dampened.
(Raz13.mp3)
- Go to the Dynamics and Shaping
section on the far right and select the Clipper effect. Turn the Drive
up to 10.5 to add some much-needed bite and grit to our patch. The Foldover
can further shape the grittiness, but we’ve had our fill of this
particular effect so turn this dial all the way down to 0. (Raz14.mp3)

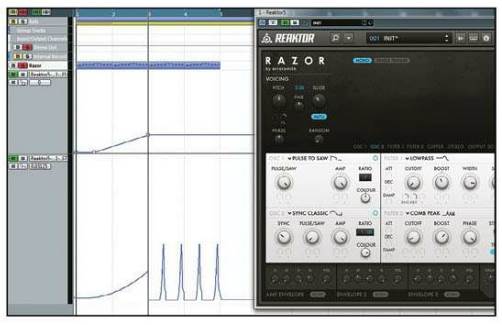
- Now’s the time to add some interest to
our bassline by recording some automation. Make sure you save your
project, though, as you might accidentally screw up your settings! For our
demo we’ve automated the filter cutoff so the sound creeps in, and the
reverb mix to accent certain notes by washing them out with reverb. (Raz15.mp3)
- Finally, we roughen up the patch with
some heavy-handed distortion to really bring out the texture and
harmonics, and squeeze the dynamics for a bigger sound. We’re using
FabFilter’s Saturn, splitting the bands into bass/mids and highs before
pushing the signal hard into the plugin’s limiting stage to really bring
out the bass and midrange. (CM_Razor_Result.nrkt, Raz16.mp3)
