Fat analogue bass with Diva
Inspired by Diva’s unabashed analogue
authenticity, we’re going to make an unashamedly analogue bass patch. You won’t
find any wobbles or screeching basslines in this walkthrough – instead you’ll
get a healthy dose of sweet, succulent analogue goodness. And rather than
bombarding our patch with excessive effects and modulation, we’ll let the
synth’s raw, fat authenticity speak for itself.
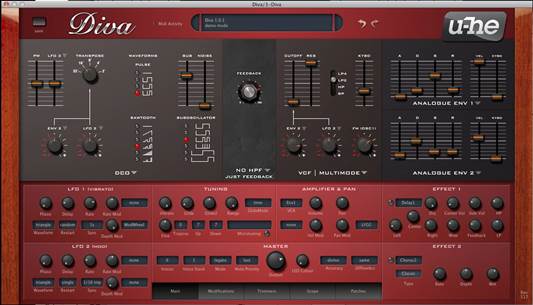
We’ll
use an envelope to modulate the filter’s cutoff frequency in order to create a
plucked effect
That said, we’re not going to stick to the
cliché of raw analogue waveforms – instead, we’ll be adding some texture with
Diva’s oscillator and filter modulation, using FM and oscillator syncing to add
a certain rip and shimmer to the basic analogue textures. As well as the
aforementioned features, which are pretty much standard issue on most virtual
analogue synths, we’ll also be using the more unusual filter frequency modulation,
which was popular with real analogue synths but has yet to find much of a
foothold with emulations. In a nutshell, this works very much like oscillator
FM, but instead of modulation an oscillator’s frequency, we’ll be modulating
the filter’s cutoff frequency. When we crank up the filter resonance the timbre
will take on a whole new tone, injecting some vital flavor and variety into
your patch.
We’ll use an envelope to modulate the
filter’s cutoff frequency in order to create a plucked effect, similar to what
we showed you in our Razor walkthrough.to spice things up here, however, we’ll
modulate the envelope’s attack stage (among other things). This will cause the
patch to bow and bend as the envelope shifts and morphs from a plucked decay to
a warbling, rising attack. As ever, we encourage you to experiment and push
your patch even further by getting your hands dirty and automating any other
parameters that tickle your fancy.
Step by step: Simple analogue bassline
- Fatness is Diva’s specialty, so in this
walkthrough we’ll be guiding you through a simple yet effective analogue
bassline. We’ll be touching on the oscillator and filter FM capabilities
for a different analogue flavor, so don’t be shy about pushing our
suggested parameters as far as you can to really shake up this sound.
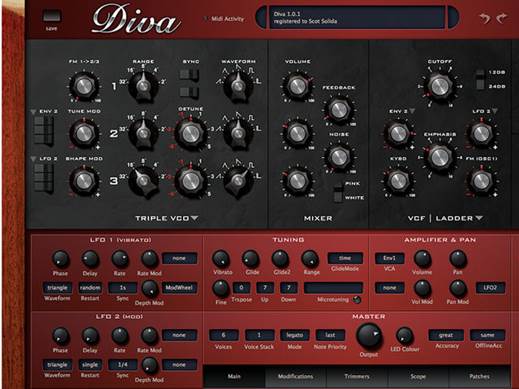
We’ll
be touching on the oscillator and filter FM capabilities for a different
analogue flavor
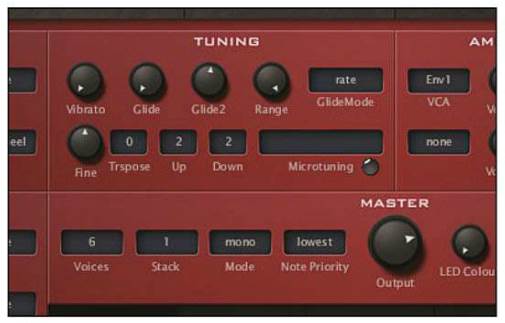
- Click the Patches button to get to the patch browser,
then click the Templates category. We’ll be using INIT Minimono
as the basis for our patch, so fire it up and set the Mode to Mono
(on the Main editing page). Drop CM_Diva_Bassline.mid into your
project. (Diva2.mp3)
- Set Oscillator 1’s Waveform to 6.0. This is
somewhere between a saw and a square wave, an interesting feature of Diva’s
oscillators (have a sweep through and hear how these ‘in between’ shapes
sound). Now turn Oscillator 2’s Volume up to 70 and pitch it
up to 2’, making sure its shape is left on saw wave. (Diva3.mp3)
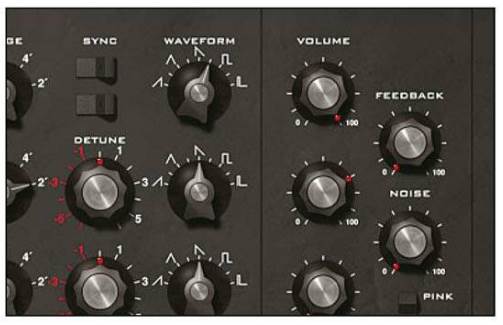
- Set FM 1ª2/3 to
70. This engages frequency modulation for Oscillators 2 and 3, with
Oscillator 1 as the source. Higher values give a more metallic sound, so
feel free to crank up the dial if it’s to your taste (a value of 100
for this patch gives a particularly interesting texture). (Diva4.mp3)

- Flick the top Sync switch to sync Oscillator 2 to
Oscillator 1. Oscillator syncing has a very distinctive character typified
by an up-and-down pitching of the synced oscillator, but in this case it
also has the added benefit of tightening the sound by stopping the
oscillators from phasing with each other. (Diva5.mp3)

- One great feature of Diva is its
beautiful-sounding filters, and for our patch we’ll be using the Bite
filter. This one has the most aggressive character of all those on offer
and will be ideal for our gritty bass patch. We’ll use Rev 1, as
it’s less squelchy and more grungy then Rev 2. (Diva6.mp3)
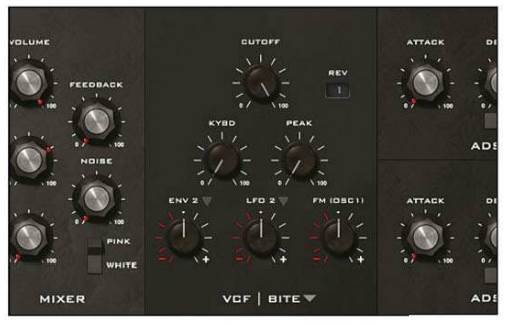
- We’ll use Envelope 2 to modulate the
cutoff of the filter. Pull the Attack down to 0 and the Decay
down to 31. This will give us a tight, plucked sound, but if isn’t
to your taste by the end of the walkthrough, just crank the Sustain
up to the maximum for a more full-bodied character.
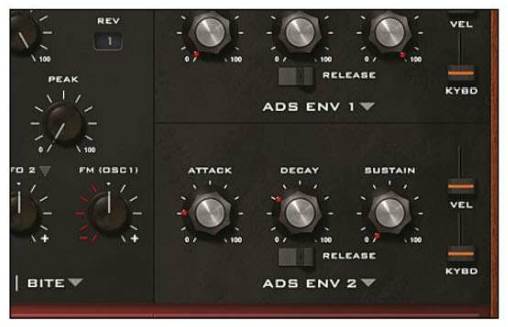
- Now turn the Env 2 modulation amount in the filter
section all the way up. This causes the filter to start fully open (cutoff
at maximum) so that the initial transient contains the full range of
harmonics, giving us a bright, bold sound. (Diva8mp3)
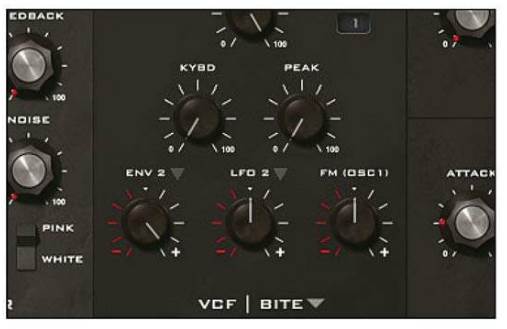
- Pull the Cutoff down to 53 and the Resonance up
to 61. If you toggle back and forth between the other filter types
you’ll notice that even at this high resonance level the filter doesn’t
really sound squelchy at all compared to the other types – it has a much
more mean and aggressive tone to it. (Diva9.mp3)
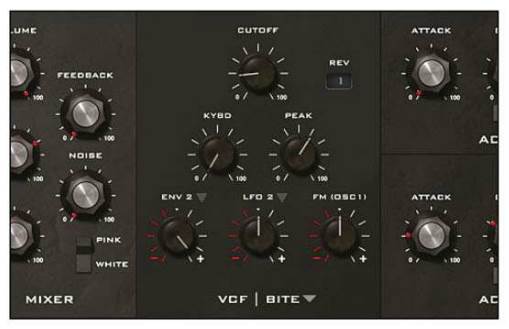
- Now we’re going to use a feature that’s common on real analogue
synths but isn’t often found in soft synths: filter FM. This enables the
filter cutoff to be modulated by the oscillator frequency, which can
deliver some really bizarre and quirky textures. Push the FM (Osc1)
amount up to maximum. (Diva10.mp3)

- Vibrato is an effect where the pitch is modulated by an LFO to
give that characteristic pitch-wobbling found in real instruments and the
human voice. The amount is controlled by the mod wheel, and we’ll be using
it to give a kitsch 80s accent to certain notes. Turn the Vibrato
dial up to maximum.
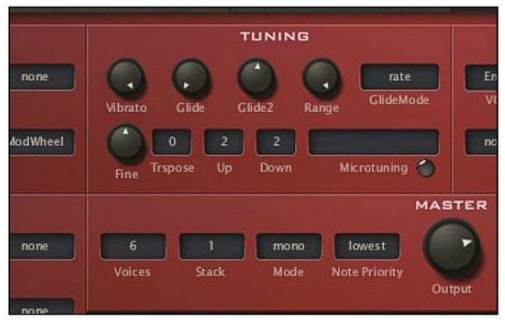
- In the LFO 1 section, set the Rate
to 2.9 and the Depth Mod to maximum. Now play back
the MIDI part and experiment with the mod wheel on your MIDI keyboard to
get a feel for the vibrato effect (or just move the Vibrato dial up
and down with the mouse, making sure it’s back at maximum when you’re
done).

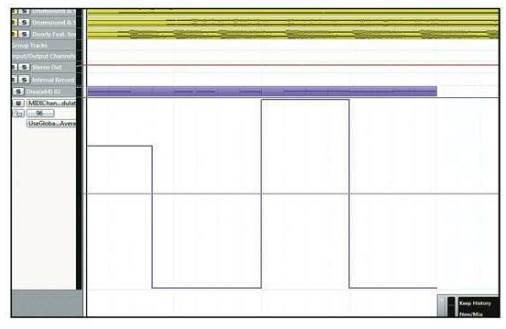
- After some practice, you’re ready to record in some mod wheel
modulation (or draw it in freehand using the mouse). The trick is to use
the vibrato to emphasize certain notes, moving the wheel up from minimum
to maximum is a fast sweeping motion. (Diva13.mp3)
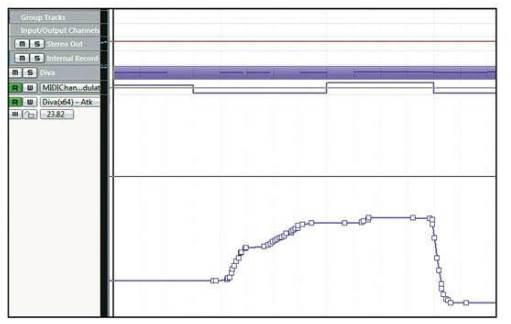
- The patch is basically done, but it still feels a bit static,
so save your project and have a bash at automating some other parameters
to add some liveliness and interest to the pattern. We’ve recorded some
automation for Env 2’s Attack, but you should also try automating
the Sustain, Cutoff and FM1ª2/3 dials. (Diva14.mp3)
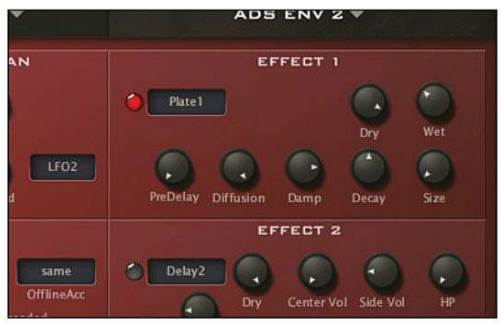
- The patch sounds very dry, but thankfully
Diva comes with decent reverb to liven things up. Switch on Effect 1 and
select Plate 1. Turn the Size down to 11 for a
tighter sound and set the Wet level to around 35 so that the
patch isn’t washed out in reverb. (Diva15.mp3)
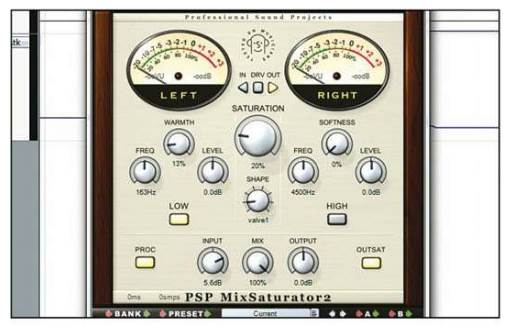
- Finally, let’s ruthlessly brutalize our handiwork with some
heavy saturation. Any plugin and saturation type will do, but for our demo
we’ve used PSP MixSaturator 2. With the output saturation turned on, we’ve
cranked the input gain to smash the patch into the saturation stage. (CM_Diva_Resul.h2p,
Diva16.mp3)
