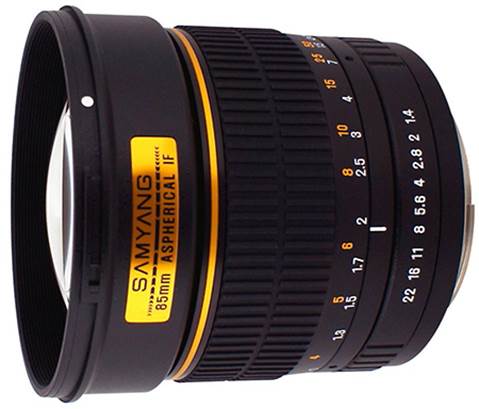
Samyang 85mm f1.4 is a short telephoto lens
at a reasonable price with a light focal ratio ideal for portraits. Just as the
other Samyang lenses, you have to manually focus it, but coming with a much
lower price than other similar lenses from major camera companies. Note that
Samyang lenses are labeled Rokinon and Walimex in several areas.
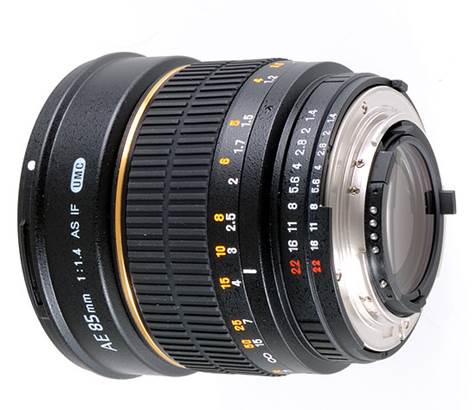
The lens comes in two versions: the basic
non-AE version available for Canon, Nikon, Pentax, Sony A, Sony E, Four Thirds
and Samsung mounts, while the other additional version with AE is available
exclusively for Nikon and has an additional circuitry which passes metering
information and allows the camera to show a focus configuration through the
viewfinder – although both AE and non-AE versions support fully manual focus.
Samyang
85mm f1.4
The AE version is 72mm in length, 78mm in maximum
diameter, an optical structure with nine elements in seven groups, a minimum
focusing distance of 1m, weighs 520g and uses 72mm filters. The leading parameters
are even lower than the 85mm f1.8 lenses from other big names. The question is
how to compare their quality. I started a series of tests with Samyang AE 85mm
f1.4, using Nikon’s demanding D800e that can share comparable quality with the high-end
85mm f1.4G Nikkor below. I will later add the results of this report in the
future, including depth and comparing bokeh. In the meantime you can scroll
down to see how to compare a landscape photograph focused to infinity.
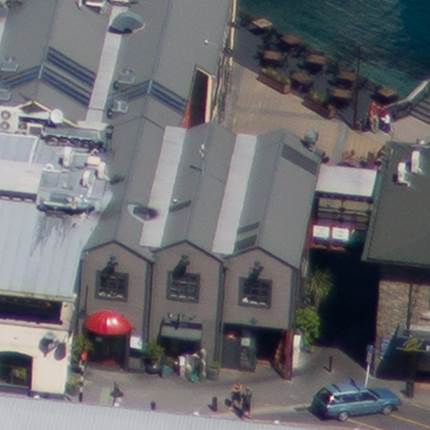
Samyang 85mm f1.4’s quality on Nikon D800e
To evaluate the actual performance of the
Samyang 85mm f1.4, I took this landscape photo with every aperture, using a
Nikon D800e placed on a rack.
The D800e set ISO sensitivity at the basic 100
and the lens focused manually on the center of the layout, using the Live View
exaggerated support. It was cut from the area marked by the red square in the
middle and the lower part beneath the entire FX frame.
I also shot the scene of this moment later,
using the 85mm f1.4G Nikkor and you can see a comparison right below.
I shoot in the D800e’s RAW mode and handled
the file in Adobe Camera RAW (ACR) through Photoshop with the following
settings: Sharpening at 70/0.5/36/10, both Luminance and Color Noise Reduction
settings at 0, and Process to 2012 with the Adobe Standard profile. High level
of focus with a small radius highlighted the most beautiful details without
causing unwanted artifacts. All adjustments for the lens were disabled, so
there was no additional software to compensate for vignette, optical distortion
or false color image.
I would be willing to accept that I had
expected the most modest result from a reasonably priced lens with wide
aperture, but as you can see below, the quality was actually quite good. On the
downside, it suffered reduced contrast from the center, which came with a few optical
errors and flickering light in and around the bright areas, but the level of
details was not bad. It was rather impressive, if a little strange, the results
from the far corner of the entire frame were even better with high level of
detail, reasonable contrast and no optical color errors to mention.
As the aperture closed, the quality in the
center improved with a slight decrease in optical blurring and false bright
colors, combined with contrast and sharper boost. I want to say that the
central peak was at f8, f5.6 though the results were not bad.
When the aperture closed, the sharpness also
increased in the angle, though to a lesser degree and it was strange that you
noticed chromatic aberrations actually increasing with smaller f-numbers. This was
contrary to what we expected, but I can confirm that the results you saw here
were true. When the lens reached f8, the corner edges became quite troublesome
when viewed at 100%, and it was worrying that it was happening in areas where
contrast was not particularly high.
This made it difficult to suggest a sweet
spot in the aperture range for the entire frame. The quality of the center
certainly benefited from reducing at about f8, while for the top corner was still
in the range of f2.8 to f4. Except for this, not only chromatic aberrations became
annoying in the corner, but the general sharpness also seemed to soften.
The good news is that you can effectively
eliminate chromatic aberrations, using software tools as in Adobe Camera RAW,
and I'll show you an example in the first table. After that, you can see how the
Samyang 85mm f1.4 competed with 85mm compete with the more expensive f1.4G Nikkor.
Scroll down to see more results.
Samyang
85mm f1.4’s sharpness in the corner

Samyang
85mm f1.4’s center sharpness
Samyang
85mm f1.4’s cutting edges at f5.6
Samyang 85mm f1.4 with and without chromatic aberrations
Here is an example of the quality of the
angle at f8 with no lens correction on the bottom side and the chromatic
aberration correction errors enabled the selection below. As you can see, the
error corrections in Adobe Camera RAW lenses effectively eliminate any color
fringing, improving the overall quality, although ensuring sharper results in
keeping the aperture angle wider lens close to f4.

Corner
sharpness at f8, all lens corrections are disabled

Corner
sharpness at f8, chromatic aberrations are enabled