So far we’ve focused on keeping local
backups for a single PC. If you have more than one PC to protect, it probably
doesn’t make sense to invest in a separate external drive for each of your computers;
it’s more efficient to set up a central backup location.

Windows
8’s File History feature keeps a running record of changes to your files, so
you can revert to earlier versions with only a few clicks
The simplest way to set this up is by sharing
a drive across your network. Home editions of Windows 7 don’t allow you back up
to a network location, but there are plenty of third-party packages that will.
If you’re moving up to Windows 8, its File History feature makes it easy to set
a shared drive as a backup location for your entire HomeGroup.
The downside to this is that the computer
hosting the shared drive must be kept switched on all the time, or backups
won’t be made. This isn’t exactly energy-efficient, and it creates a central
point of failure should something go wrong with the host computer. A safer
approach is to invest in a dedicated low-power network storage device. Until
recently we might have recommended an appliance based on the Windows Home
Server operating system, but Microsoft confirmed in July that its home-oriented
server OS is no longer under development, so we’d be hesitant to invest in it
at this point.
Instead, we recommend taking a look at some
of the simpler network-attached storage (NAS) devices that are out there. For
example, the Synology DS2112j offers a friendly Windows-like interface, with
nice extras such as the ability to mount ISOs as network volumes and to stream
audio over your local network. It also supports RAID mirroring, so you can be
confident a hardware failure won’t mean losing any data – which is, after all,
what it’s all about.
Missing PCS and MACs
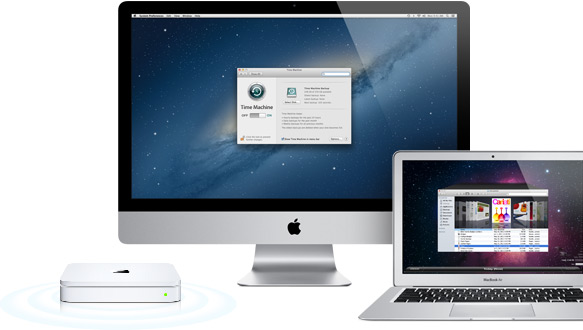
If you own a Mac as well as a PC, you may
be using Apple’s Time Machine system to handle backups. Most people do this via
an external drive connected to the Mac, but can use a shared network drive if
you prefer. The easiest way to do this is with one of Apple’s dedicated Time
Capsule boxes. This works automatically with Time Machine, and can be mounted
on Windows clients for use as a backup destination.

Apple’s
Time Machine backup system is deliciously simple to use, but it can be awkward
to integrate into a mixed-platform environment
The potential downside of this is that Time
Capsules are quite sophisticated by NAS standards, featuring 802.11n Wi-Fi and
a USB port for sharing printers and secondary drives. They are also sealed
units, unlike most NAS devices, which are designed to be user-upgradeable with
desktop hard drives. This makes them fairly expensive, with prices starting at
$320 for a 2TB unit. Annoyingly, Apple doesn’t officially support saving Time
Machine backups to generic NAS devices, or shared Windows volumes. However,
there are workarounds if you don’t mind a bit of technical hackery. Note that
the process involves changing system settings and isn’t guaranteed to work with
all devices, nor with Mountain Lion Proceed at your own risk.
iPhones and iPads
When it comes to mobile devices, backing up
needn’t be hard. However, the process varies depending on what sort of hardware
you have. If you’re using an iOS device – that is, an Apple iPhone, iPad or
iPod touch – backup is built in. by default iTunes automatically backs up all
of the data on these devices, including purchased music and TV shows, messages,
application data and device setting, each time you sync your device with your
computer.

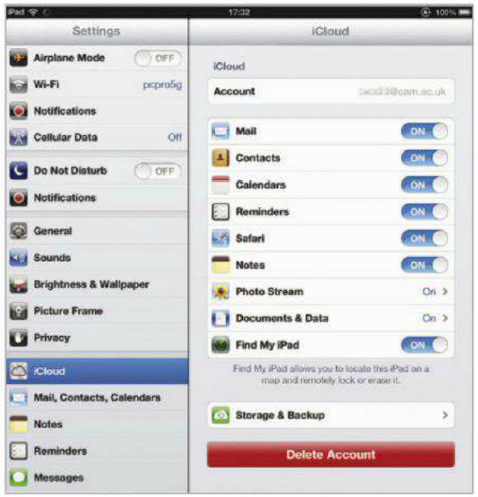
Apple’s
ICloud service provides automatic backups for iOS devices
There are caveats. First, only the most
recent state of your device is stored. If you want to back up your backups, as
it were, you’ll have to copy them out of the default location manually. In
Windows 7 this is C:/Users/[your username]/ AppData/ Roaming/ Apple Computer/
MobileSync/ Backup. What’s more, the information is stored in a proprietary
format, so you can’t just go trawling through the files on your PC. Restoring
it to your iPhone or iPad is simplicity itself, however: simply right-click on
the device in iTunes and select Restore from the context menu.
If you’re using iCoud, iTunes backups are
disabled, and your data is instead backed up automatically once a day to your
iCoud accound, so long as your device is powered and connected to the internet
via Wi-Fi. You’ll find options to turn on iCoud, and force manual backups, by
opening the Settings app and tapping iCloud / Storage & Backup. Free cloud
storage is limited to 5GB, so you may want to exclude some applications from
backing up their data; you’ll find the options for this in the Settings menu
under iCloud / Storage & Backup / Manage storage.
If you need to restore from iCloud, you can
do so by completely erasing your device (go to Settings / General / Reset /
Erase All Content and Settings). The next time you restart, you’ll be prompted
to restore from an iCloud backup.
Android
“Android user can restore data simply by
logging in to a Google account”
If you’re an Android user, you can allow
Google to keep a central copy of your contacts, book marks, dictionaries and
some other settings automatically. This information can then be restored to a
new phone or tablet simply by logging in to your Google account for the first
time, taking much of the pain out of replacing or upgrading hardware. You can
control what’s synchronized by going to Settings / Accounts & Sync on your
Android device, then clicking on your Google account (the lower-case “g” in a
blue square).
While this works well, there are plenty of
things Google doesn’t back up, such as downloaded files, application settings
and SMS messages. If you want to safeguard these, you’ll need a third-party
application. One of the most popular choices is MyBackup Pro, available via
Google Play. The app costs a princely $4.77, but it lets you back up more or
less every file and setting on your phone, either to local storage or to the
company’s own online servers. Backups can be run manually or to a schedule, and
a new experimental feature lets you trigger a backup remotely, so if your phone
is lost or stolen you may still be able to grab a copy of its contents.
Of course, MyBackup Pro isn’t the only
backup software for Android. If you’ve “rooted” you device – that is, broken
the operating system’s built-in protections – you may want to check out the
free Titanium Backup app, again available from Google Play. This is a
comprehensive backup tool, with support for advanced features such as encrypted
backups, multi-user support and automatic uploading to online services
including Dropbox and Google Drive. If you don’t have a rooted phone or tablet,
however, it won’t work at all.
Windows phone
The Zune software backs up Windows Phone
settings and media when you sync with your PC or Mac, just like Apple’s
automatic iTunes backups. However, there’s no officially supported way to
perform a full backup of a Windows Phone handset that includes your message
history and app data.
There are, however, third-party tools that
can potentially help. The unauthorized Windows Phone 7 Backup application lets
you make a complete copy of your phone’s data and OS, ready to restore at a
later date. There’s no guarantee it will work, though – and even if it does,
it’s an all-or-nothing operation, with no way of selectively restoring some
types of data while skipping others. In other words, you’re protected against
disaster or loss (as long as you replace your lost phone with an identical
model, as backups aren’t guaranteed to work across different hardware), but not
if you recklessly overwrite a data file and later wish you hadn’t.