The final step of our Crash Course
explores Windows 8’s task management, networking and maintenance tools
Key points
·
Windows 8’s Task Manager has been completely
redesigned
·
Startup tasks can be managed from within Task Manager
·
Performance information is now easy to see
·
Networking has been made easier, and you can
still use Home Groups
·
Automatic maintenance helps keep Windows running
smoothly
Up to now, our Crash Course series has
concentrated on the parts of Windows 8 that you’ll regularly use. Here, in the
final installment, we’re going to roll our sleeves up and delve deeper inside
Microsoft’s latest operating system.
Task Manager
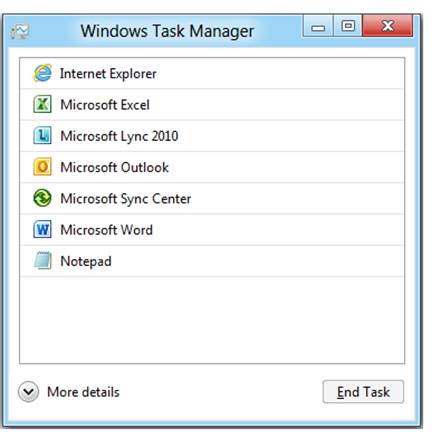
Windows Task Manager has always been a
useful troubleshooting tool, and in Windows 8 it has been redesigned to make it
even more helpful. To open Task Manager from the Start screen, click the
Desktop tile, right-click a blank part of the Taskbar, then choose Task Manger.
A small window will open, showing any open old-style (Desktop) or new-style
apps, including any that have crashed (indicated by a ‘Not responding’
message). To force an application to close, select it and click ‘End task’.
Only do this if normal ways to close a program don’t work.

Task
Manager has been completely redesigned
Click ‘More details’ to see a new tabbed
interface. The Processes tab shows everything that is going on inside Windows,
with columns to the right showing performance statistics.
Now click the Performance tab. At a glance
you can see exactly how busy the PC is, with live performance graphs for the
processor (CPU), memory, hard disk and network (Ethernet or wireless). For
example, click the CPU section to show how busy the processor is, along with
details such as the processor speed and how long the PC has been turned on (the
‘Up time’ figure).
Another addition is the Startup tab. It
lets you see which programs load when the PC starts. If a PC takes ages to
start, you should disable some programs to see if that speeds things up. Start
with programs labeled as ‘High’ in the Startup impact column.
Understand networking
Configuring and using networks in Windows 8
can be a little confusing, because the network-connection status is not
immediately visible from the Start screen. To view it, either open the Desktop
and click the network icon in the Notification Area; or from the Charms bar
(hold down the Windows key and tap C) choose Settings then click the network
icon to open a side panel that shows a list of networks.
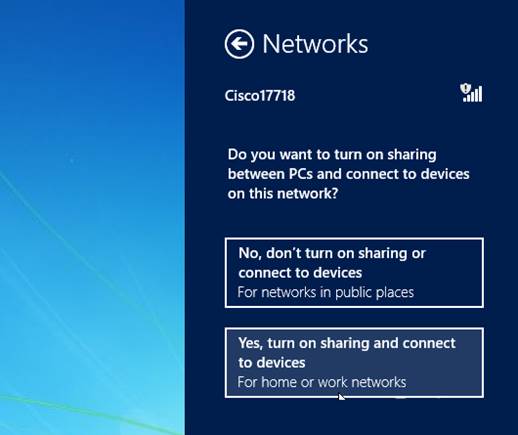
Right-clicking a connected network shows a
‘Turn sharing on or off’ option. Turn this on the share folders with other PCs
and make the PPPC visible on the network. Sharing should be turned off if the
computer is connected to a public network, such as a wireless hotspot. For
wireless networks, right-clicking the status icon shows options to monitor data
usage and set the network as a metered connection – these are useful for
monitoring a 3G broadband connection with a download limit.
HowGroups (first introduced in Windows 7)
simplify network sharing between PCs on a home network, allowing any Windows 7
or 8 PCs to share files, folders and attached printers with little fuss. To
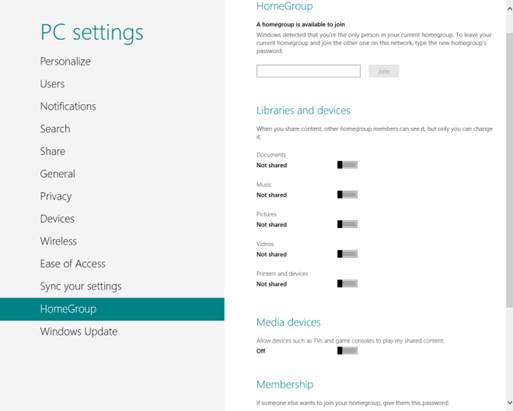
create, join or leave a HomeGroup, at the Start screen open Settings on the
Charms bar, then click Change PC Settings. Click HomeGroup then click Create
(if there is already a HomeGroup on another PC, click Join). The screen will
then show the sharing options for Libraries, printers and devices, with toggles
to turn sharing on or off for each item. The HomeGroup password, which other users
need to join the HomeGroup, is at the bottom of the screen.

It’s
now possible to disable startup items in Task Manager
XP and Vista PCs can’t join a HomeGroup,
but they can access the Public folders as long as password-protected sharing is
disabled. To do this, open File Explorer (hold down the Windows key and tap E),
select the Network section, and then click Properties in the ribbon menu. Click
‘Change advanced sharing settings’; then expand the ‘All networks’ section.
Select the radio button labeled ‘Turn off password-protected sharing’, and then
click ‘Save changes’. If prompted for a username and password when trying to
connect to Public folders from a Vista or XP PC, type any name in the username
box and leave the password blank – this is just an odd Windows quirk.
To change the sharing options for a
specific file or folder, even if it’s not in a library, open File Explorer,
select the item then click the Share tab. To stop all sharing of the item,
click the ‘Stop sharing button. Otherwise, choose whom to share it with in the
‘Share with’ box. To share with non-HomeGroup users, click ‘Specific people’.
In the dropdown menu, click Everyone, then Add. In the ‘Permission level’
column, choose Read to allow viewing, or Read/Write to allow changes.

Enable
sharing to allow PCs to communicate via a network
Maintenance
A new tool called Automatic Maintenance
automatically performs tasks such as antivirus scans, defragmenting the hard
disk and installing Windows updates.
To view and change the settings, open
Control Panel, then click ‘Review your computer’s status’. Expand the
Maintenance section by clicking the down arrow on the right. Automatic
maintenance tasks run at a set time each day if your PC is not busy. Click
‘Change maintenance settings’ to change the time. By default, the PC is woken
up from sleep mode to run Automatic Maintenance – clear the tick box to disable
this.
The main dialogue box also shows the
statuses of other maintenance items, including hard disks, driver software,
File History and HomeGroup. If there’s a problem, an alert shows up.

Change
HomeGroup settings in the PC Settings menu
Finally, a useful item is the Reliability
History chart – click the link labeled ‘View reliability history’. It shows
what problems Windows has detected during its lifetime, with an overall
reliability score out of 10. This helps highlight problems with new software or
hardware. Details can be viewed by clicking on a day in the chart.
Active tip
The new performance graphs in Task Manager
are very useful, but give only a broad overview of what’s happening on the PC.
To see more detail, click on the ‘Open Resource Monitor’ link below the graphs.
This launches a much more in-depth monitoring program that is great for
advanced troubleshooting.