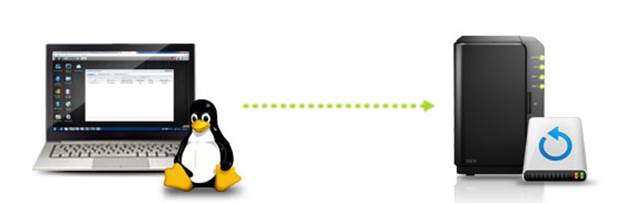
We have a look at backing up in Linux,
using lots of Tar
We have already
covered backing up in a previous How-To Basics, but on those instances we’ve
only concerned ourselves with the Windows environment. This time around, we
thought we’d have a look at backing up in Linux. However, there’s a bit of a
problem here because, as there are so many versions- or distributions
(distros), to use the correct term-of Linux around, that’s it’s night on
impossible, to cover very one. Certainly within the scope of this series.
Backing up Linux is a lot easier than
Windows
So, rather than
skimming the surface of multiple distros, we instead used Linux Mint 14 as
we’ve also covered the installation of this popular distro in an earlier How-To.
Backing up
Backing your data up is important. So
important that almost everyone forgets to do it or doesn’t do it
correctly. Here’s a thought, though: one of the biggest problems we come
across with new Linux users is that, after using their system for six months
(and as they begin to feel confident enough to tinker), they suddenly do
something wrong and render their OS unusable. It’s often only then then that
they realize they forgot about backing up.
The same goes for Windows user as well, but
new users to Linux seem to be an especially blasé when it comes to a decent
backup routine. Therefore, we’ll cover some of the basics here, and what in
–built programs can be used to the best efficiency, and by in –built we mean
the programs already available in the default build of Linux Mint 14.

Linux
Mint 14.
Tar
One of the simplest forms of backing up in
Linux is the Tar command. Basically, it will take a copy of everything on the
system (depending on what you specify) and compress it into a single file.
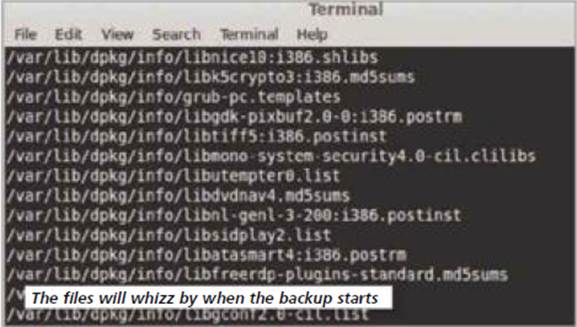
The
files will whizz by when the backup starts
Let’s say, for example, you want to back up
everything on the Linux system, excluding some of the folders that aren’t
really required in a normal backup. Then start by dropping into a Terminal and
becoming Root, by typing in the following command:
sudo su
After you’ve pressed Enter, type in your
root password, the one you decided on when you first setup Mint. Now we can
issue the command to back up everything, minus the folders that aren’t really
considered useful. Be warned, though, in this example a single, probably very
large file will be created because of the sheer amount of data you may have on
your system. We’re only using this as an example, so you can get the gist of
what’s going on. So, when you’re ready, enter the following into the Terminal:
tar cvpzf backup.tgz --exclude=/proc
--exclude=/lost+found --exclude=/home/david/backup.tgz --exclude=/mnt
--exclude=/sys /
On pressing Enter, this essentially uses
the Tar command to back up all the files from the root upwards, using the
options ‘cvpzf’ to create a new back up archive, verbose mode (print what it’s
doing on the screen), preserving permissions of the files put in to the
archive, compressing the backup with ‘gzip’ and specifying the name of the
archive (“backup”, in this case).
The command “-exclude=” specifies the
folders that you don’t’ want in the archive, including the actual backup you’re
creating (which is the “—exclude=/home/david/backup.tgz”) part of the command,
so substitute the ‘david’ part with your own user area.
After pressing Enter, the screen will start
to output the contents of the Tar command, and will look something like fig 1.
After a while, the command will most likely finish with an error ‘tar: Exiting
with failure status due to previous errors’, but you can ignore that as the
files are written into the archive (which you can see if you open up Nemo and
navigate to the root of the system). As you can see from fig 2, our archive,
backup.tgz is 2.4GB in size compressed from 5.3GB, and if you double-click it
you can read the contents and restore them individually via the graphical
splendour of Nemo, or you can enter a command into the Terminal, which we’ll
cover in a moment.
Create a backup Script
If all went well then you now have an easy
way to back up your system, providing you remember the command. What you could
do here is create a script. To start, drop into the Terminal again and type:
gedit backupMint, then press Enter.
This will launch the text editor Gedit,
with the filename ‘backupMint’. In Gedit, type the following as the first line
of the text file:
#! /bin/bash
Press Enter a couple of times, leaving an
empty space, then enter the following:
sudo tar cvpzf backup.tgz --exclude=/proc
--exclude=/lost+found --exclude=/home/david/backup.tgz --exclude=/mnt
--exclude=/sys /
Remember to rename the ‘/home/david’ part
to your own home area. Click on the ‘Save’ button and exit Gedit so you’re back
to the Terminal. Now type in the following command to make the file you’ve just
created executable:
chmod 755 backupMint
And press Enter.
What you’ve just done here is create a
Linux Shell Script, which is kind of like a windows batch file. Linux, however,
isn’t fussy about file extensions as it simply looks at the file permissions
and whether or not it’s executable.
This means that your new script is an
executable file that can be run by simply typing ‘backupMint’ into the
Terminal, then entering your password, which sure beats having to re-enter the
entire command over and over again. Plus, if you decide to alter the
destination, or include/exclude some extra folders, then altering the script is
far easier than the other options available.
Restoring
Now that the backup is complete, you have a
couple of choices in front in front of you. You can either, as before, open the
backup from the graphical file manager and navigate it that way to restore
individual files and folders, or you can enter the following into the Terminal:
sudo tar xvpfz backup.tgz –C /, and press
Enter.
This will, of course, overwrite every file
on your system in one go, so it’s best to treat it with an element of caution.
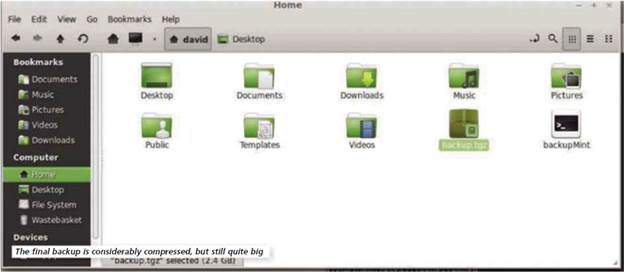
The
final backup is considerably compressed, but still quite big
Other Distros
If you’re using another distro, such as
Arch, then take look at this great backup wiki for a full system backup using
Tar: goo.gl/G5OiE. There’s also a very informative how-to to be found at
goo.gl/G561H, which goes into creating a shell script.
Tar is a very powerful tool, which can be
used to back up everything. If you want to spruce up the command, and mix it
with the script, then consider creating a schedule with Crontab, naming the
file with the current time and date, and having it automatically copied to a
backup drive elsewhere on your system or network.