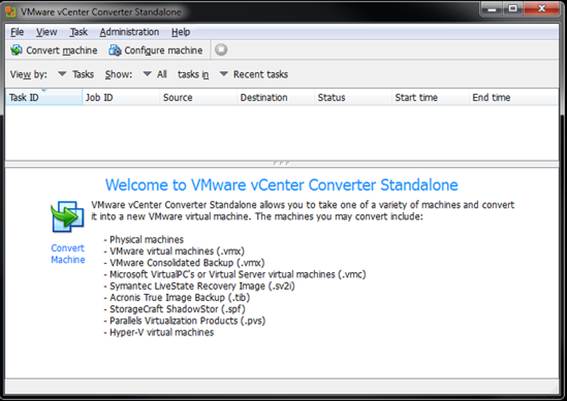
Step 6
There will be a slight delay while the
computer is analyzed. Once this is done, select the ‘VMware Workstation or
other VMware virtual machine’ option from the dropdown menu. From the next
dropdown menu, leave ‘VMware Workstation 8.0.x’ selected and then, in the Name
field, type in a suitable name for the resultant virtual computer. Click the
Browse button to choose where the virtual computer should be created and click
Next to continue. Bear in mind that your existing PC setup may occupy a lot of
room – an external hard disk might be required here.

From
the next dropdown menu, leave ‘VMware Workstation 8.0.x’ selected and then, in
the Name field, type in a suitable name for the resultant virtual computer
Step 7
If you have multiple drives or partitions
installed, you may decide that you do not want to include all of them in your
virtual machine. Select the ‘Data to copy’ option in the central column of the
dialogue box and tick the boxes next to the drives you are interested in on the
right. You should also ensure that the options labeled ‘Ignore page file and
hibernation file’ and ‘Create optimized partition layout’ are ticked. You
should then click Device in the list beneath the ‘Data to copy’ entry.

You
should then click Device in the list beneath the ‘Data to copy’ entry.
Step 8
There are a series of settings relating to
the virtual machine that is about to be created, but you need not concern
yourself with most of them. However, one area that should receive your
attention is memory. In the Devices section, select the Memory tab and use the
up and down arrow buttons in the right-hand pane to specify how much physical
memory should be allocated to the virtual computer – this can be adjusted later
if necessary. If your new PC has, say, 8GBof memory and you allocate 1GB to the
virtual computer, and then the new PC will have to make do with 7GB of memory
when the virtual computer is running. When you have done this, click the Next
button at the bottom of the screen.
Step 9
A summary screen will appear to show the
chosen settings. If you spot anything that is incorrect, click the Back button
at the bottom to make any necessary changes. Once happy with everything, click
the Finish button to continue. You will now have quite a wait on your hands,
because the converter tool has a large amount of data to copy. Just how long
the process will take will depend on how many files you have and how many
applications you have installed on your PC.
Step 10
Vcenter converter will display an estimate
of how long the creation of the virtual PC is going to take. As mentioned, this
will vary from one computer to another, but expect it to take a good few hours.
During this time, avoid using the computer, as problems may arise. In the
meantime, turn to your new computer.

Vcenter
converter will display an estimate of how long the creation of the virtual PC
is going to take
Step 11
Once the download is complete, double-click
the file to start the installation. There are no options you need to worry
about, so just keep clicking Next to work your way through the installation
wizard. Near the end, click Continue, wait for the installation to complete and
then click Finish. Now launch the program by double-clicking the shortcut icon
that has been placed on the Desktop.
Step 12
On the new computer, launch a web browser
and visit www.vmware.com. Now click the Products tab and scroll down the page
to find the Free Products section – click the Free Download link to the right
of the Player entry. Click the top-most blue Download button and then save the
file to the Desktop.
Step 13
The first time vmware player is launched
you will need to agree to the license agreement, so do so. Next, you will need
to transfer the virtual machine from the old computer to the new one. If both
computers are connected to the same network, copy from one machine to the other
or transfer using an external hard disk. With the file copied to the new
computer, click the ‘Open a Virtual Machine’ link.
Step 14
Browse to the folder containing the .vmx
file created by the converter tool; select it and click the Open button. The
virtual machine will be added to the list that appears to the left-hand side of
the program window. To start using it, click to select it and click the ‘Play
virtual machine’ link on the right. Your old computer will then appear in a
window on the new PC and should work just the way it always has.