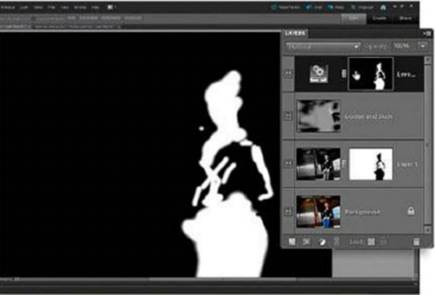
11. Invert the mask
Press Ctrl+I to Invert the Levels
Adjustment Layer's mask so that the girl's shape is white, while the background
is black. These white strokes will enable the Levels Adjustment Layer to change
the tones of the girl without altering the carefully dodged and burned tones in
the rest of the image.
Invert
the mask
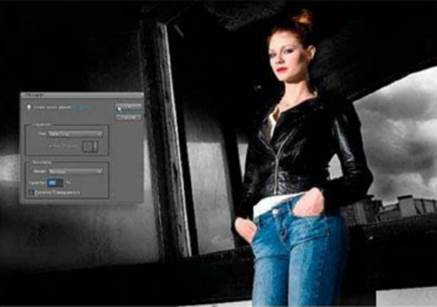
12.
Adjust the levels
Click on the Levels Adjustment Layer's
thumbnail (the little cog icon) to see the Image layer. In the Levels
adjustment panel drag the grey slider left to 1.24 to lighten the girl's
midtones. Drag the white slider left to 236 to brighten her highlights and help
her stand out against the dark background.

Adjust
the levels
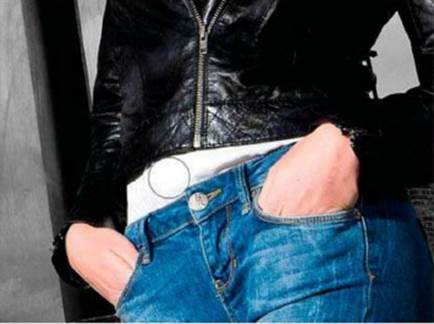
13. Restore clipped highlights
The highlight Levels adjustment brightens
up our subject and gives her more impact, but her white shirt has become
clipped. To restore detail to the shirt's blown-out highlights, grab the Brush
tool from the Layers palette. Set Opacity to 50%. Now click on the mask and
spray grey strokes on the shirt.
Restore
clipped highlights
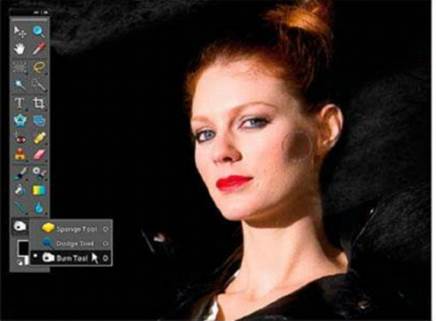
14. More modeling
To emphasise the contours of the girl's
face, increase the contrast between the shadows and highlights. Grab the Burn
tool and set Range to Midtones and Exposure to 15%. Set Size to 90 pixels.
Click on the grey Dodge and Burn layer. Spray over the shadows on her neck and
cheek to darken them.
More
modeling
15. Reduce saturation
The model’s colours are a little too
vibrant. To create a more subtle colour palette choose Layer>New Adjustment
Layer>Hue/Saturation. Drag this Adjustment Layer to the top of the layer stack.
In the adjustment panel, drag the Master Saturation slider down to -21. This
creates a moodier look.

Reduce
saturation
16. Go grey
To 'rough up' the clean digital image and
give I O the whole thing a more filmic look, choose Layer>New>Layer. In
the New Layer window, name the layer 'Grain' and click OK. Next, go to
Edit>Fill Layer. In the Fill layer window set the Contents Use drop-down
menu to 50% Grey. Click OK.
Go
grey
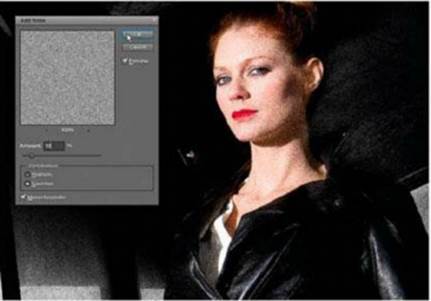
17. Make some noise
Set the Grain layer's Blending Mode to
Overlay I / so that the neutral grey pixels become invisible. Go to
Filter>Noise>Add Noise. Set Amount to 10%. Tick the Monochromatic box.
Click OK to apply the noise to the layer. At this stage the noise doesn't look
like film grain, but we'll fix that in the final step.
Make
some noise
18. Create film grain
Go to Filter>Blur>Gaussian Blur. Set
the Blur Radius to 1.0 and click OK. This turns the sharp dots of noise into
more organic-looking clumps of grain. To see the grain more effectively, grab
the Zoom tool and click to view at 100%. For a more subtle effect, reduce the
Grain layer's Opacity to 70%.

Create
film grain
Learn the lingo
Overlay
The Overlay Blending Mode makes pixels that
have a 50% grey value become transparent. By using the Burn tool to make the
grey pixels become darker, you can darken pixels on the layers below. This
enables you to burn a picture's pixels in a nondestructive way, as you can
hide or delete the grey layer and restore the image to its original tones at
any time.
Dodge and Burn
Traditional darkroom photographers were
able to vary the tones In their monochrome prints by changing the amount of
light that hit particular parts of the photo paper during the development
stage. By holding a piece of card in front of certain areas they could
selectively reduce exposure time and burn in darker tones. By creating holes in
the card they could Increase exposure time and dodge in brighter highlights.
Tips
When spraying a black or white brush on a
Layer Mask to reveal or hide the attached layer’s pixels, tap the right square
bracket key to increase the brush tip’s size so that you can edit a larger
area. If fine-tuning fiddly bits, tap the left square bracket key to shrink the
brush tip. The tip’s size will be displayed in the options bar.
In step 12, we used a Levels Adjustment
Layer to brighten up the girl while leaving the rest of the shot’s tones
untouched. To quickly reduce the intensity of the adjustments, simply click on
the Levels Adjustment Layer’s thumbnail and reduce its Opacity to 80%. The
non-destructive nature of Adjustment Layers enables you to fine-tune your edits
with ease.
Because you’ve dodged and burned on a
separate layer you have more control over the image’s tonal range. You can
click on the Dodge an Burn layer at any time and continue fine-tuning its
highlights, midtones or shadows safe in the knowledge that the Background
layer’s original tones remain untouched. Click on the Dodge and Burn layer’s
eye icon to toggle it on or off to compare the edited tones with the original.