We reveal how to use the Clone Stamp and
Healing Brush to remove distracting elements

Use
cloning to clean up coastal scenes
What you’ll need
Photoshop Elements 9 or above
What you’ll learn
How to the Clone Stamp and Healing Brush
tools to seamlessly tidy up unwanted objects and blemishes in your images
It only takes
20 minutes
When shooting a landscape at sunrise or
sunset, you’ll have a small window of opportunity to capture the scene in the
opportunity to capture the scene in the optimum light. This means that you have
less time to compose the shot carefully so that you exclude distracting
objects, such as the post on the right of our start image. You will also have
little time to physically remove bits of distracting debris that’s been washed
up on the shore.
Here, we’ll show you how to overcome
composition and content problems with help from the Clone Stamp tool, which
enables you to sample details from one part of an image and relocate them to a
new location, hiding unwanted objects with appropriate pixels. We’ll also give
you tips on how to clone with more control, so that you can tidy up your images
quickly and effectively.
To capture sharply focused detail in a
landscape’s foreground and background, you’ll need to use a small aperture
value such as f/22, though this can exaggerate sensor spots. These unsightly
smudges are especially noticeable in areas containing relatively little detail,
like the sky in our watery landscape. When shooting near water you may also get
droplets on the lens, which can add other distracting lens-related artefacts
such as blobs of flare. We’ll show you how to banish ugly artefacts such as
sensor sports with the Clone Stamp’s cousin, the Spot Healing Brush.
When you spray this dust – busting tool on
a sensor spot, it automatically samples adjacent pixels and places them over
the artifact to hide it. The sampled and relocated pixels are carefully blended
with their new neighbours to create a seamless edit. Read on to find out more…
1. Open the start file
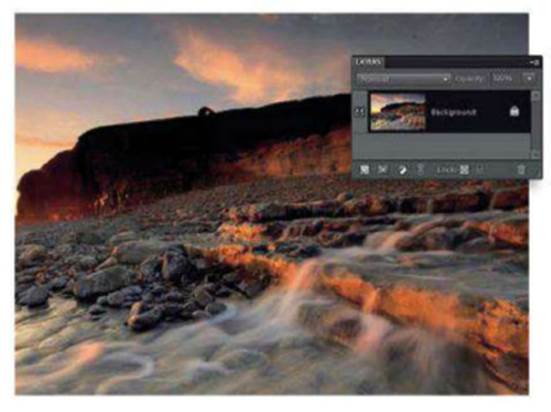
Click on the link (below) to download the
Basics folder. Go to File>Open, browse to the folder and click on the
cloning_before.jpg icon to select it. Click Open. The photo will open in
Photoshop Elements’ Full Edit workspace. If it’s not already visible, choose
Window>Layers to open the Layers palette.
2. Zoom right in
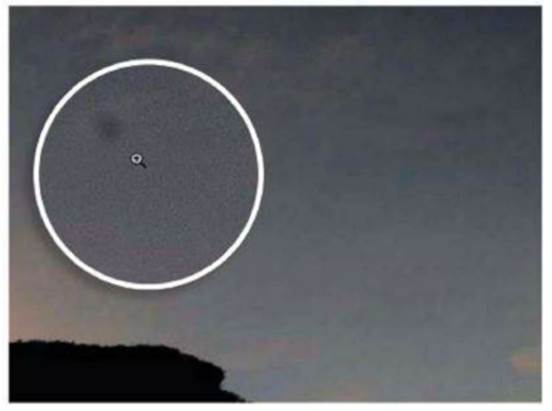
We’ll kick off by eradicating unsightly
sensor spots. Choose the Zoom tool from the Tools palette. Click the 1:1 icon
in the options bar to view the shot at full size. Hold down the spacebar to
temporarily evoke the Hand tool and click/drag the mouse to view the sensor
spot at the top right.
3. Create a new layer

Click the Create a New Layer icon at the
bottom of the Layers palette. Double-click on the new layer’s name and re-label
it Sensor Spots. Choose the Spot Healing Brush tool from the Tools palette.
Click on the Brush Preset picker in the options bar and choose a hard-edged
tip. Set Size to 70 pixels.
4. Adjust the options

In the options bar, set Type to Proximity
Match and tick the Sample All Layers box. This enables you to sample pixels
from the Background layer and then place them on the new transparent layer. By
healing onto a separate layer you can tidy up any mistakes far more easily.
5. Hide the spots
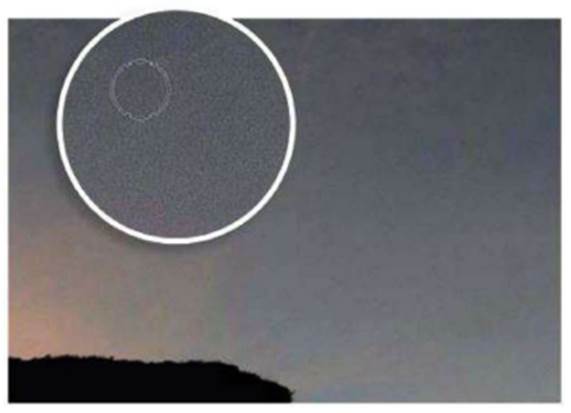
You can now place the brush tip over the
sensor spot and click. The Spot Healing Brush will automatically sample
adjacent sky pixels, place them over the spot and then blend the edited area
with its surroundings. You may need to click and spray again if the spot
doesn’t vanish straight away.
6. Clean up the sky
Use the Hand tool to find more sky- based
sensor spots and hide them with a few clciks of the Spot Healing Brush. To
remove smaller spots, tap the left square bracket key to shrink the brush tip’s
size. To remove unwanted objects overlapping more complex areas, you’ll need to
switch to the Clone Stamp tool.
7. Set up the Clone options

Create a new transparent layer in the
Layers palette called Clone Stamp, then choose the Clone Stamp tool from the
Tools palette. In the options bar, tick the Aligned and Sample All Layers
boxes. Click on the Clone Overlay icon at the right of the options bar and tick
Show Overlay and Clipped.
8. Sample a clean area
Choose a brush with a 100-pixel tip from
the Brush Present picker. Hold down Shift and tap the right square bracket
twice to give the tip a harder edge. Move the cursor to the left of the
unwanted building and Alt-click to sample the cliff top. Place the brush tip’s
preview overlay on the building.
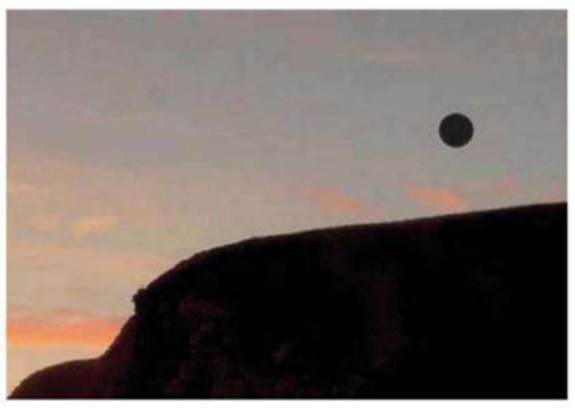
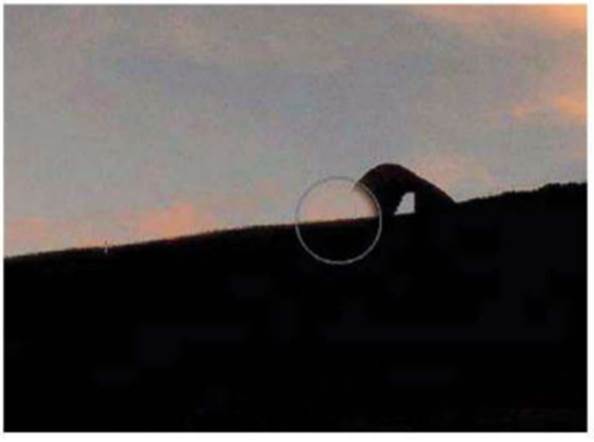
9. Clone out the building
If the overlay shows that the sampled cliff
top doesn’t align with the cliff and sky at the new location, Alt-click to
sample the image again. Once you’re happy, click and spray the sampled pixels
and relocates them inside the brush tip.
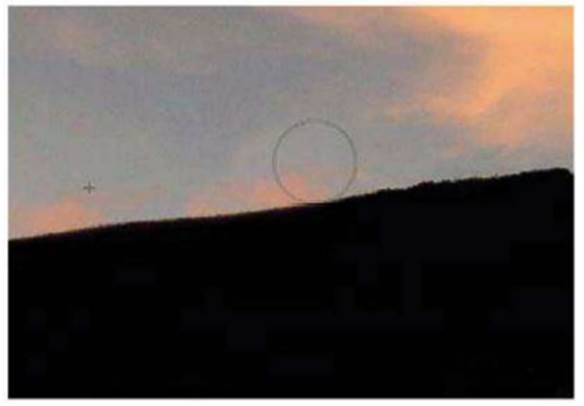
10. Remove the
post

Alt-click the Clone Stamp to sample a clean
patch of cliff top adjacent to the post at the right of the frame. Spray the
sampled pixels over the post to hide it. The relocated clouds might look a bit
messy, so choose the Spot Healing Brush and spray it over the clouds to tidy
them up.
11. Remove the
flare

Zoom in to the orange flare patches on the
left of the image. Choose the Clone Stamp. Alt-click to sample clean rock and
spray it over the blown-out flare. As the three lighter orange patches retain
detail, choose the Sponge tool, set it to Desaturate and spray to remove the
colour in these areas.
12. Finishing
touches

Alt-click with the Clone Stamp to sample
clear patches of rock or water and spray them over distracting bits of driftwood.
If you obscure important details, use the Eraser tool to remove problematic
pixels from the Clone Stamp layer. Don’t remove all the wood, as it adds
important colour and texture.
Learn the lingo
Sensor
spots
Specks of dust can get onto your camera’s sensor
when you change your lens. These specks can show up as small dark smudges in
your photos, especially when shooting with a narrow aperture setting. Many SLRs
enable you to expose the sensor so that you can dislodge dust particles with a
blower brush. This operation can save you the hassle of dust-busting in
Photoshop.
Aligned
When you Alt-click on an image to sample
pixels with the Clone Stamp tool, you can make sure that the sampled area (the
cross-hair) always stays in the same relative position to the cloned area (the
brush tip) by ticking the Aligned option. If you untick Aligned then the tool’s
sampling cross-hair will always jump back to the area that you initially
sampled, regardless of where you actually place the brush tip.
Expert tip
“When trying to find and remove sensor
spots from a photo, you can get confused if your computer’s monitor is also
dusty. If you don’t have a dedicated LCD wipe, zoom in to the image and use the
Hand tool to slide the shot around. This will help you differentiate between
image dust and screen dust”.
“When using the Clone Stamp, keep
re-sampling new adjacent areas to add variety to your cloned sections. Don’t
sample too close to the area that you want to clone as this can create
noticeable repeating patterns. You’ll also run the risk of sampling and
repeating the ibject that you want to clone out. Avoid sampling and cloning
objects that are too distinctive, as they will give the game away that the shot
has been edited”.