Compiling a list of cool digital photography
techniques and tutorials is no easy job. The first challenge is to figure out
what’s cool, and what’s not! Once you’ve figured that out comes achieving the affects
you think are cool. Almost always, there are more than a few different methods
to achieve the same effect. We’ve listed out 25 of our own personal favourite
photography techniques, or should we say 25 shots you must try out if you’re a
photography enthusiast.
1. Diorama/miniature effect
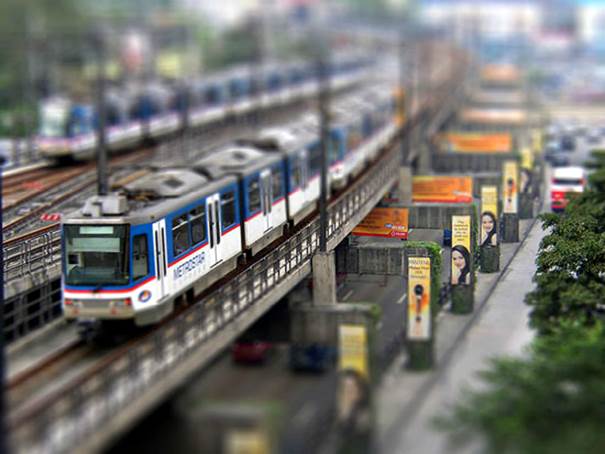
The Diorama effect is a process in which a
photograph of a life size location or object is made to look like a photograph
of a miniature scale model. Blurring parts of the photo using selective focus
simulates the shallow depth of field normally seen in close-up photography,
making the scene seem much smaller than it actually is. The blurring can either
be done optically when the photograph is taken or by digital post-processing.
Miniatures can be simulated optically by using the tilt function in a
tilt-shift lens, although the effect is somewhat different from the shallow
depth of field that normally results from close-up photographs.
2. Cross processing

Cross processing was the procedure of
deliberately processing photo-film in a chemical solution intended for a
different type of film. Images processed like this are often seen in fashion
advertising, and in more recent years has become associated with the Lo-fi
photography movement. Colour cross processed photographs are often
characterised by unnatural colours and high contrast, and these effects can be
simulated in digital photography by a number of techniques involving the
manipulation of contrast/brightness, hue/ saturation, and curves using image
editors such as Adobe Photoshop or GIMR
3. High speed photography
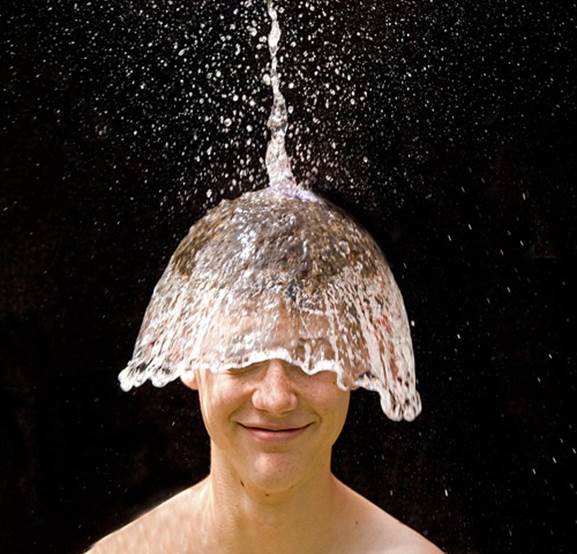
As the name suggests, this deals with
taking pictures of very fast phenomena. It can loosely be defined as a set of
photographs captured by a camera capable of 128 frames per second or greater,
and of at least three consecutive frames. The primary requirement is that the
photograph must be taken in a way as to appear to freeze motion completely,
eliminating any possibility of motion blur. Imagine a water droplet being
photographed as it falls and hits a surface. In order that such an image shows
any significant detail of what becomes of the water droplet as it falls and
hits the surface, high speed photography techniques must be employed.
4. Lomography
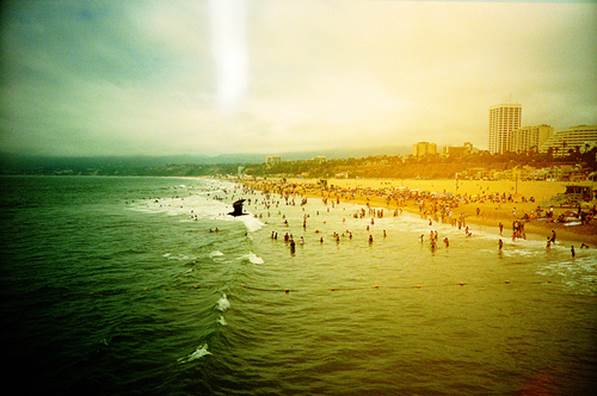
Lomography is an analogue camera movement
and community advocating creative and experimental film photography. It is also
a commercial trademark of Lomographische AG. The Lomographic Society
International was founded in 1992 by a group of Viennese students afterthey
discovered the Lomo LC-A camera created by LOMO PLC of Saint Petersburg,
Russia. While it is possible to simulate the look created by Lomo cameras using
some of the popular image editing software available today, clicking a picture
with a Lomo camera and film is the real deal!
5. Colouring black and white pictures
While purists might not like the look of
colourised black and white photographs, the ability to add colour to black and
white images is indispensible and simple. If nothing, it'll at the very least
help you restore and colourise old black and white pictures. While this effect
doesn't look natural, and almost always won't look like a regular colour
photograph, it is great if you like a retro look and can be good fun on old
pictures.
6. Polar panoramas
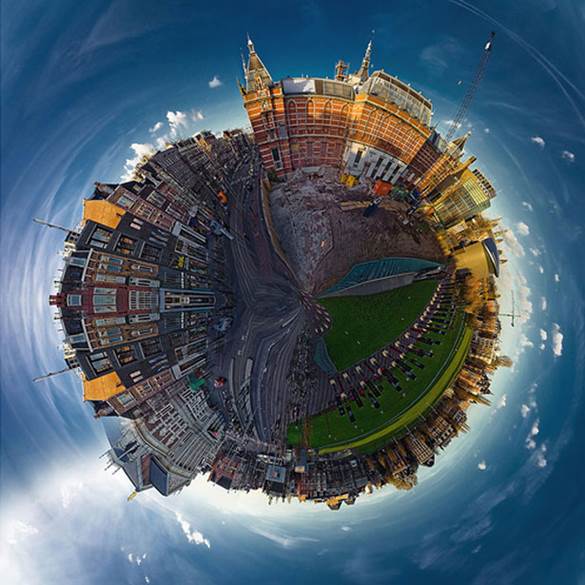
A polar panorama can make a 360 view appear
almost as a planet. Using image editing software, it is possible to create a
circular or round image of a 360 degree panorama image to make it appear like a
small planet. Such an image makes a great print at any standard dimensions, and
also helps avoid the problem of printing and framing long, thin panoramas.
7. Dragan effect/dramatic portraits
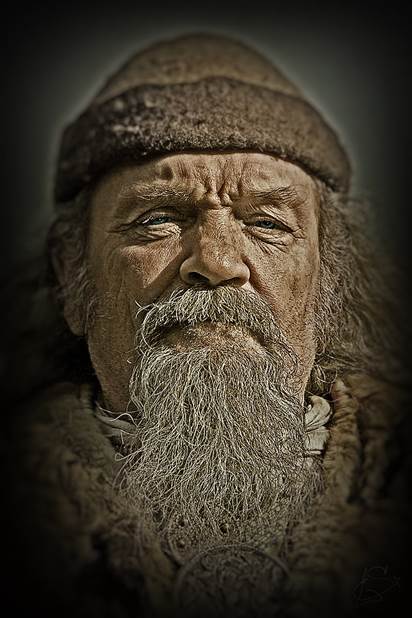
If you're a photo buff and have come across
the amazing work of Andrzej Dragan, his portraits have a very high contrast and
a colour style unlike the standard portraiture you'll see. The effect is eye
catching and dramatic. Similar effects can be created with the image editing
software available today with just a few simple steps.
8. Vintage effects
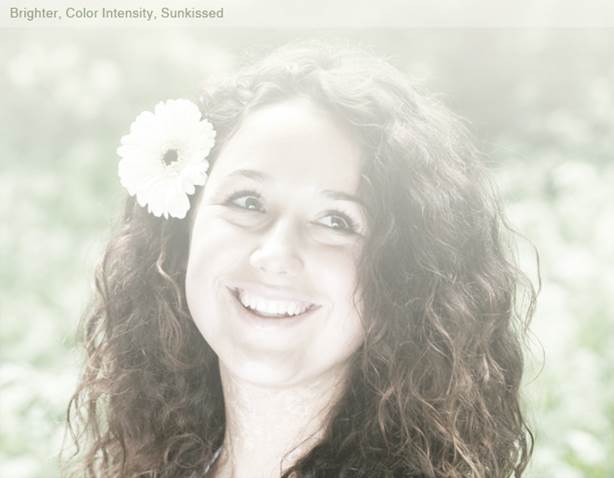
Recreating your photos in a vintage style
is easy. If you're adept at using image editing software, simulating old camera
effects is simple. Even if you aren't, plenty of free software are available,
that'll turn your existing pictures into vintage style photos with the simple
click of a button. Software such as Picassa, applications like Instagram for
smartphones are all capable of doing this, and fairly well too!
9. Droste effect

The Droste effect is the effect of a
picture appearing within itself, in a place where a similar picture would
realistically be expected to appear. The appearance is recursive; the smaller
version contains a smaller version of the picture, and so on. This could go on
forever only in theory. Practically, it continues only as long as the
resolution of the picture allows. The effect is named after the image on the
tins and boxes of Droste cocoa powder, a Dutch brand, which displayed a nurse
carrying a serving tray with a cup of hot chocolate and a box with the same
image on its cover.
10. Manipulated
smoke photos
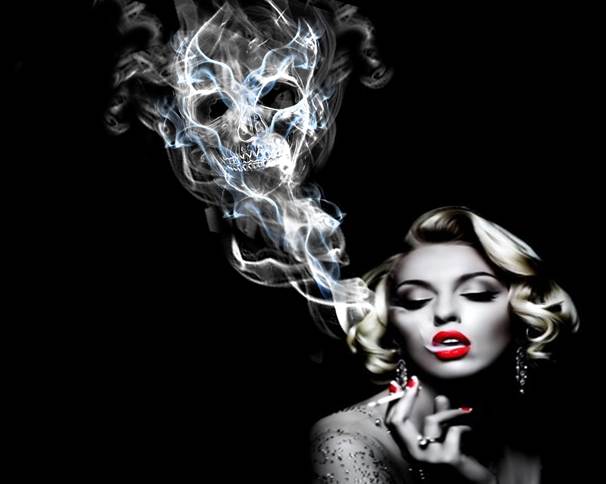
At the outset, smoke might not necessarily
seem like a very interesting subject to shoot, but once you try shooting smoke,
you'll realise that it is a mysterious subject to shoot, giving you surreal
images, and it is almost impossible to know what exactly you'll end up
capturing until you look at the display after your shot has been taken. The
possibilities of using different techniques while shooting smoke are endless.
Combining smoke creatively with props or using it with graphics makes for
interesting images. Try some of your own ideas with smoke.
11. Long
exposures/light trails
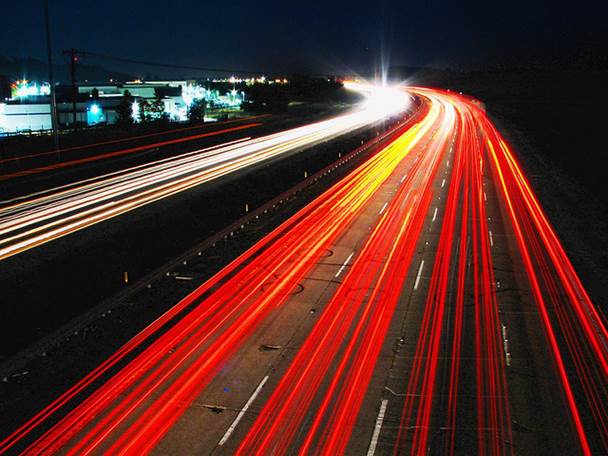
Long exposure is a simple technique
involving a relatively long-duration shutter speed to sharply capture
stationary elements within an image while blurring the moving elements, making
the paths of the moving light sources clearly visible.
12. Light
painting

This technique is closely related to the
previous long exposure method. Light painting requires a slow shutter speed,
usually a second or more. In this technique, exposures are made by moving a
handheld light source or by moving the camera. By moving the source of light,
it can be used to selectively light up portions of the subject or even to
“paint” a picture by shining it directly into the lens of the camera.