Preview and share your Cliplet
Click the Play button located beneath the
video window and your footage will be rendered for you. If you’re happy with
the results, you’re ready to save your completed project. If not, you can
continue editing and previewing your video until you produce the results
you’re looking for. It’s worth spending a little time on this to get the best
possible Cliplet.
You’ll find that Cliplets makes it very
easy to create something truly eye-catching, and you’ll no doubt want to share
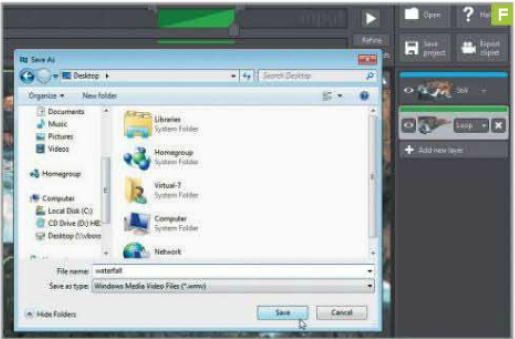
your creations with others. Click the Export Cliplet button in the upper right
of the screen, enter a suitable name, and use the "Save as type"
drop-down menu to choose a video format to save the file in (image F), or
choose to save it as an animated GIF. It’s now ready to post online or email.
image
F
Clean Up Your Hard Drive with DrivePurge
You’ll need this
Drivepurge: A free, portable hard drive
cleaning utility from bit.ly/nmBRSL.
Although hard drives are now bigger and
cheaper than ever, you may be surprised by just how much unnecessary garbage is
cluttering yours. While the chances of running out of space are lower than they
have been in the past, an untidy hard drive is still less efficient than a neat
one, and can slow down the overall performance of your computer.
DrivePurge is a fantastic, free maintenance
tool that will not only tidy up all the unwanted files that accumulate
overtime, but can also help protect your privacy by cleaning up the data stored
in your PC’s log files and registry. You’ll be amazed at how much useless data
is filling up your hard drive! Try the tool out for yourself to see how much
space you can save.
Download and Install
For the download, navigate to www.qaiiin.at/en/dldrivepurqe.php.
Beneath the Download heading, click Download. DrivePurge is provided as a compressed
RAR file - on the off chance that you don’t already have a program capable of
extracting .rar files, we recommend 7-Zip, available for free at www.7-zip.org/.
Extract the DrivePurge RAR. The program
doesn’t require an install, so you’ll be able to run the executable directly
from the folder you extracted to. Right-click it and select Run as Administrator
to get started with the program.
Configure Drivepurge
Click Yes in the User Account Control
dialog and DrivePurge will load. It will start in German mode at first, so
select the Extras menu and then click Sprache / Language followed by English
(image G).

image
G
Click OK and then close and restart the
program in the same way to activate the new setting.
Before deleting any files, click the Extras
menu and select Settings. Now move to the System Cleanup tab and check the box
labeled "Move files to the Recycle Bin (if possible)" before doing
the same on both the Drive Cleanup and User Tracks Cleanup tabs. Click OK when
this is done.
Clean up your system
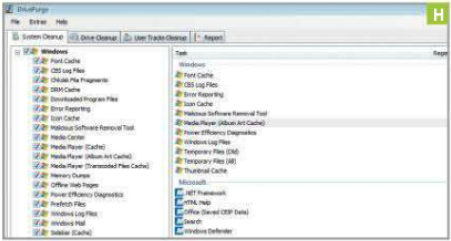
On the System Cleanup tab, check the boxes
to the left of the Windows, Microsoft, and Applications labels to select all
of the options, and then click the Analyze button at the bottom of the screen.
When the results of the drive search are shown (image H), click the Cleanup
button to the bottom right, followed by OK to delete them.
image
H
If you change your mind about deleting a
particular item in the list, you can right-click its name and select the Remove
Job option. Once this is done, you’re ready to move to the Drive Cleanup tab.
To the left of the screen you’ll see a list
of all the hard drives inside your computer. Check each of them, make sure that
All is selected from the drop-down menu to the right, and check all of the
boxes below. Click Analyze, and once the scan has been performed click Cleanup
followed by OK. Now move to the User Tracks Cleanup tab to protect your
privacy.
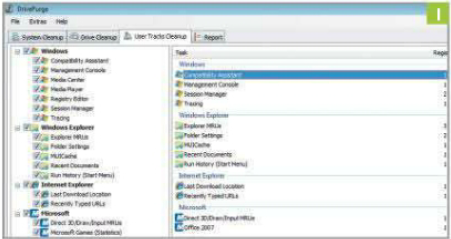
In addition to saving space, DrivePurge can
also be used to protect your privacy by cleaning up traces of your past
activities. In the same ways as before, you can check all or just some of the
boxes on the left (image I) before clicking Analyze and then Cleanup, this time
to remove logs stored by programs. Work through these tabs on a regular basis
to free up space and clean logs.
image
I