Adobe Illustrator CS6 makes pattern
generation groovier than ever
It’s been a while since we looked at
pattern generation here, and there’ve been some interesting changes in a
coupled of the core tools. Both Illustrator CS6 and Photoshop CS6 have improved
pattern-creating abilities, so if you want to make smoothly tiling step and repeat
graphics, check them out. Let’s talk about Illustrator first, since that’s what
I’ve looked at most recently; I’ll leave Photoshop for another day.

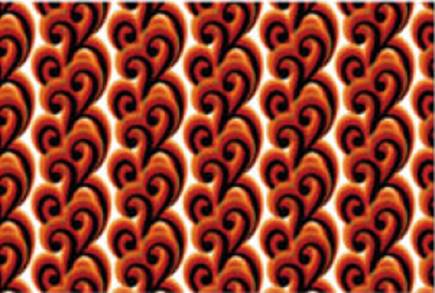
My
eye! Certain repeating patterns have very odd effects on the human brain.
They’re cool, but probably not the best ones to pitch to Graham & Brown
All repeat pattern processes involve one or
more of three core steps of translation, reflection and rotation. Translation
is just a fancy term for ‘copying and moving’, and you can do this in Illustrator
by Alt-dragging an object on your page with Shift pressed as well, perhaps, to
keep things neatly constrained. If you want numeric control, choose Object >
Transform > Move and type in some numbers. Remember to click Copy rather
than OX or you’ll just move your original object instead of duplicating it.
Scroll
or nothing: You can really go to town with patterns if you don’t have to do it
all manually
Reflection is done with the Reflect tool,
tucked in with the rotate tool. Click where you want the reference point to be
and then click and drag anywhere. The reflection happens along the virtual
mirror line that spins around the reference point, and if you hold down the Alt
key before you let go, you’ll get a reflected copy of the original item.
Rotation is simple: click to place the
reference point, then drag anywhere to spin the item, remembering to hold down
Alt before you let go so you get a duplicate. At this point, the Transform
Again command (Object > Transform > Transform Again, or Cmd-D for short)
is perfect for building up the rotation repeat. And the very next thing you’ll
probably hit is the difficulty of getting your first rotation precise enough so
the repeat ends up perfectly aligned with the start.
What’s needed for proper precision is a way
to dial in specific rotation amounts. If you hold down the Alt key while you
click to place the reference pin point, you’ll open the Rotate dialog instead
of dragging the graphic around by hand. How many items do you want in the full
repeat circle? Divide 360 by that number, and that’s what to type into the
Angle field. As always, click the Copy button to spin a fresh copy, then
Transform Again until you have enough.
Manual translation reflection and rotation
are ways to create the core part of a repeat pattern. The next step is to set
up the big repeat. The old way is to drag your graphics into the Swatches panel
to add a new custom pattern swatch to the list; draw out a large rectangle and
pick this new swatch as the fill. Job done! However, you may want some proper
control over the way the parts repeat. This method doesn’t give you the
opportunity to play with offset from one repeat part and the next, or with the
way the pattern directions go. The old way of doing this meant making the whole
repeat array by hand, ending up with a ton of individual graphics all over the
page. It works, but it’s a bit of a messy, long-winded route. Fortunately, one
of the features added to Illustrator CS6 makes this stage much, much simpler.
The Pattern Options panel adds some
sophistication and control to the process. Choose Window > Pattern Options,
select the items you want to use, the pick Make Pattern from the floating
window’s pop-up menu. This puts the whole Illustrator document into a dedicated
pattern-editing mode; the selected objects are added to a new swatch already,
but anything that’s done from now on will update this.

Get
the Hex bug: Illustrator CS6’s Pattern Options panel offers much more
sophisticated pattern design options. The Hex Tile Type, for example, creates a
chicken-wire-like hexagonal array that would be tedious to create any other way
In the Pattern Options window, Tile Type is
where the magic starts to become clear. Grid is the normal horizontal and
vertical repeat, but the two Brick variants let you play with off-setting every
other row (or column) by halves, thirds, quarters or fifths at a time. Breaking
the habit of traditional horizontal and vertical arrays, the Hex choices string
out the objects in one direction (column or row) and use another two facets
either side for the rest.
The width and height fields are the size
and edges of the repeat boundary. These start life at the outer edges of the
graphics, but reducing them creates overlap and a visually linked result. If
numbers aren’t your thing, you can click the small Tile Tool button in the
top-left of the window and drag the tile boundary around directly.
What makes this pattern mode really
interesting is the fact that everything’s still fully editable. Slide different
items around, change fills and opacity, use the Direct Selection tool to tweak
paths; the changes are all shown live in the ghosted copies as you go. Anything
that’s even partly inside the pattern tile boundary is included in the tile
pattern. Even more usefully, you can play with all the rotation, reflection and
other repeat tricks you like, and the full repeat effect is shown as you go.

Going
in circles: The Rotate dialog lets you rotate an element by a precise amount
Why not start in pattern-editing mode right
from the start? Begin with a blank slate and build the design while watching
exactly how it’ll play out when multiplied as a fill: all you have to do is
open eh Pattern Options window and choose Make Pattern without having anything
selected. Oh, but first copy anything you might want from the current document,
as you’ll be locked into pattern mode once you do that. Then paste, and play.
Seeing how the repeat behaves makes it much easier to make sure things fit as
you want. When you’re done, exiting the pattern editing mode drops you back
into normal Illustrator life with everything as it was when you began. All your
hard work is safely stored in that pattern swatch.
You can still edit a pattern after it’s
been made. Apply your pattern as a fill to some object, open the Pattern
Options window, and with the filled shape selected, choose Edit Pattern from
the window’s pop-up menu. This jumps straight back into the pattern editing
mode, ready for further work. Or, rather, play. My surface design students love
it, even the ones with an aversion to computers, so it really can’t be work.