Find your documents faster with
color-coded labels
You have physical labels, tabs, and other
forms of organization in the real world, but what about the digital world of
your Mac desktop? Sure, you may use an app for that, but there’s a little-known
feature that gives you the same flexibility in organizing your files and
folders in the Finder. Labels are OS X’s way of visually organizing and tagging
your files for future use, and we’ll quickly show you how to label your files
and folders, and then search for them using their labels.
What you need
A Mac
Files to organize
1. Customizing the Labels
Customizing
the Labels
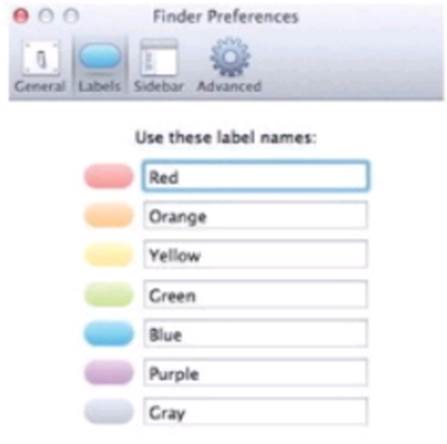
You can customize the meaning of the labels
by opening Finder > Preferences (or by pressing Command +, [comma]). Select
the Labels tab; here you can change all the label names for the seven different
color labels. They can be as general or as specific and descriptive as you
wish.
2. Labeling your files and folders

Labeling
your files and folders
To label a file or folder, right-click on
the file or folder in the Finder (or open the Get Info panel by selecting the
file and pressing Command + I), and select the color that you wish to use to
describe that file in the ‘‘Label’’ section. The filename color in the Finder
will then turn to match the label that you have selected. If you change your
mind about the label, you can simply repeat the process above to correct the
label, or click on the small "No Label" button (which looks like an
X) to remove the label.
3. Searching for labeled files and folders

Searching
for labeled files and folders
Labels are a great way to distinguish
between files visually, but searching is where their true power comes in. To
search for items that have a specific label, open a new Finder window and begin
typing in the search field. Click on the small + (plus) button to the right of
the Save button in the search content area, and then in the first filter box,
select "File Label" (if File Label doesn’t appear, click
"Other" to select that filter criteria), and then select the color
label you wish to use to filter. Only files and folders matching both the label
and the search text will appear in the search results.
If you want all of your labeled files and
folders to appear in one place, then a Finder Smart Folder is what you need. To
create a new Smart Folder based on your search criteria, delete the search
text, and then click the Save button. This will prompt you to type in a name
for the new Smart Folder and specify a save location. You can optionally add
the new Smart Folder to the Finder sidebar for easier access. This Smart Folder
will be updated automatically whenever a new file is labeled with that color. A
Smart Folder is somewhat like an Alias, so you can delete it without deleting
its contents.