The Enhance and Exposure tools can
bring realistic brightness to photos that lack depth and suffer from dull
finishes
Difficulty: Beginner
Time needed: 10 minutes
Sometimes you think you’ve got the perfect
shot, but when you see the result on screen, it looks a little flat. This can
happen with any type of image, but is a real problem with portraits, because
you want your model to show clearly. If the image looks dull, then it’s
difficult to see the face.

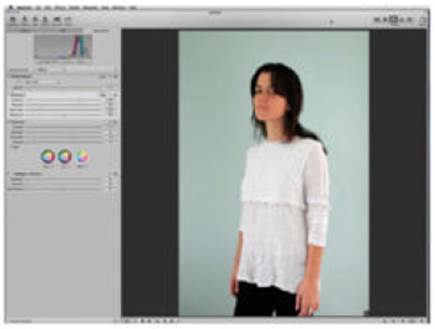
In the example shown here, the model’s
white shirt shows up more clearly than her face, and her skin has a slightly
green tone. The whole image looks muddy, but this can be cured with a few
adjustment sliders. When the work is done, you have the option of leaving the
background wall bright and colorful, or you can take its color away, so that
all focus goes on the model’s face. Either way, you’ll see immediate
improvements.
Step-by-step: Aperture Brighten images with Enhance and
Exposure
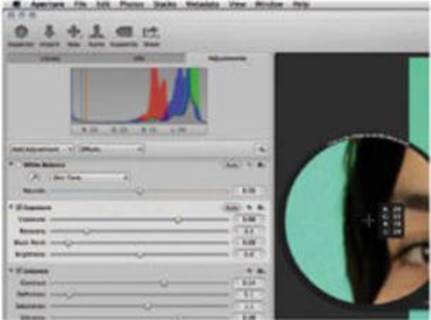
1. Study the light
Import FlatImage.tiff to Aperture. Click on
the Adjustments tab, and look at the colored mountains to see how they change
as you work.

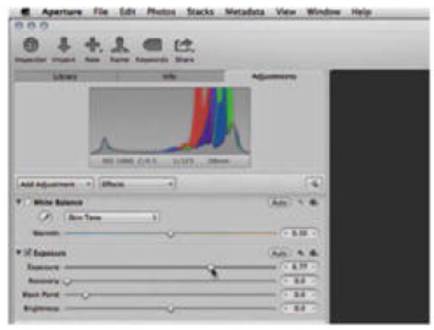
2.
Change Exposure
Drag the Exposure slider until the right
side of the mountains in the histogram just hit the right of the box. The image
should immediately look brighter.
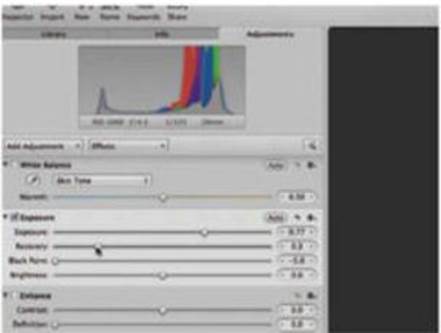
3.
Recover highlights
The white part of the image has become too
bright, so drag the Recovery slider to the right until the mountain moves back
slightly towards the center.
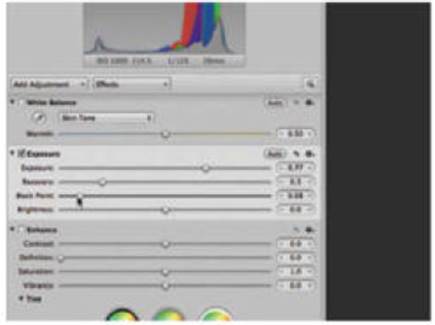
4.
Set the Black Point
Drag the Black Point slider until the
leftmost mountain just hits the left side of the box. This slider removes
details from darker shadows.
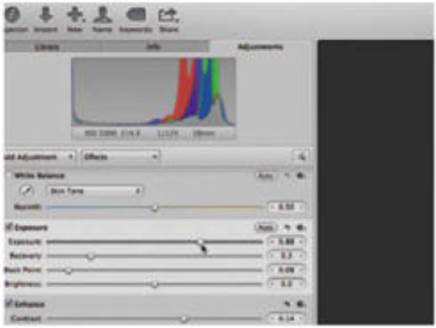
5.
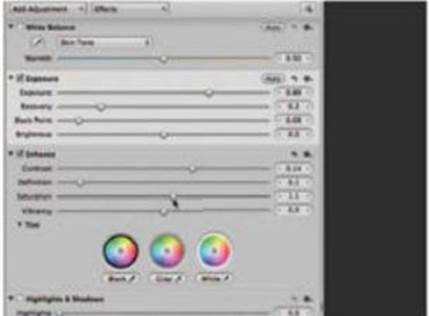
Adjust Contrast
Under Enhance, drag the Contrast slider to
0.15. Too much contrast will look cartoony. If the image needs more brightness,
move the Exposure slider up.
6.
Add color
When you drag Saturation to the right, you
add color, so a small adjustment to 1.1 adds the right amount of color without
making skin look too pink.
7.
Vibrant image
If you want the wall to look bright,
without spoiling the skin, drag Vibrance to the right. A slight increase in
Definition can also help add contrast.
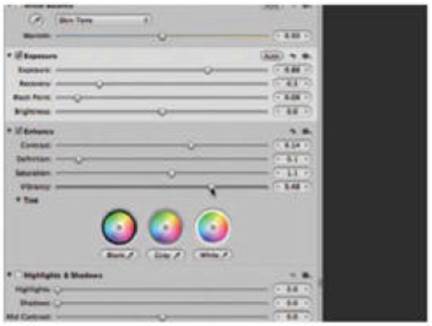
8.
Tint colors
The original image had a green tint, and
this remains in the black areas. Click the Black eyedropper, under Tint, then
click on a black part of the image to correct.
9.
Alternative ending
The image looks fine, but sometimes you
want to remove all the colors apart from the model’s skin. To create this
effect, drag Vibrance right down.
Exposure and Enhance
Get to grips with the tools you need
to brighten images
Histogram
The histogram might look confusing, but if
you follow the instructions in this tutorial, you’ll see how it can help you
perfect an image. Watch how the mountains of color slide right and left as you
make adjustments
Exposure
The first steps to correcting your image
begin in the Exposure settings. First, use the Exposure slider to get the
essential look, then use Recovery to correct over-exposure and Black Point to
add a hint of contrast
Viewer
No matter what adjustments you make, they
are meaningless unless your photo looks good. Although you’ll learn to use the
Histogram readings, you need to check that your image looks the way you want it
to look
Knowledge base - Perfect contrast
If you take a photograph of a misty lake,
with a shadowy boat, the image looks good because there is low contrast.
Sometimes too much can look bad. If you shoot somebody standing in full
sunlight, the extreme contrast can look terrible. When you use gentle lighting,
the end result often looks too flat and dull, so use the Enhance and Exposure
controls to add brightness and improve contrast.
Enhance
An extra level of control comes with the
Enhance tools. They give you control of Contrast and Definition to get exact
levels of darkness and light. Vibrance, Saturation and Tint give you control of
color

