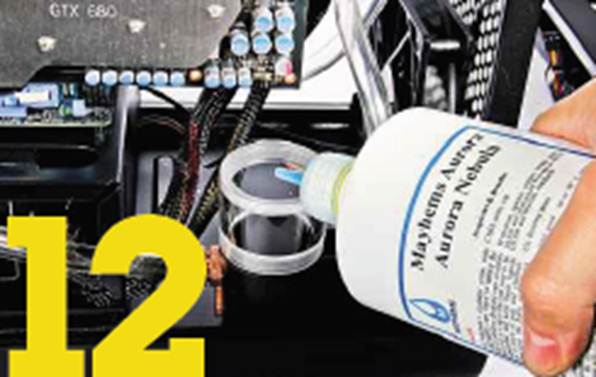
Step 12.
Prior to cable tidying, you need to
leak-test your water-cooling loop, just to ensure that you won't damage any of
your hardware. Start by filling it with coolant - we opted for some Mayhem's
Aurora Nebula Blue ($22.5 from www.specialtech.co.uk), which looks fantastic
next to the copper- plated fittings. Fill your chosen reservoir with the
coolant, following the instructions provided-our EK reservoir has a screw-cap
lid, making it easy to fill the system.
After that, connect the pump to your PSU
and disconnect the power to your motherboard and graphics card. You now need to
use an ATX bridging plug (85p from www.aquatuning.co.uk) to jump-start the PSU
without plugging it into the motherboard. Disconnecting the power ensures your
hardware will be safe if any leaks should occur in this test.
Prior
to cable tidying, you need to leak-test your water-cooling loop, just to ensure
that you won't damage any of your hardware.
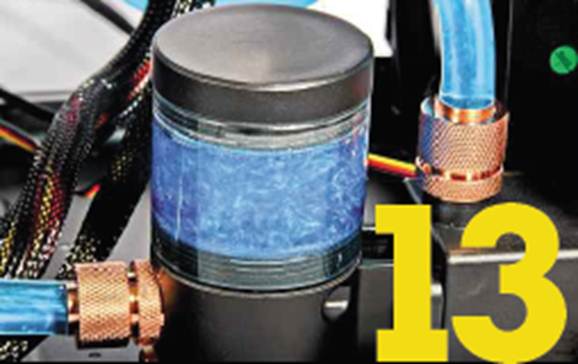
Step 13.
The Mayhem's coolant is fairly good at
bleeding the system of air bubbles itself, but it's always worth tilting the
case to allow air to bleed from the radiator and CPU blocks -thankfully, this
is a much easier task with the dinky Prodigy than it is with a full-tower case.
Don't befooled into thinking that the pearlescent effect of the coolant is
trapped air-it's a actually an ingenious feature that makes the reservoir look
particularly spectacular.
Don't be tempted to fill the reservoir to
the brim, though. Instead, once you've fully bled the air from the loop, and
it's powered on, allow a good centimetre or so between the coolant level and
the top of the reservoir. The pressure of the pump will lower the coolant
level, meaning that there will be a lot of pressure in the reservoir when it's
switched off. Leaving a small gap will allow the coolant to expand when the
system is switched off.
The
Mayhem's coolant is fairly good at bleeding the system of air bubbles itself,
but it's always worth tilting the case to allow air to bleed from the radiator
and CPU blocks.
Cable tidying
Step 14.
Cable tidying is usually the bane of all PC
builds, but it's a comparatively easy job in the Prodigy. BitFenix has had the
foresight to leave large gaps on either side of the PSU cage, which provide
excellent locations to tie your stray power cables and tuck them away. As
there's no motherboard tray, you need to perform all your cable tidying on the
rear side of the case - access will be easy with the side panel removed.
Depending on which motherboard you choose,
you may not have enough 3-pin fan headers to power all your fans (the Asus
P8Z77-I Deluxe only has two fan headers, but our case and cooling system has
four fans).
To solve this minor issue, we used some
Molex to 3-pin fan adaptors to power the additional fans; you could also use an
internal fan controller (since the 5.25in bay is unusable) or a fan splitter
cable.

Cable
tidying is usually the bane of all PC builds, but it's a comparatively easy job
in the Prodigy.
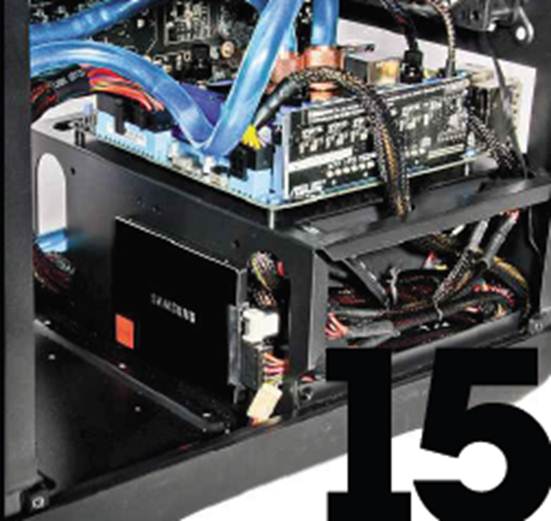
Step 15.
The final component to install is the SSD.
We left this until last because you can secure it practically anywhere in the
Prodigy with some double-sided tape or Velcro. With the location of the pump
finalised, and the rest of our cables tidied away, we settled on the side of
the PSU cage for the location of our SSD. This meant that we could route the
SATA power and data cables directly to it through one of the cable-routering
holes, rather than trailing them around the inside of the case. It also means
that the SSD can be easily accessed from the side.
The
final component to install is the SSD.
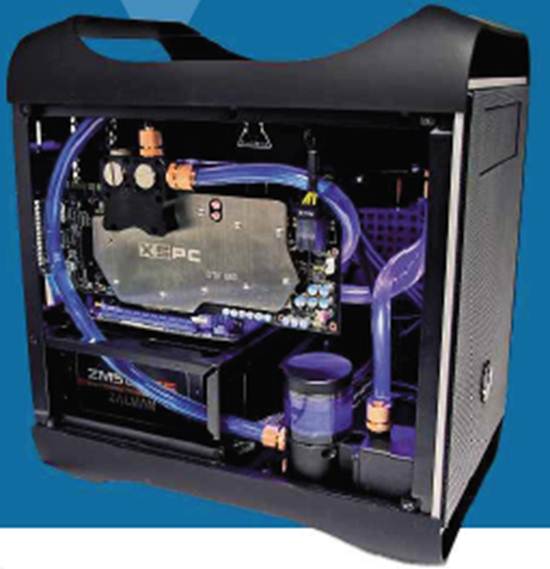
Step 16.
That's it! Sit back and admire your mini-monster.
If you're using any of the Z77 motherboards in this month's Labs test, you can
use our settings to overclock your CPU. A lot will depend on your particular
setup - especially if you water-cool both the CPU and graphics card- and the
number and size of radiators you use. Check your temperatures once the PC is up
and running.
That's
it! Sit back and admire your mini-monster.