Wi-Fi Direct lets you send files to
other devices the easy way
Wi-Fi Direct is a great way of connecting
to other devices to perform simple tasks. The main difference between this and
many other similar services is that you don't need to be connected to the
internet to start sharing and connecting with others. As well as phones, Wi-Fi
Direct can also be used in conjunction with several other electrical devices.
For example, using Wi-Fi Direct, you can quickly send your files to a nearby
wireless printer or transmit video from your phone to your TV. Although it
isn't available on all Android devices, as of yet, it's still a great piece of
software, that's easy to get to grips with.

Wi-Fi
Direct isn’t available on all Android devices, so access your Wireless and
Networks settings to see if it’s present on your device
1.
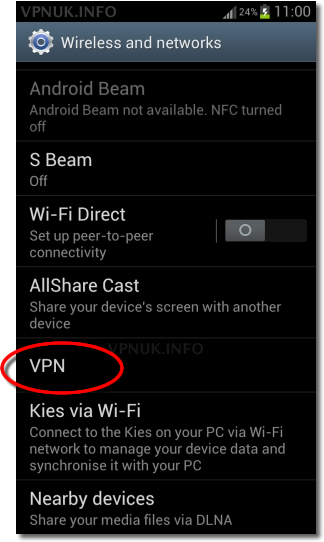
Open your settings
From your device’s home screen, open up
your Settings menu and navigate to the Wireless and Networks tab. If your
device is Wi-Fi Direct compatible, you should see it listed near the bottom of
all your settings here. By default it will be switched off, so flick the switch
to activate it.
2.
Add a name
After opening up the Wi-Fi Direct menu,
press on the Options button on your device, and select Device name. This will
now bring up the keyboard on your device, and allow you to enter a name which
will represent your phone when other people search for it. Press the OK button
once you’ve completed it.
3.
Begin a scan
Press on the Scan button when you’re ready
to start searching for other devices and electrical items to connect to. Any
devices that then appear on your screen are Wi-FI Direct compatible, such as
phones that have the feature turned on. In a similar fashion to Bluetooth,
you’ll need to enter a PIN code to connect. From the list of options you’re
presented with, select the one you want to connect to.
4.
Send and share
No matter what you’re connected to, you can
begin sending files to it. Open up the Gallery app on your device, or any other
app where your media files are kept, and press on the Share button usually
located on the top of the app. From here you should now see the Wi-Fi Direct
option become visible. Select it and your file will begin transferring.
5.
Multi-connect
Next to the Scan option is Multl-connect.
Not only does this option let you connect to numerous devices at the same time,
It’s also the best way to connect to another device if you want to play games.
Not all devices support the Multi-connect feature, so you’ll need to select it
once you have scanned for devices to see which ones are compatible. You’ll find
most televisions do support the Multl-connect feature, as do modern games
consoles. Devices like printers and Hi-Fi systems tend to not support this
feature, however.
Backup and restore your data
Keep your apps, photos and data safe
by backing up regularly. Find out how with MyBackup
A smartphone is much more than just a
phone. It will contain a host of data, files and information that are vital to
the owner. It is only when any of these are lost that it becomes obvious how
important they are.
Backing up a device is a task that often
gets overlooked, but it is one that should be instigated on a regular basis. To
make sure that data and information is safe and sound, the help of a
third-party app is needed. There are a host of free and paid-for apps on the
Google Play store that are perfectly capable. For this tutorial the services of
MyBackup have been employed.
The app is available in several guises,
including the free version used here. On offer is a simple and intuitive
interface that allows users to back up, restore, manage, view and schedule
applications, media and data.

1.
Back up options
Backups can only be installed via a
removable SD card or online. Note that the online option only provides 2MB. For
more space, users will need to upgrade to the Pro version of the app. The
associated setup screen will appear each time the MyBackup application is
started.
2.
Online account
Add a password and email address and tap OK
to send the login information to the address added previously. This will set up
the password and complete the account setup process. Head to www.rerware.com,
select Web Viewer and log in to view your backups.
3.
Backup
To get started, tap Backup. Select
Applications & Media to back up apps or media, or alternatively, select
Data to back up data. The next step is to choose the backup location. Select
from Local (SD card) or online. On offer are four different options: Apps,
Photos, Music and Videos.

4.
Apps backup
To back up all the files in a section, eg
Apps, simply tap the available button. An active option will display a green
tick. To select individual items from a category, tap Select All and choose
items to back up. When complete, tap OK and give the backup a name. Hit OK to
start backing up.
5.
Data backup
To back up data, select Backup, choose Data
and select the backup location. A list of data to back up will be displayed
including Contacts, Bookmarks, SMS, System Settings, Dictionary and Calendar.
Tap Select All or choose individually. Press OK, name and tap OK again.
6.
Restore data
To get started, tap Restore and select
Applications or Data. Note that the free version does not allow users to
restore from online. Select the Local option which lists available backups.
Select a backup and choose which apps or media to restore and press OK to begin
the process.