For some exciting tile repeat
options, check out Photoshop’s’ Fill dialog
Repeat patterns are everywhere, from the
pavements and brick walls outside to eth fabric weave of the clothes we wear.
Photoshop can be used to create repeating patterns very easily: just make a
rectangular selection of what you want to use as your repeating ‘tile’ and
choose Edit > Make Pattern. Name it if you like, although it’s not
necessary, and you’re done. Applying it is as simple as choosing Edit >
Fill, choosing Pattern from the Fill dialog’s pop-up menu, and picking your
custom pattern from the list. Your selection or even the entire Photoshop
document will be flooded with your tiled pattern. Bosh.

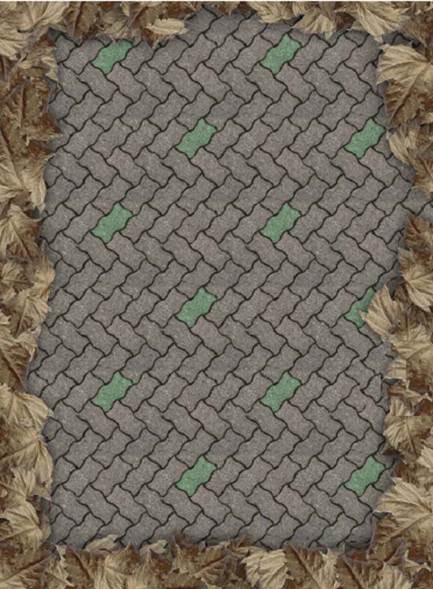
Pavement
artist: This image is entirely built from regular and scripted repeats in
Photoshop – not one element was hand-placed
It’s probably far from perfect, though.
Notice those hard line edges where the tile repeats? It’s a simple repeat with
no blending or flipping. Unfortunately, you can’t get Photoshop to do the kind
of reflection tricks that Illustrator provides. Fortunately, you can set that
up yourself before you make the pattern, so I’ll outline a quick and pretty
easy way to do that.

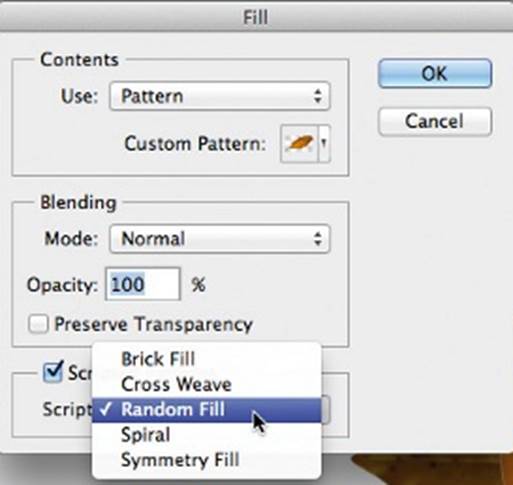
Fill
your boots: The Scripted Fill checkbox in Photoshop’s standard Fill dialog
throws up some interesting pattern generation options
Make your selection, then copy it and
choose File > New. Photoshop offers to make this new document the exact size
of what you just copied, but double it instead: make it exactly twice as high
and wide as Photoshop suggest. Click OK and then paste your copied graphic into
this new window. Drag this up to snap into the top left corner, then paste
again. This time, choose Edit > Transform > Flip Horizontal and drag it
to the top-right corner. Merge the two pasted layers together, duplicate this,
and use the Transform menu choices to flip this duplicate vertically. Drag
down, flatten the image, and you’re done: you’ve made a tile will repeat with
no hard edges. All you need to do now is make this into a pattern. You don’t
even need to make a selection first, as the pattern will be taken from the
entire image if there’s no marquee area. The next creative step is to try
making another pattern that’s twice the width and height of the first one.
Apple the first to one layer and the second to the next, then experiment with
opacity and blending modes to get the two layers interacting.
As all this show, Photoshop’s
pattern-generating abilities aren’t as fine-grained and flexible as
Illustrator’s, at least on the surface. But this isn’t where the options stop:
the Scripted Fill option at the bottom of the Fill dialog throws some very
interesting extras into the mix. Open the Fill dialog again and click the
Scripted Patterns checkbox. Now you can pick from a short list of different
fill styles that alter how each tile is placed into the fill space. The success
of the final repeated pattern depends in part on the content of the pattern
tile you choose. Cross Weave creates a staggered, under-and-over effect, and it
works best with content that has some transparent areas. Failing that, the tile
should be a perfect square or you’ll get holes across the artwork. Brick Fill
does what you’d expect. Random is good for scattering things such as leaves
around, but you might find it useful to make your tile out of lots of different
leaves to keep it feeling realistic. The two jaw-dropping items, Spiral Fill
and Symmetry Fill, are also ones that work best with patterns that have
transparency.

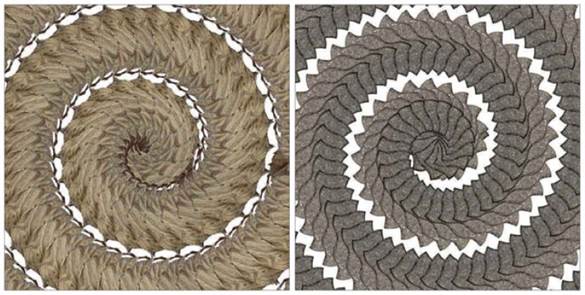
Spiral
bound: These two images were created using a custom script for pattern rotate
If you’ve been playing along at home, you’’
have seen a big problem here. The Brick Fill, Cross Weave and Symmetry Fill
scripted fill choices do what they promise, but they also throw in random
changes with each tile iteration. Cross Weave changes bright, but the hue
change of the Brick, Random and Symmetry choices is particularly jarring. The
intention is obvious with Brick; many walls won’t loll totally uniform, with
each individual brick slightly different from the next. But if you’re not
trying to make an actual brick pattern (or you’re replicating eth kind of
bricks that don’t vary that much in appearance, this is a bit of a deal
breaker). Even if you want a traditional brick-with-variations appearance, the
color range that’s used in the randomized hues is a bit of the fanciful side.
At this point, this feature probably feel
more like a tech demo than final polished ability and, in fact, that’s pretty
much what it is: a demo of something that’s designed to be open and modifiable,
if you have the JavaScript chops to write your own. This is called the ‘Deco
framework’, which Adobe describes as ‘a scriptable environment that is tailored
for creating procedural patterns’. The Deco JavaScript files are in Presets/
Deco inside the Photoshop CS6 application folder, ready to be cracked open with
a text editor. Excited yet? Probably not, but don’t worry, there are people who
have already done this and made their work available to others.

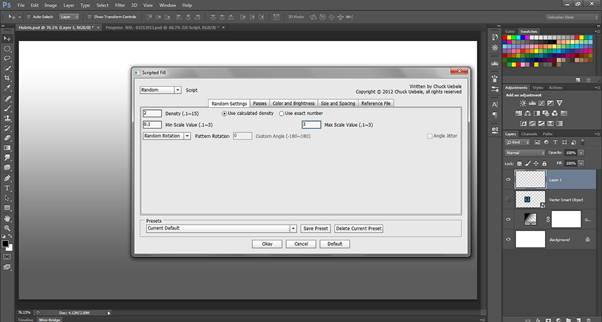
Deco
art: Chuck Uebele has written a script that tackles some of the hue issues with
Scripted Fills
Start with the details at bit.ly/deco
scripting, a page from the Adobe Advanced Technology Labs outlines some of the
Deco scripted patterns possibilities. Don’t worry much about the links to
writing your own unless you really want to start with eth ready-mades. Eth Partial
Plane Symmetry Fill zip archive by Richard Kain pushes things to interesting
extremes, helping apply patterns using 17 different symmetry types. There’s an
instruction document in the archive, although it’s difficult to open (it’s
being fixed, but until then there’s a PDF of this file at
bit.ly/partialplaneinfo).
Something that addresses the specific
problems of the hue changes in Adobe’s bundled scripts has been made by Chuck
Uebele. Go to uebelephoto.com/CS6_Fill.html and grab the Scripted Fill UI download.
After it’s installed, it has to be invoked from the File > Scripts menu. As
of version 1.2, some of the controls are a little jumbled in the interface, but
once you’ve picked your settings and clicked Okay, the regular Fill dialog is
opened, set to run the new Temp Fill Script item in the Scripted Patterns menu.
Yes, it’s all a bit Heath Robinson, but it means you can customize the standard
Deco scripts to behave the way you want – without having to write custom
JavaScript. Frankly, I’m impressed.